Our New Instagram Landing Page + a Squarespace Tutorial
I'm excited to announce that now if you see something you like in our Instagram (past or present), you can easily find what you are looking for via the link in our bio. For those that are curious about how this works, I've put together a technical post. If you're interested in seeing how the sausage gets made or are interested in learning how to make an IG landing page for your own website, then read on. If you're just here for the design inspiration, feel free to skip this post, we've got some great recommendations for you in the "more like this" at the bottom of this page.
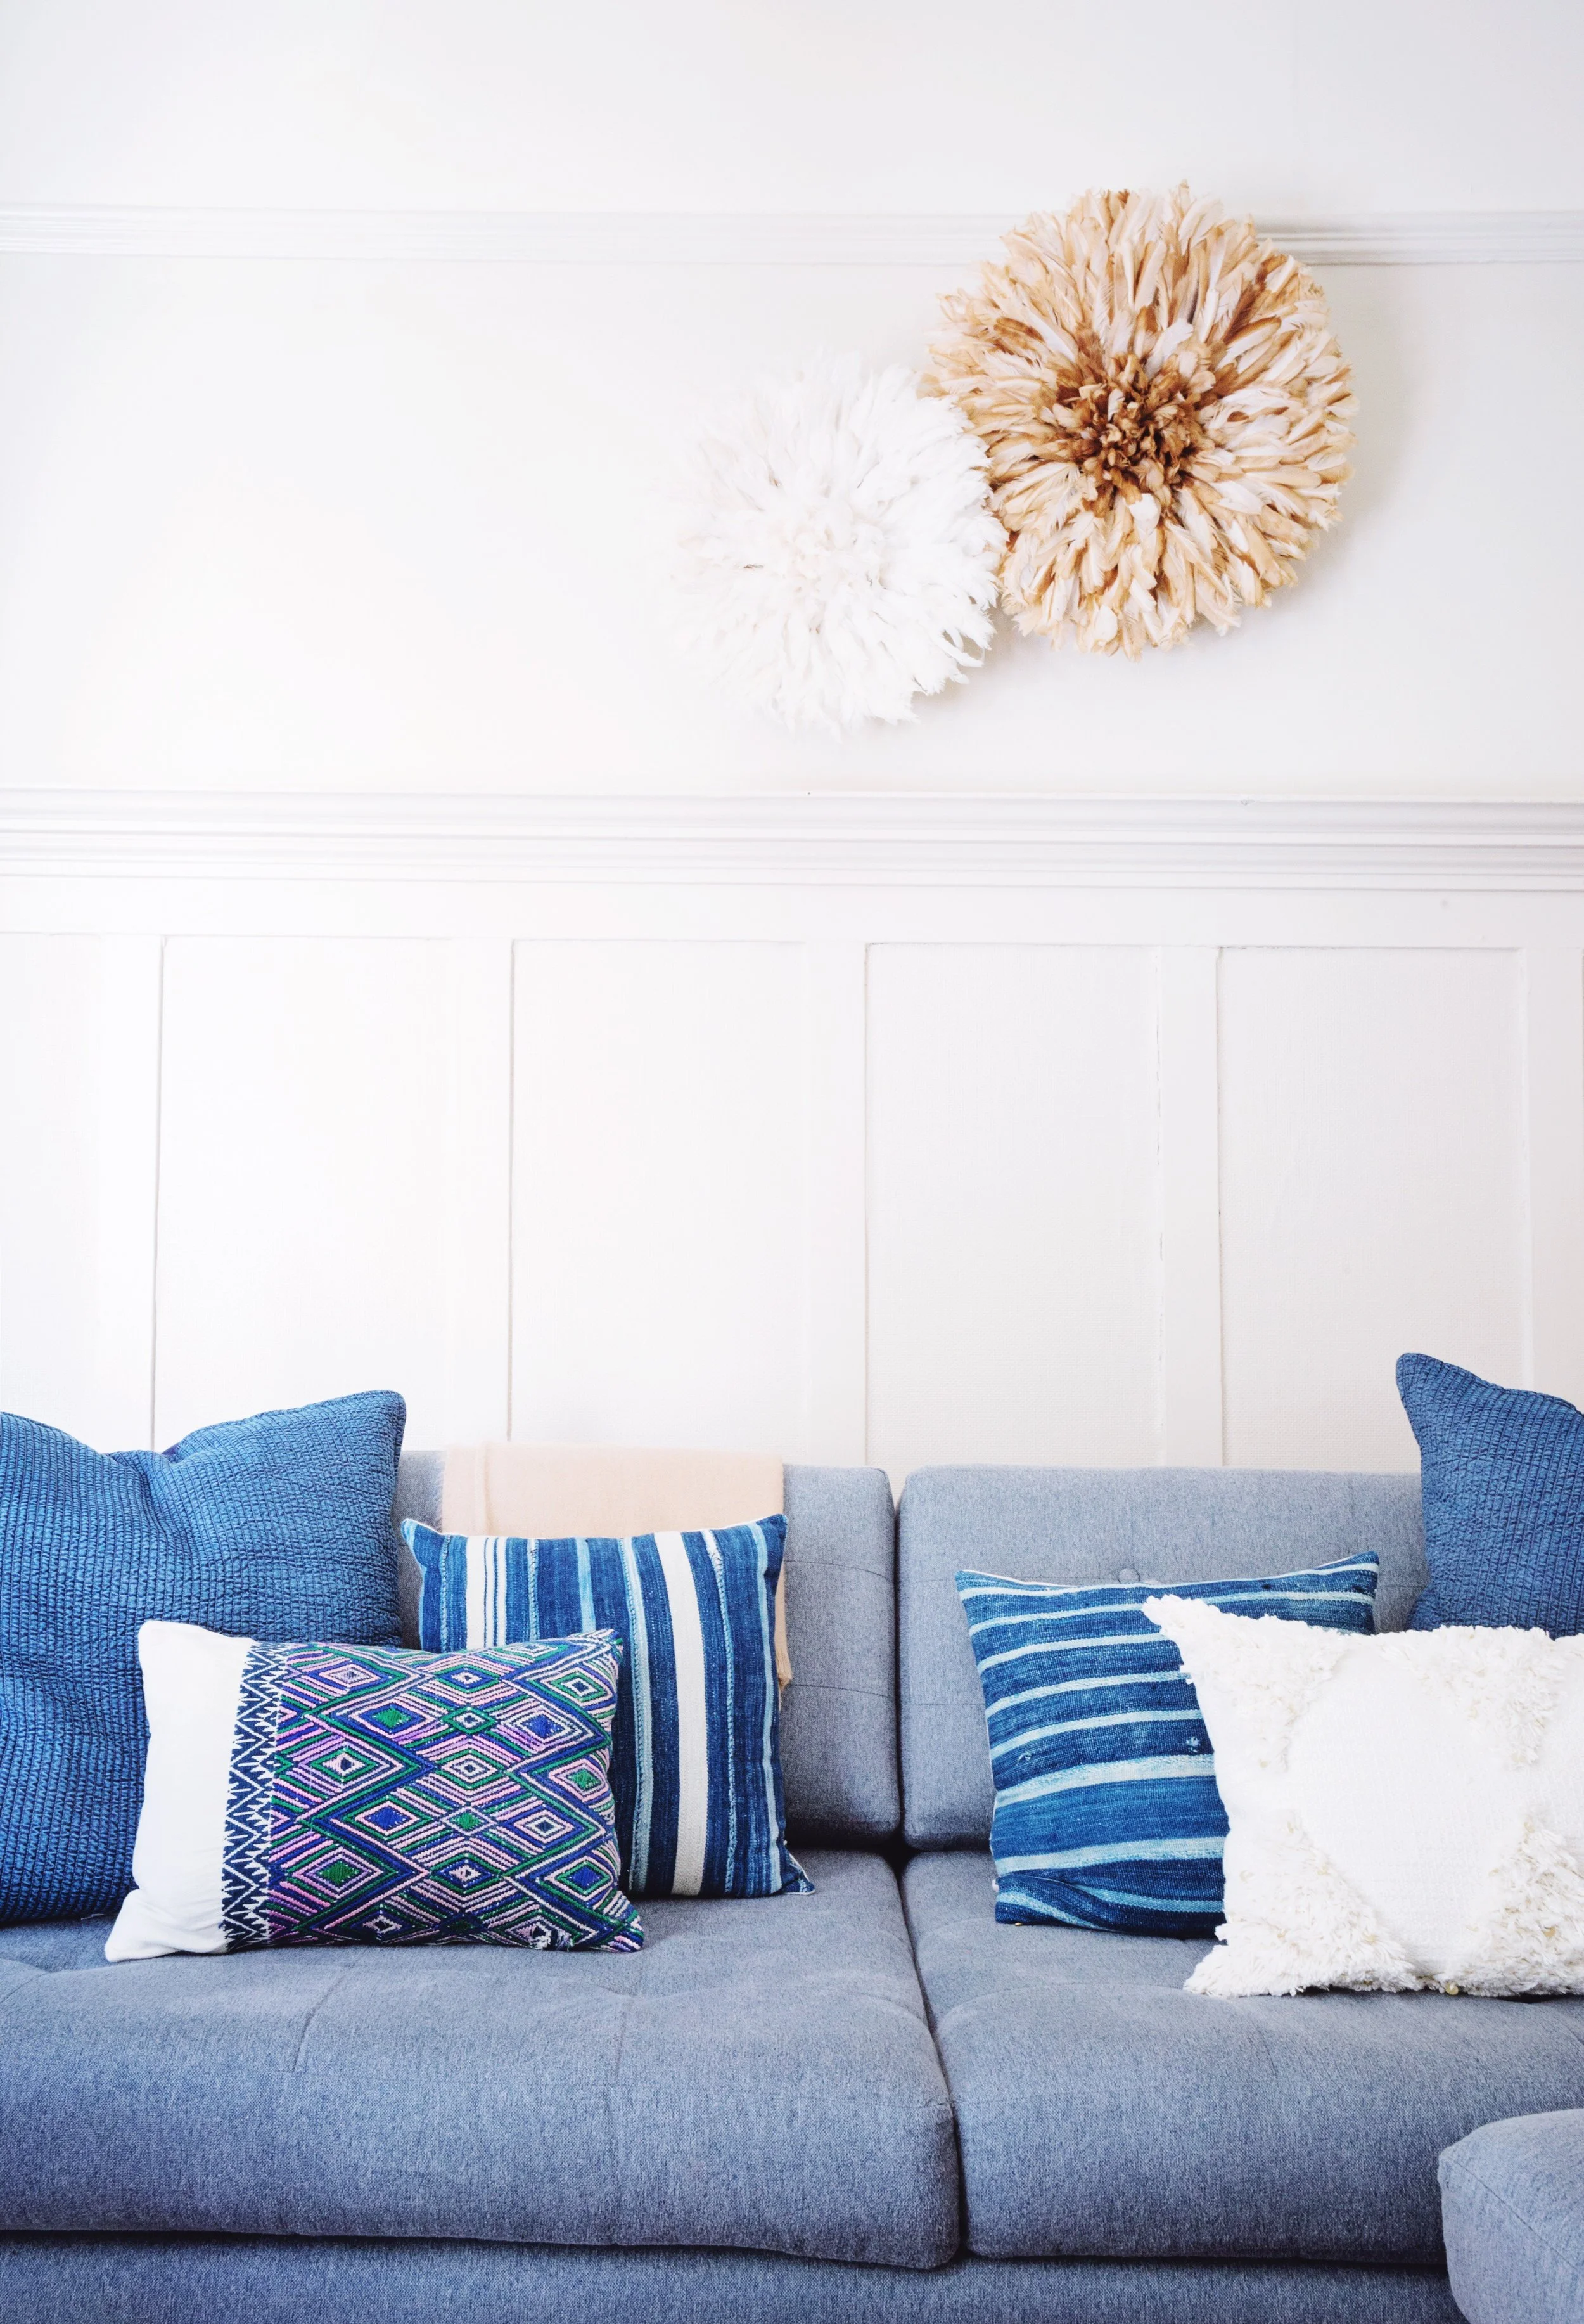
I’m a photographer by trade, and I love creating and sharing images, so Instagram is naturally the platform I gravitate to the most, but I think we can all admit when you’re trying to share a link to go along with an image... it’s a bit awkward and clunky. First, you have to let everyone know where they can find said link (in bio) then you have to paste in the new address every time you want to change it, meaning that the last thing you shared is gone. Some people get around this by sending you directly to their website’s home page and leaving you to fend for yourself to find the product or post you came to check out. The more sophisticated solution to this and one that more and more major brands are adopting is to have a link to something that resembles your Instagram feed but allows you to click through on the images to posts or products. There are a handful of companies currently offering this capability, but there’s a reason you only see the more prominent brands using them: it’s expensive. The most affordable version we could find came in at $40 a month, a little line item for a big company but a sizable one for a small blog on a budget. While I was clicking around to the different services that offer them (and getting discouraged) it dawned on me, it’s just a landing page and a straightforward one at that. Within about 30 minutes I had mine set up and running, and while I don’t have it set up to auto-update it should only take a minute to do it myself when I have something I want to share. I love that it’s self-hosted (no monthly fees, I own it outright) and I have complete creative control; I can link up to a blog post, gallery, a product I like or even a Pinterest board.
Here’s how I built mine in Squarespace:
1. Go to your Instagram profile on a desktop and go to edit profile> privacy and security> data download then select "request download" and they will email you a download of all of your existing assets including images. They advise it may take up to 48 hours, but I had mine within one.
2. Once you have your images downloaded to go your Squarespace blog. In editing mode go to "pages" on your sidebar and use the + to create a new “unlinked” page and leave it blank. Name it something simple as it will become the URL you display in your bio; mine is “insta” making the link www.design-confetti.com/insta
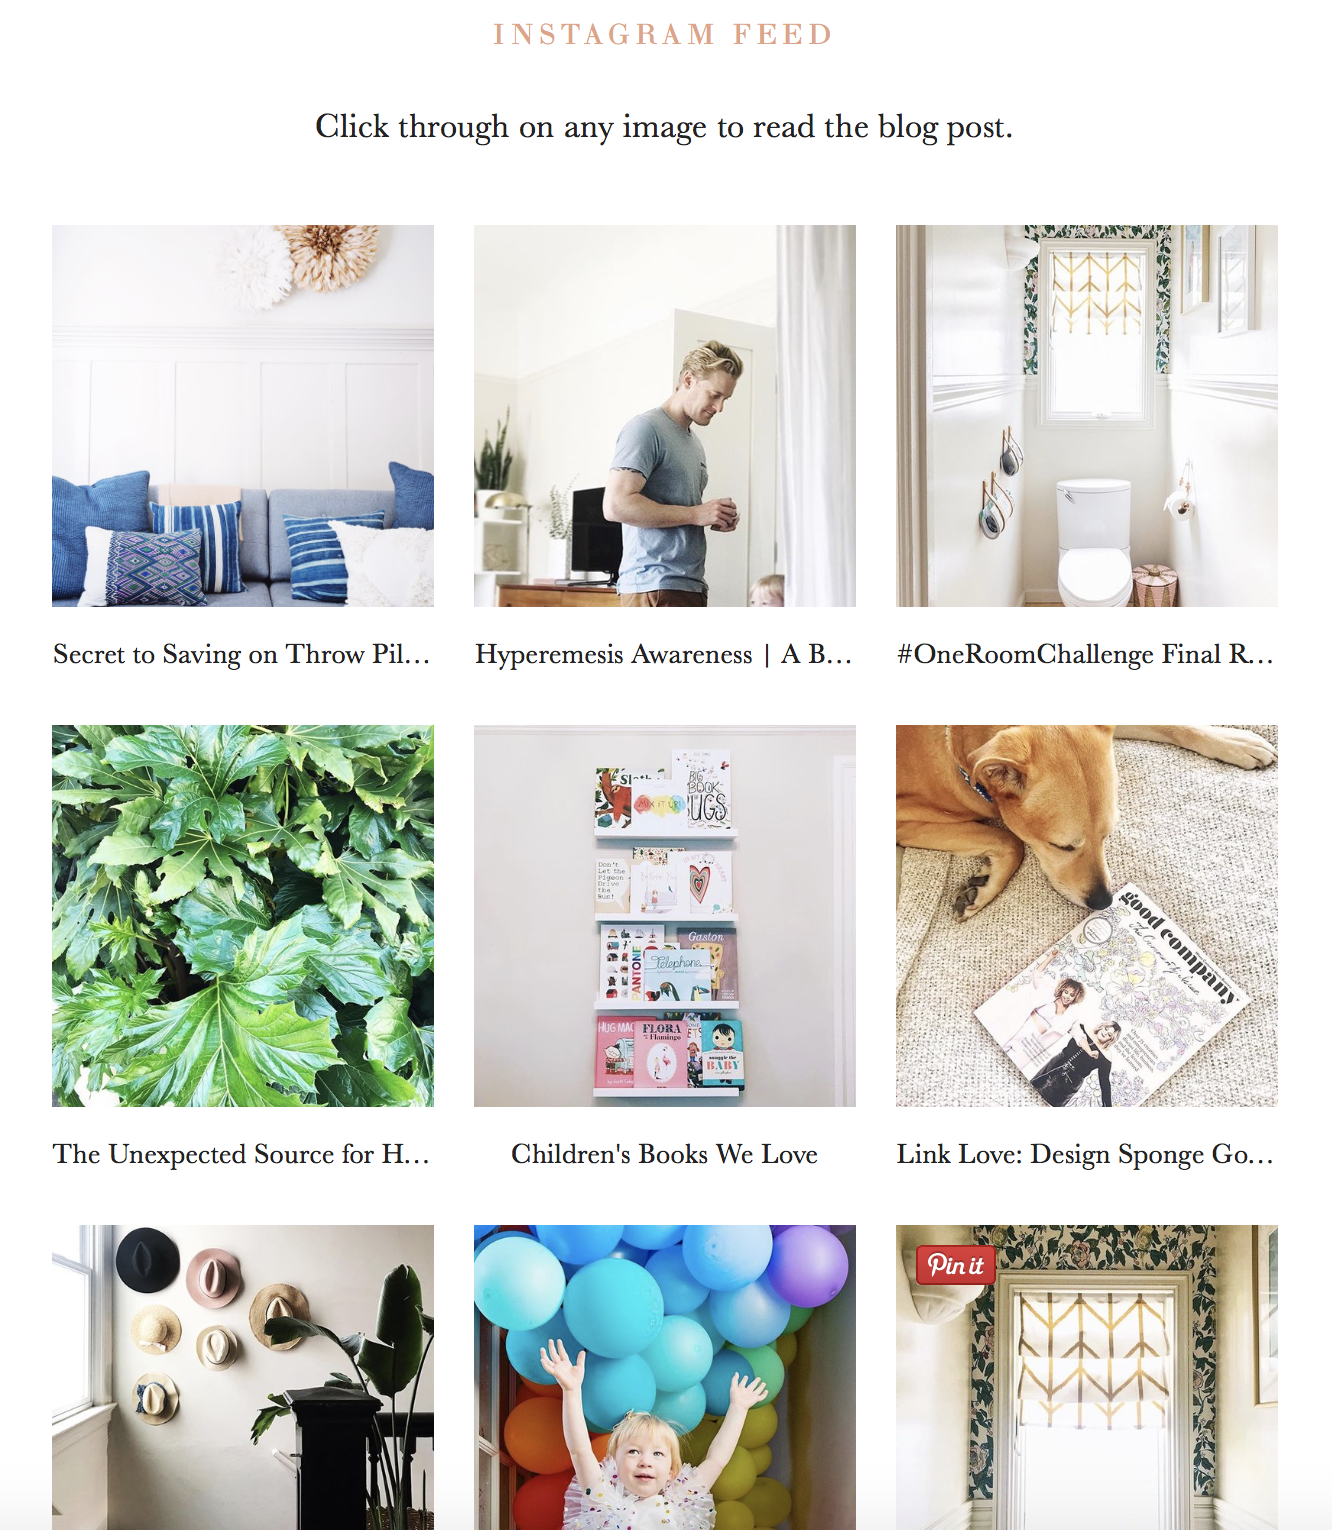
4. Select "start editing" and use the + to create a gallery, selecting the “Grid” display option. You can also adjust how many you would like to show up in a row. Upload your Instagram images and drag them into the order you would want them to appear. Hover over the image thumbnail in the editor and click on the gear symbol, edit the image title to the title of the post you will be linking and paste your link into the form for clickthrough URL. Repeat for each image
5. Under the "design" tab in your gallery editor make sure it is set to grid, your aspect ratio is 1:1, select show title, choose your number of thumbnails in a row (I set mine to three) and your padding around images (I set mine to 20). I recommend also selecting "open links in new window." Save your settings and gallery.
6. Hover over your screen in edit mode and click on "edit page content." Then click inside the text editing box above the gallery adding a title and description for the page in the text box at the top letting your visitors know what to do then hit save.
7. On your sidebar select your page and click on the gear to edit your page settings, select "enabled" but leave your page in the unlinked section, this will make it live on your site and accessible via the URL but it will not show up anywhere else on the site.
8. Update as needed by adding your latest image to the gallery and adding in the title + link as you did above.