
How to Ice Dye (with Color Swatches)
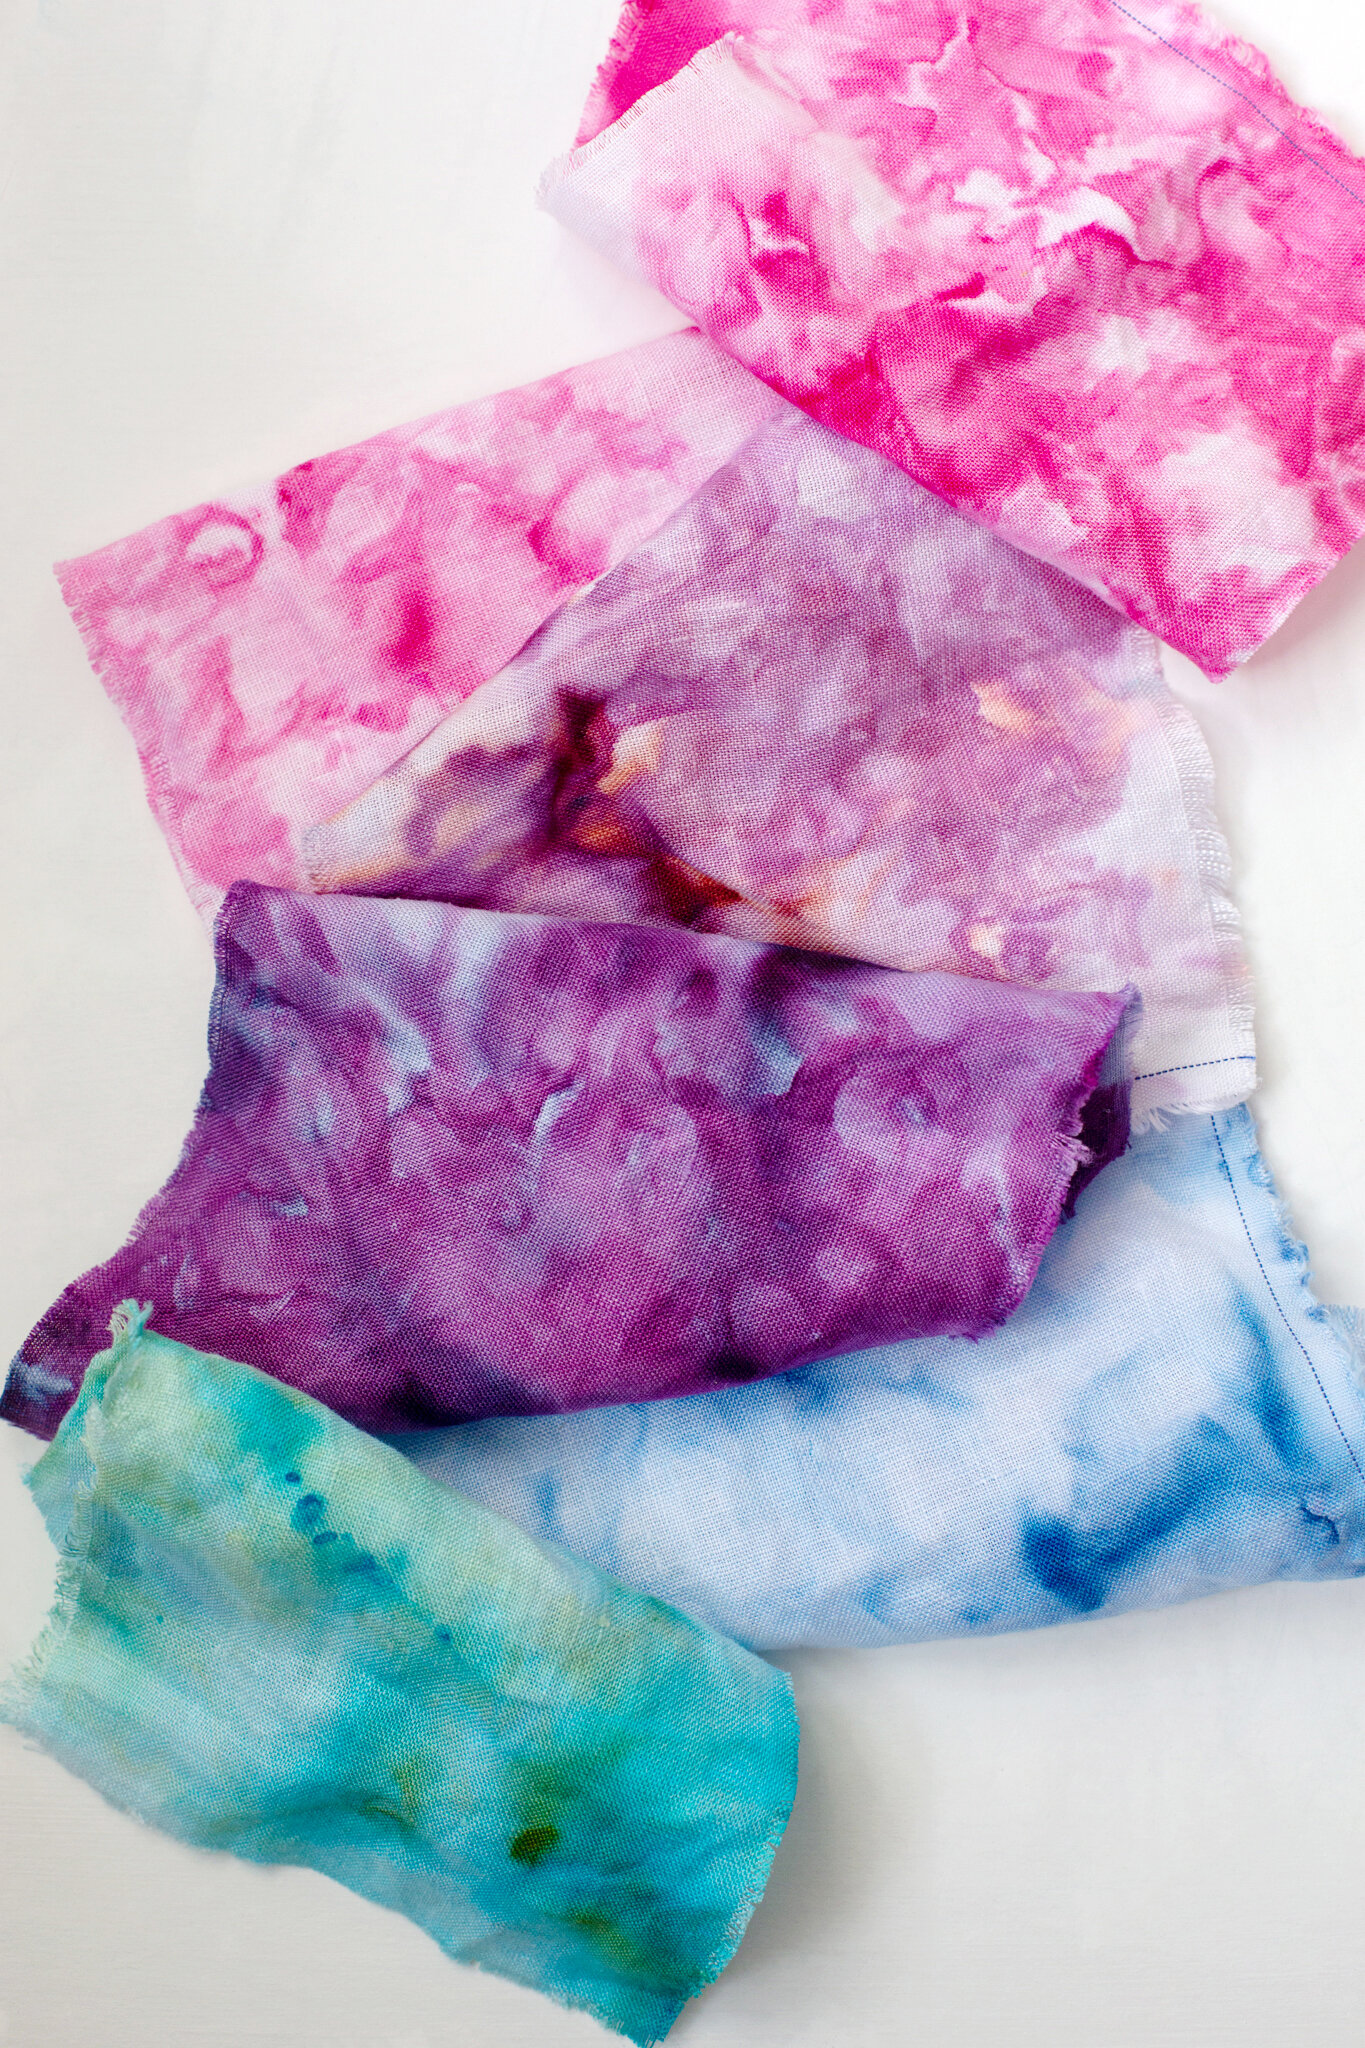
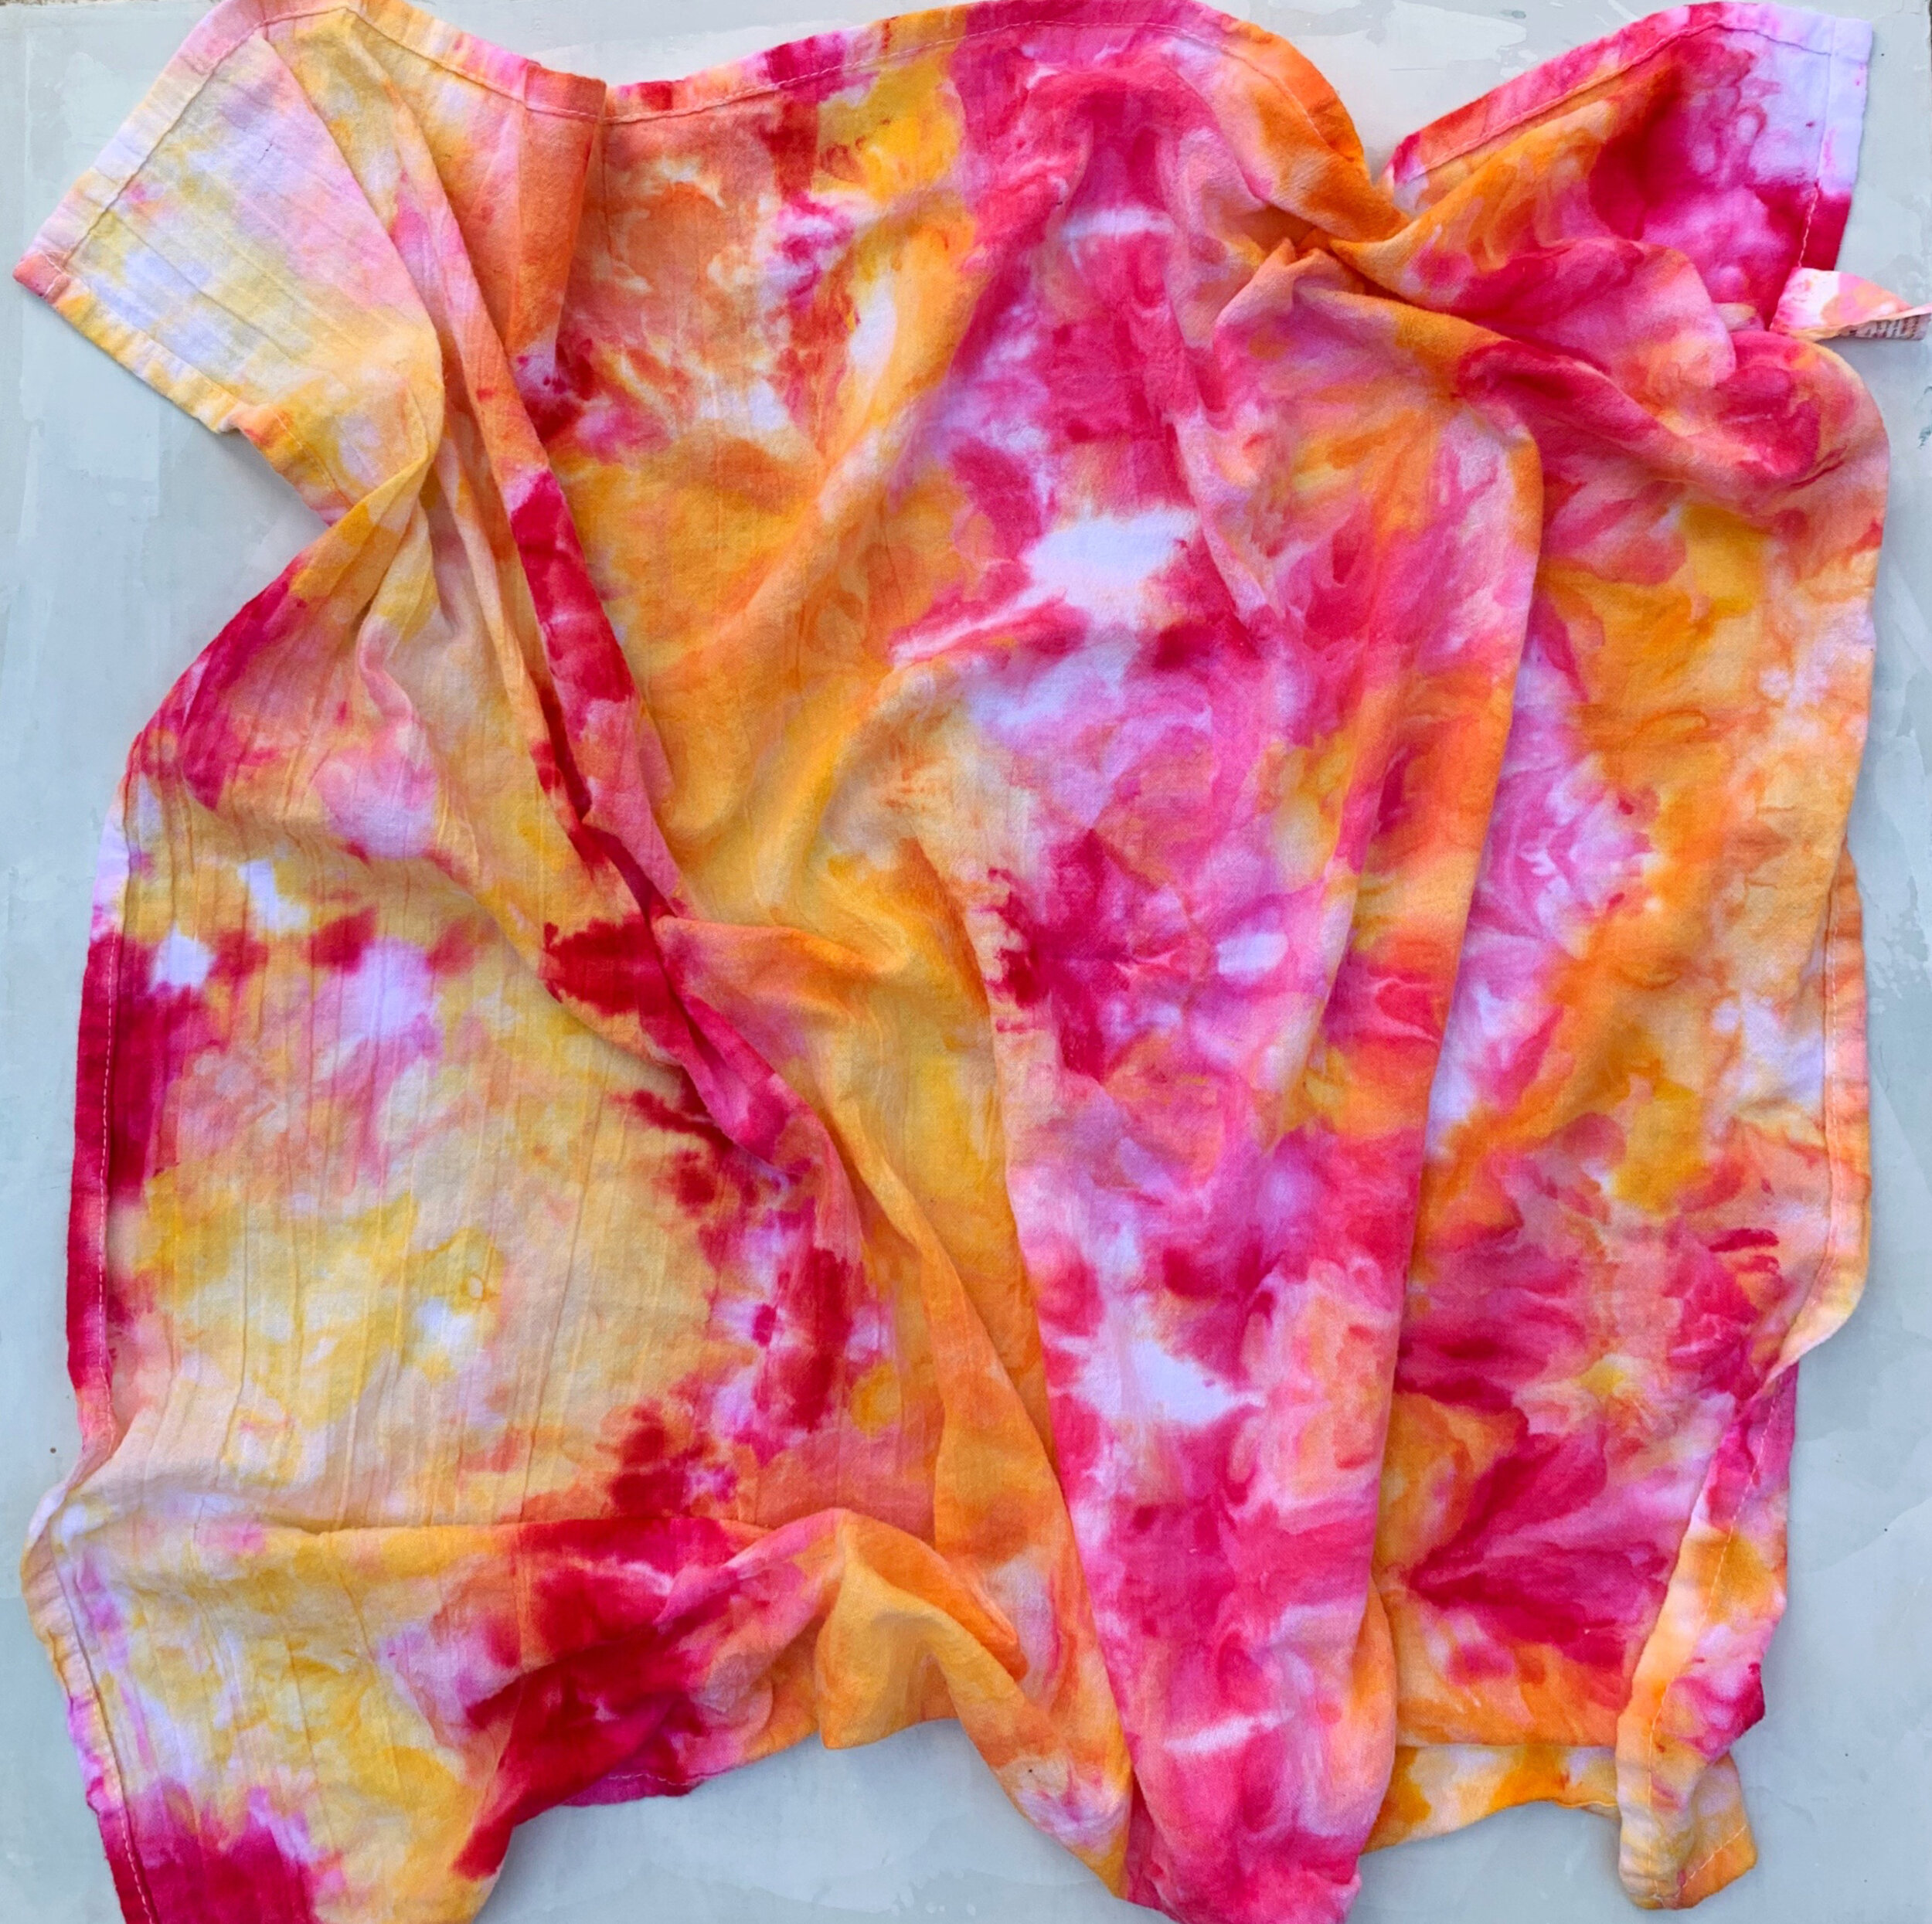
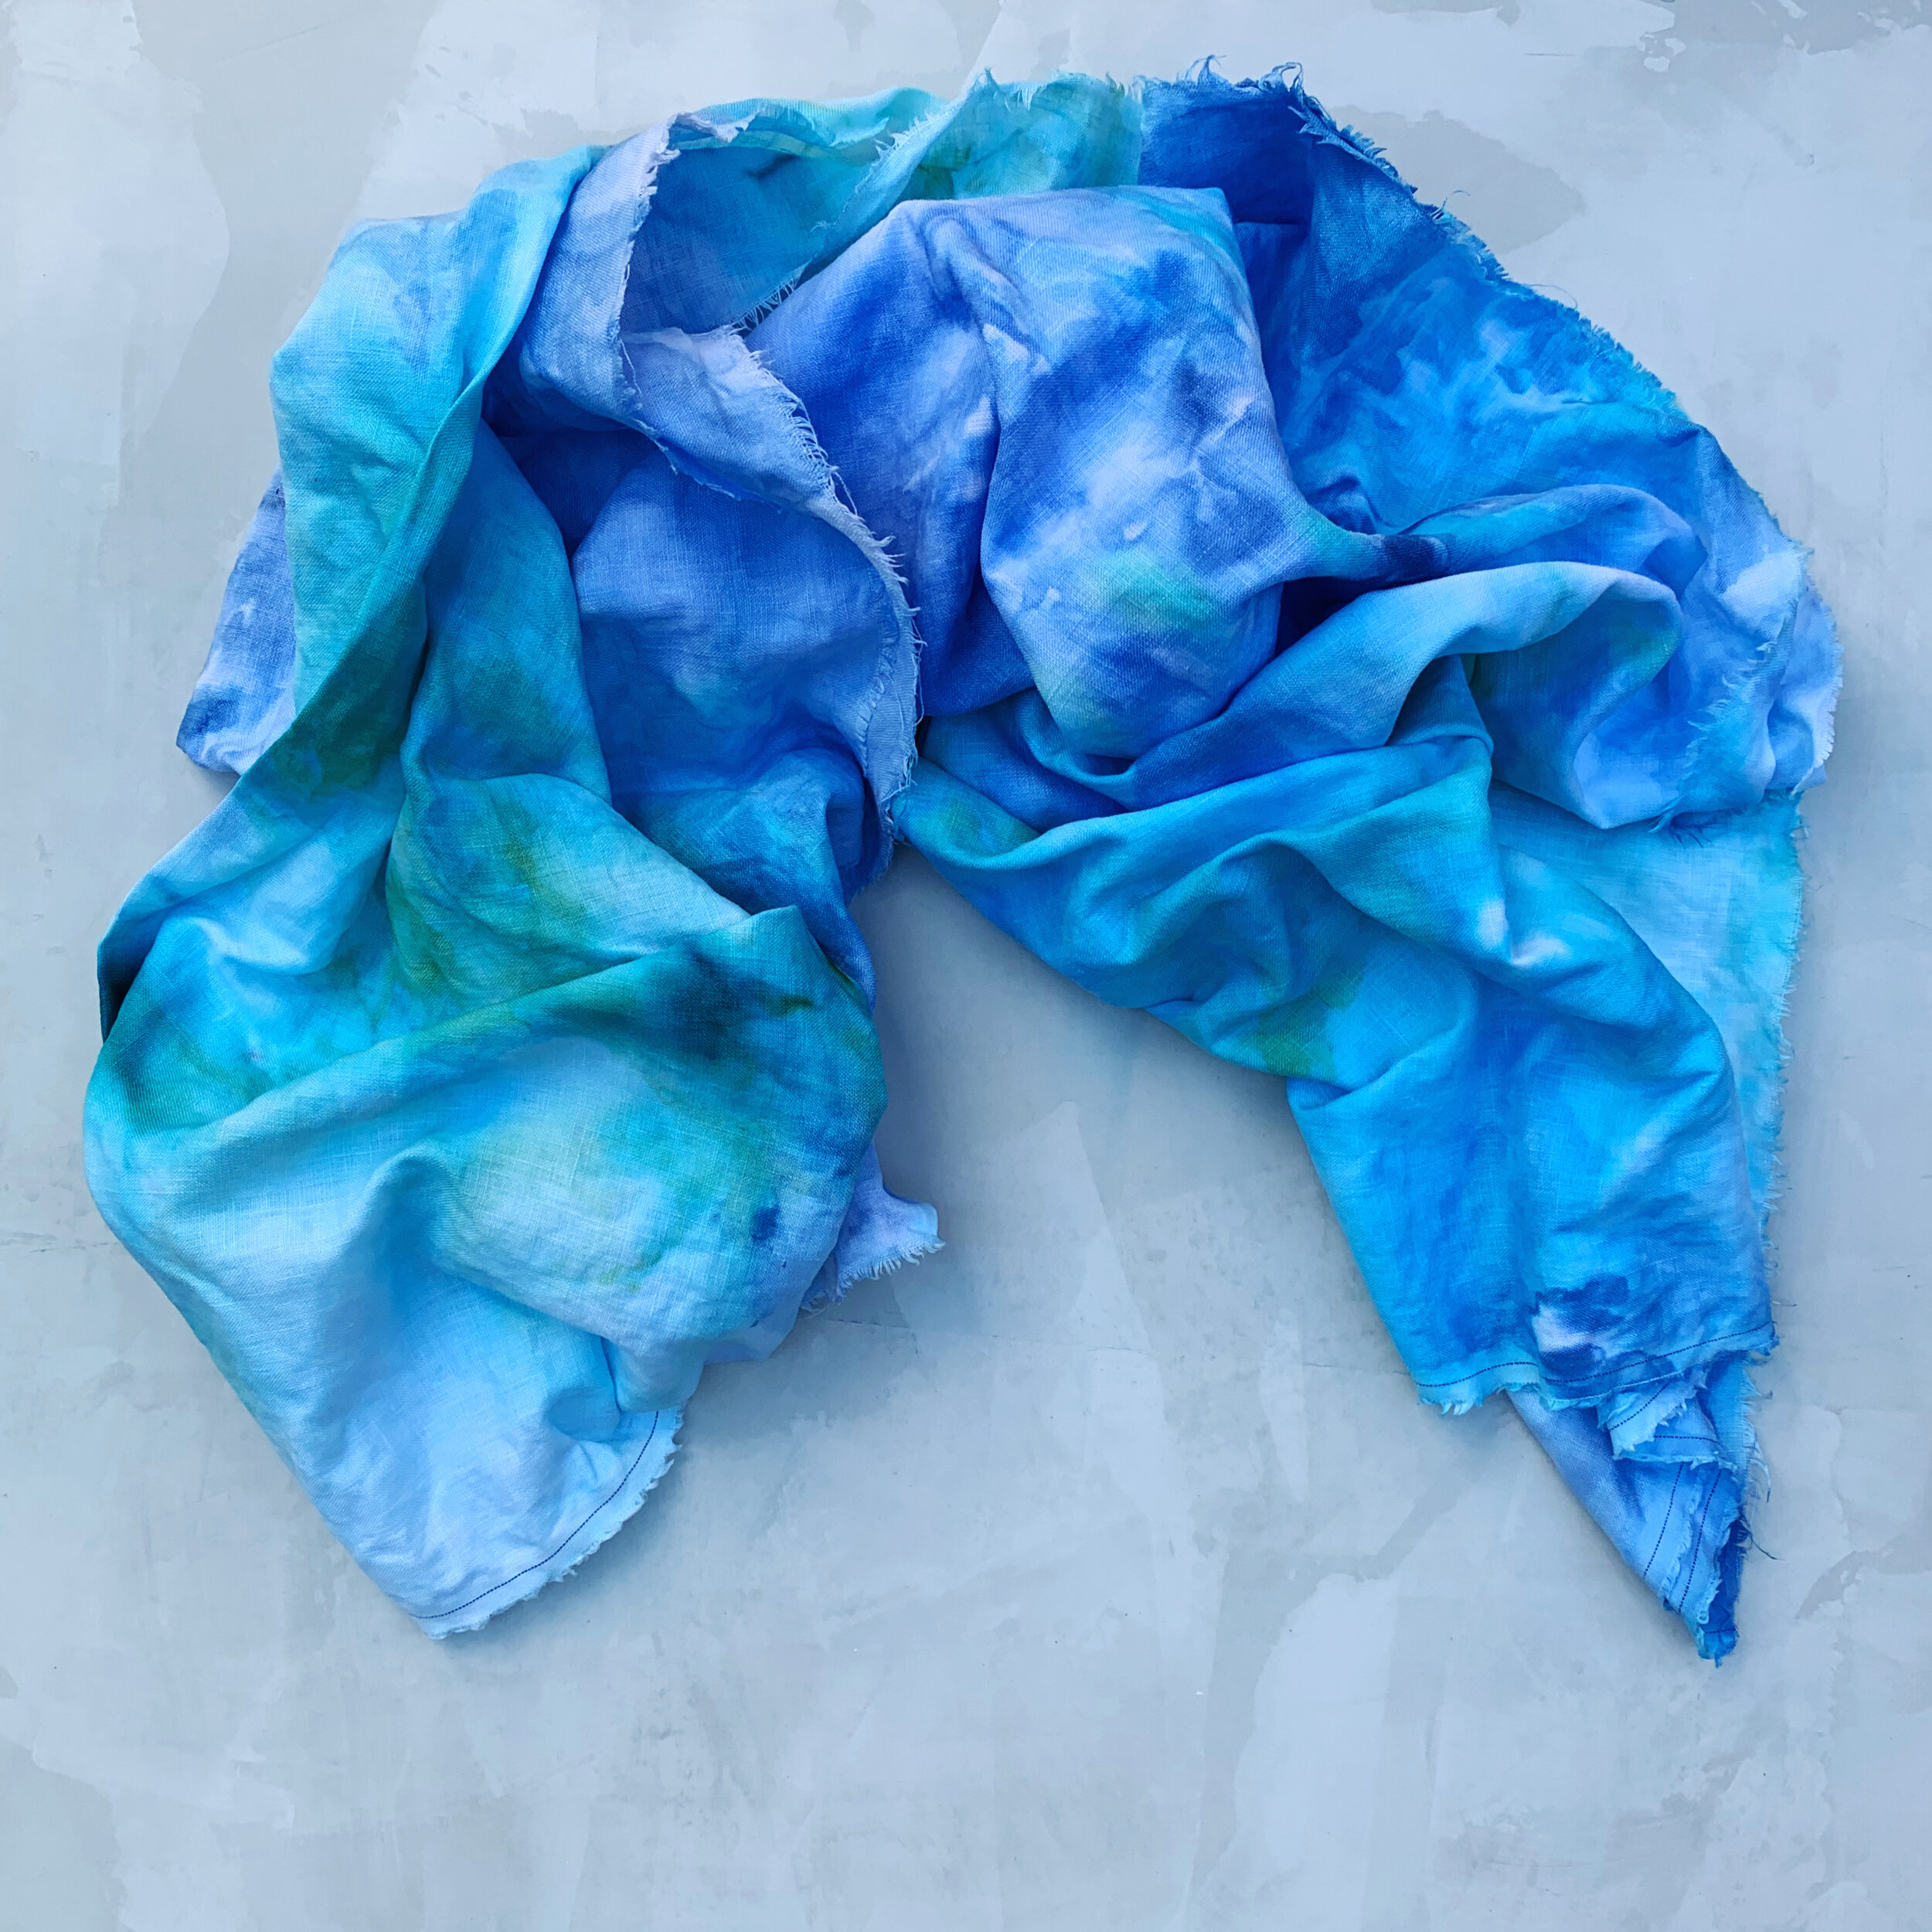
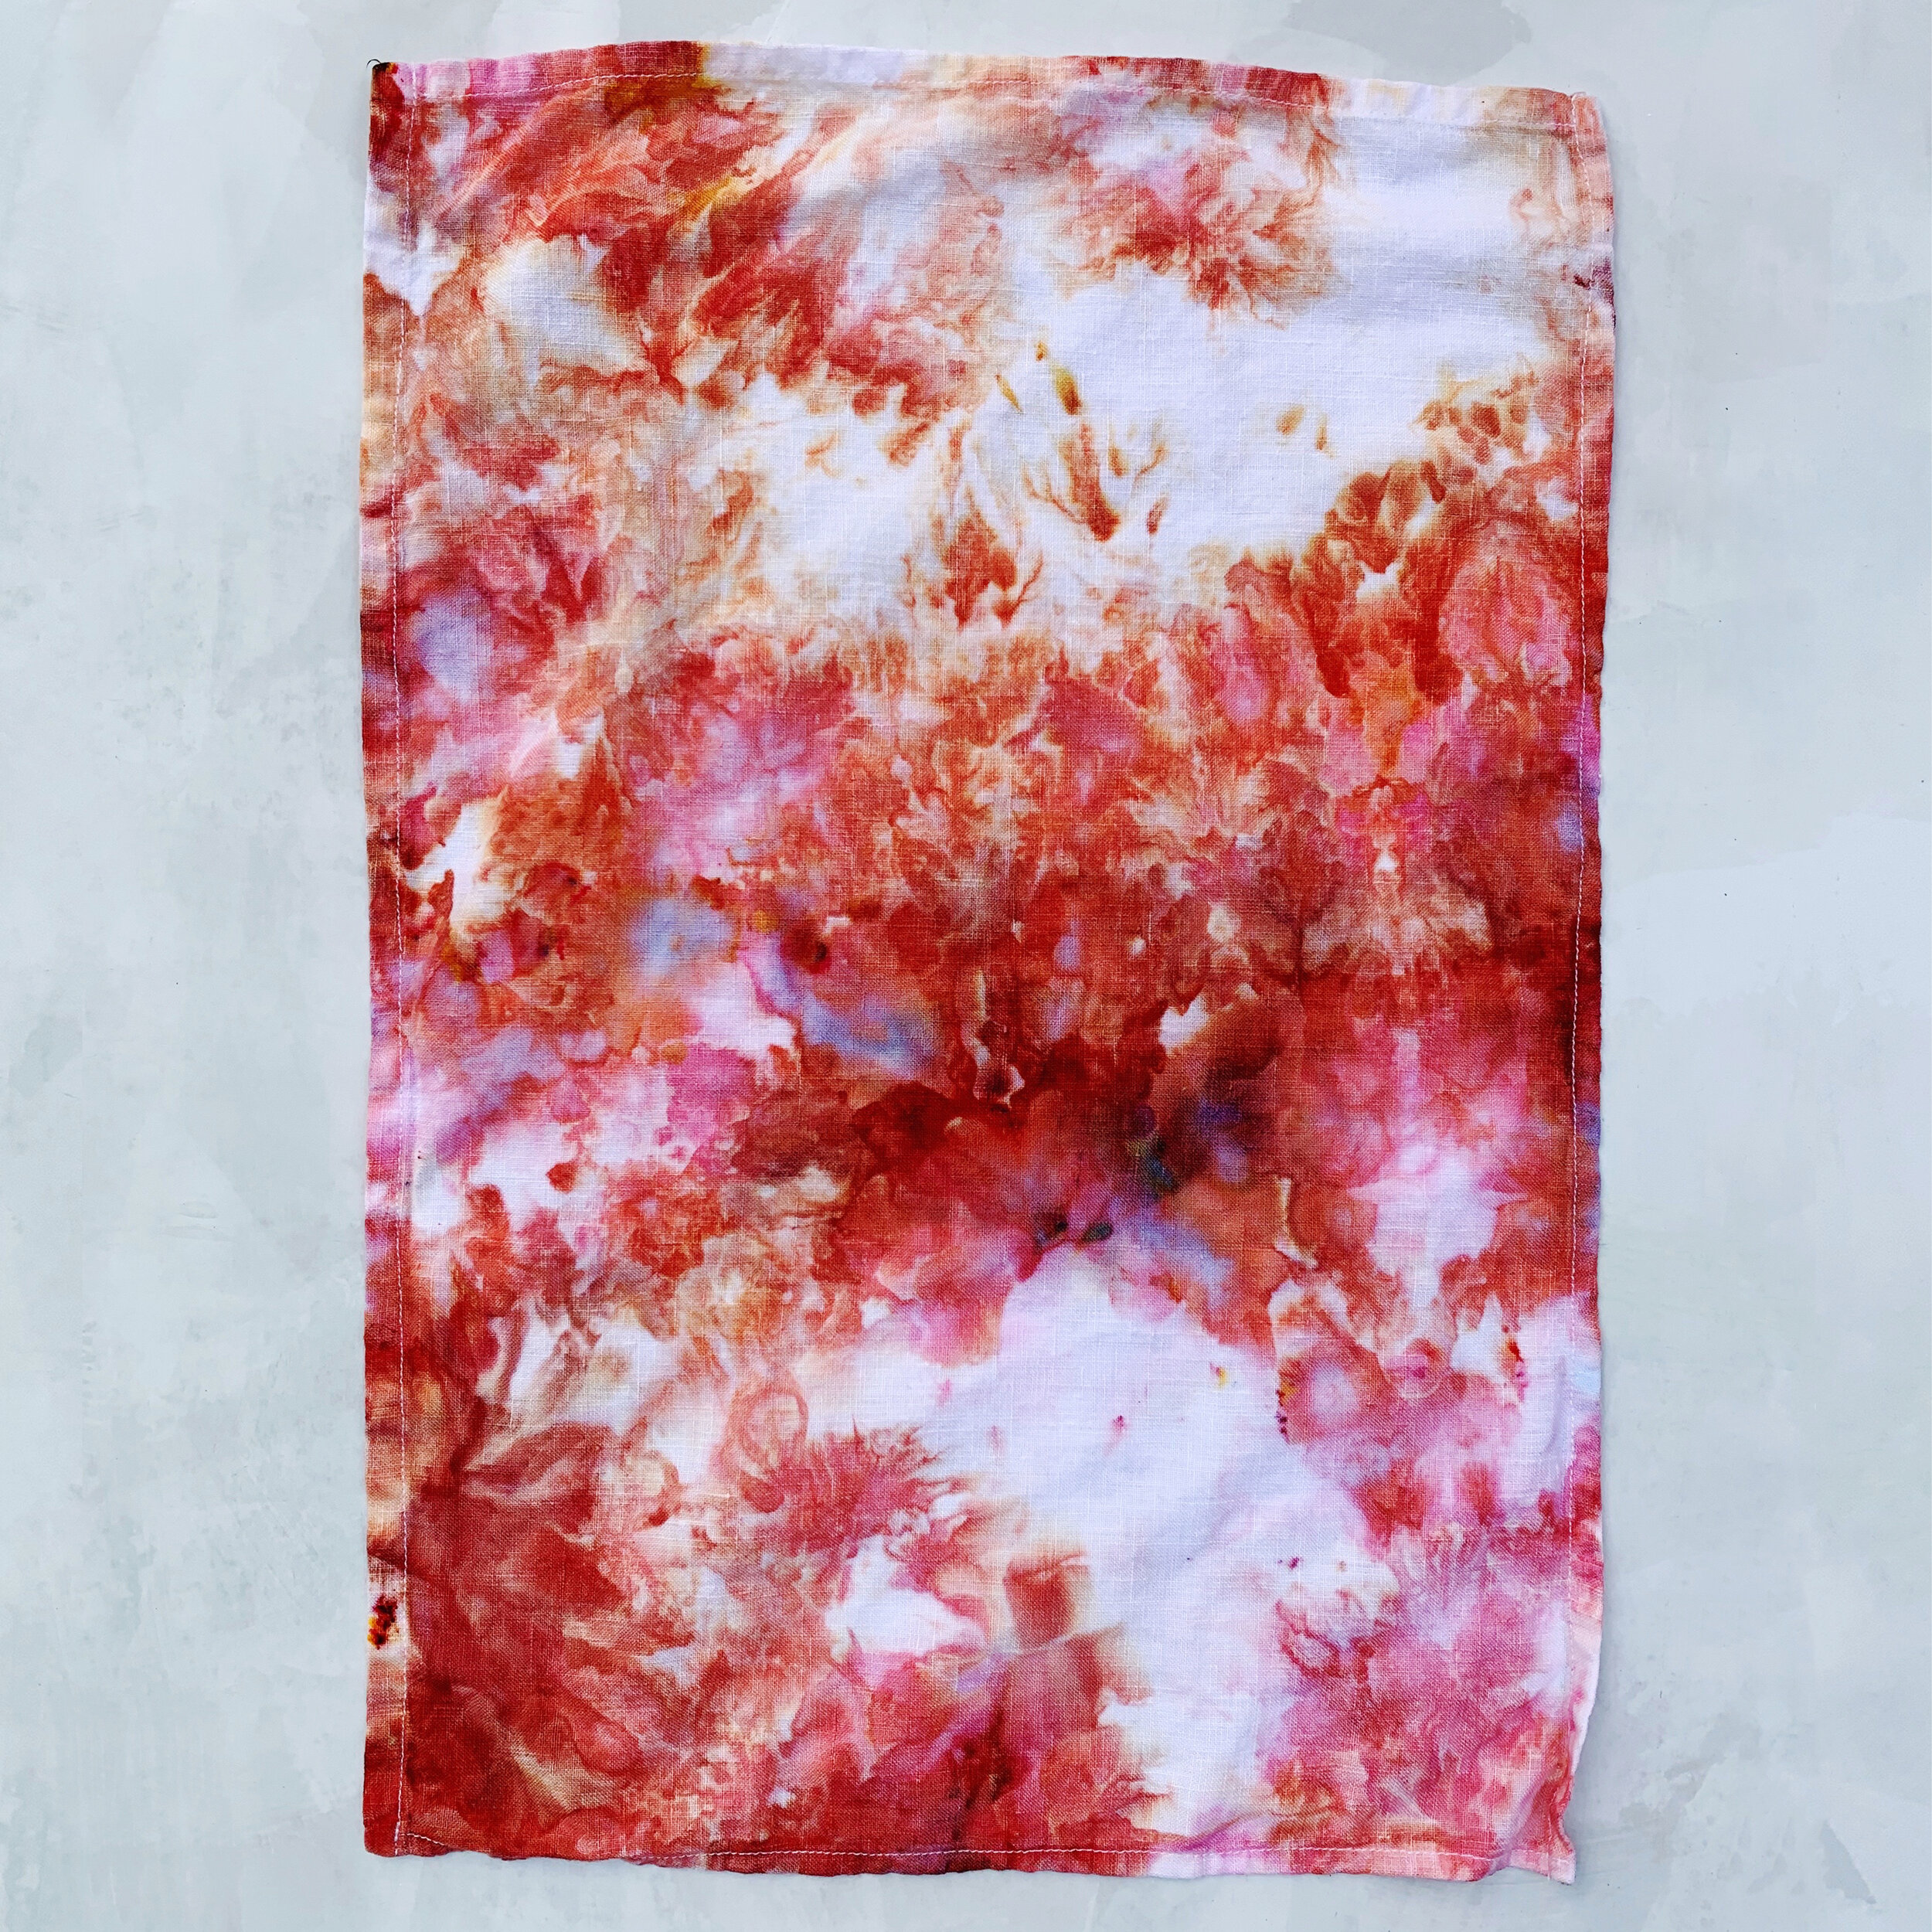
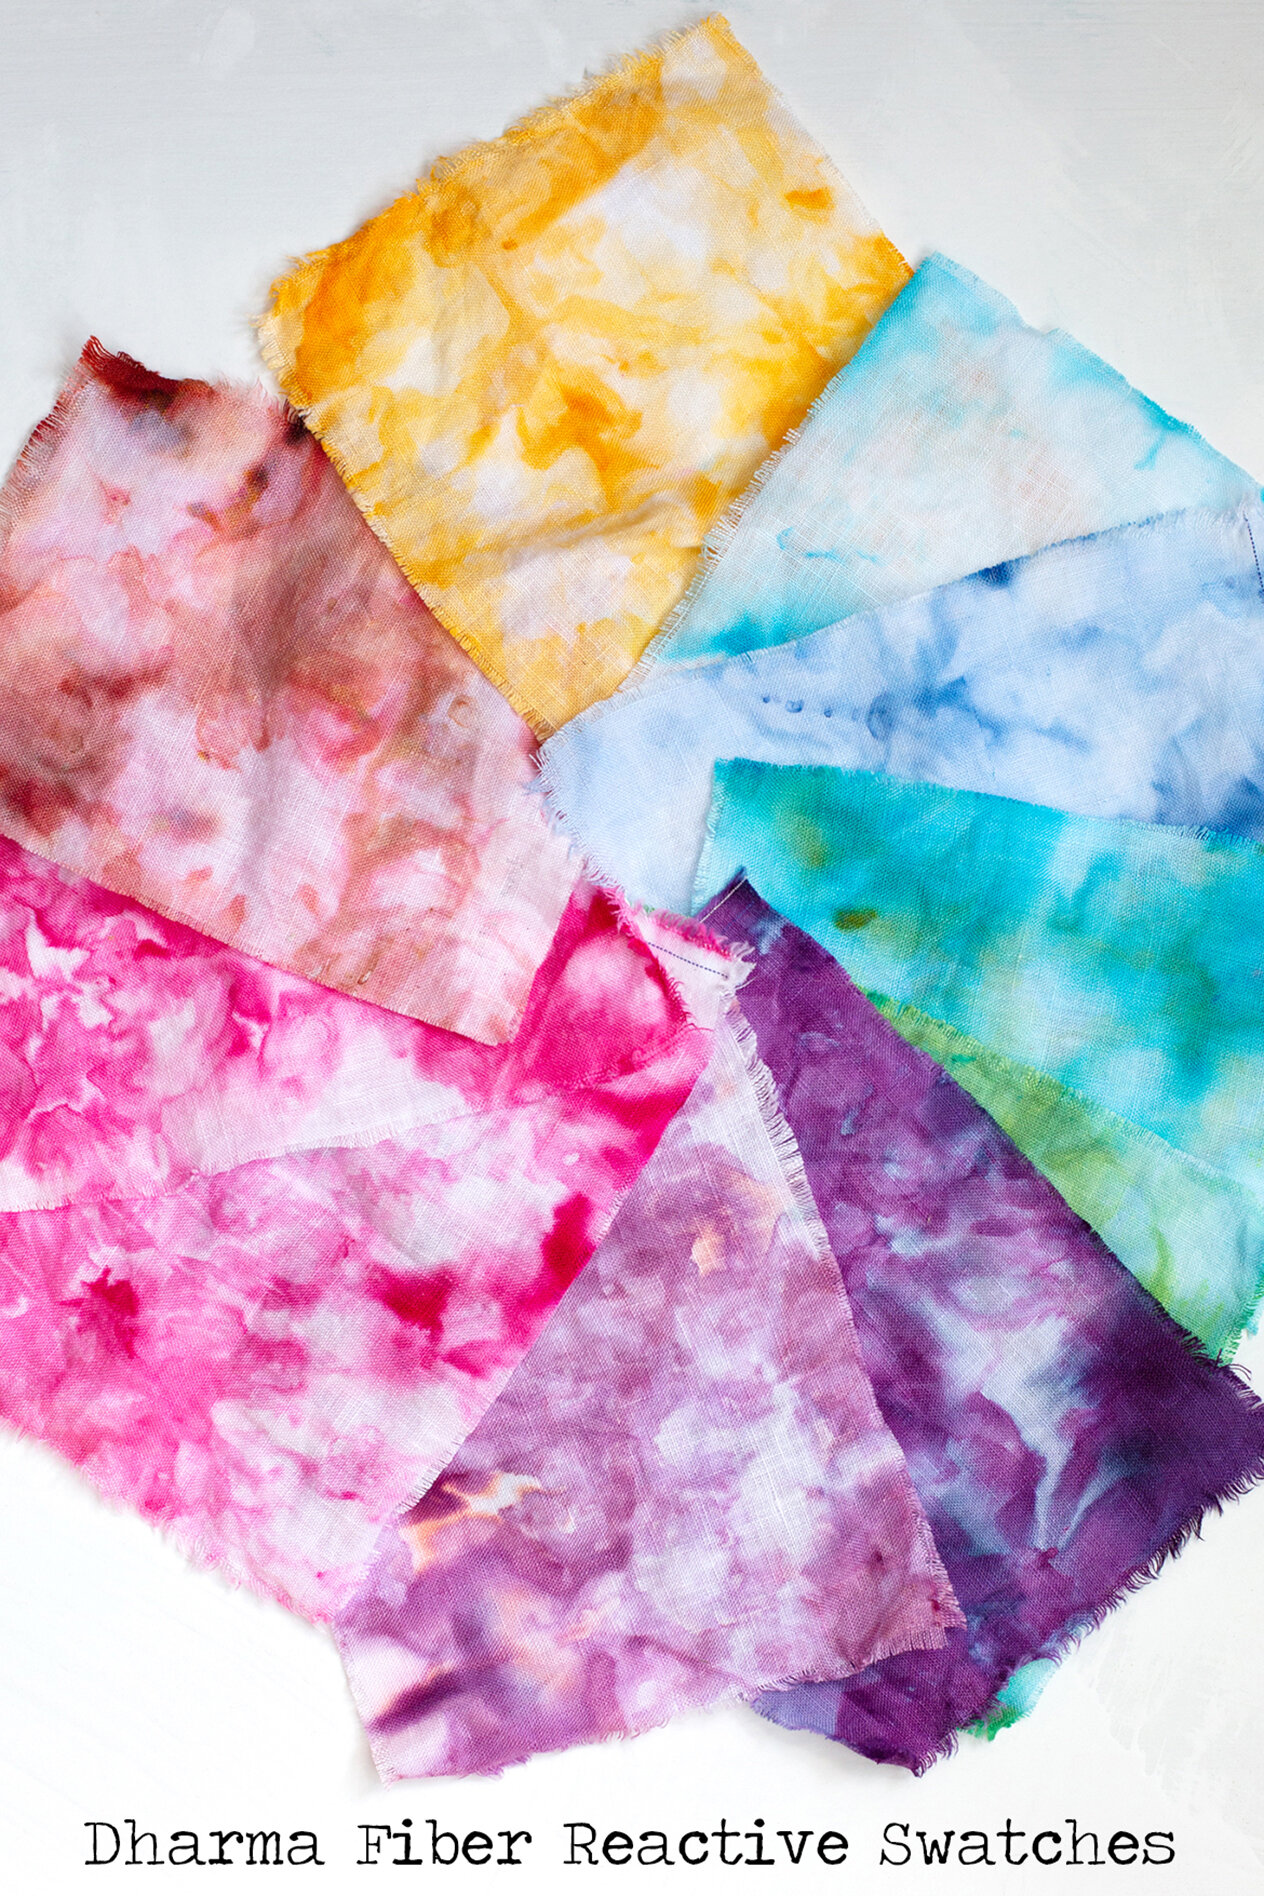
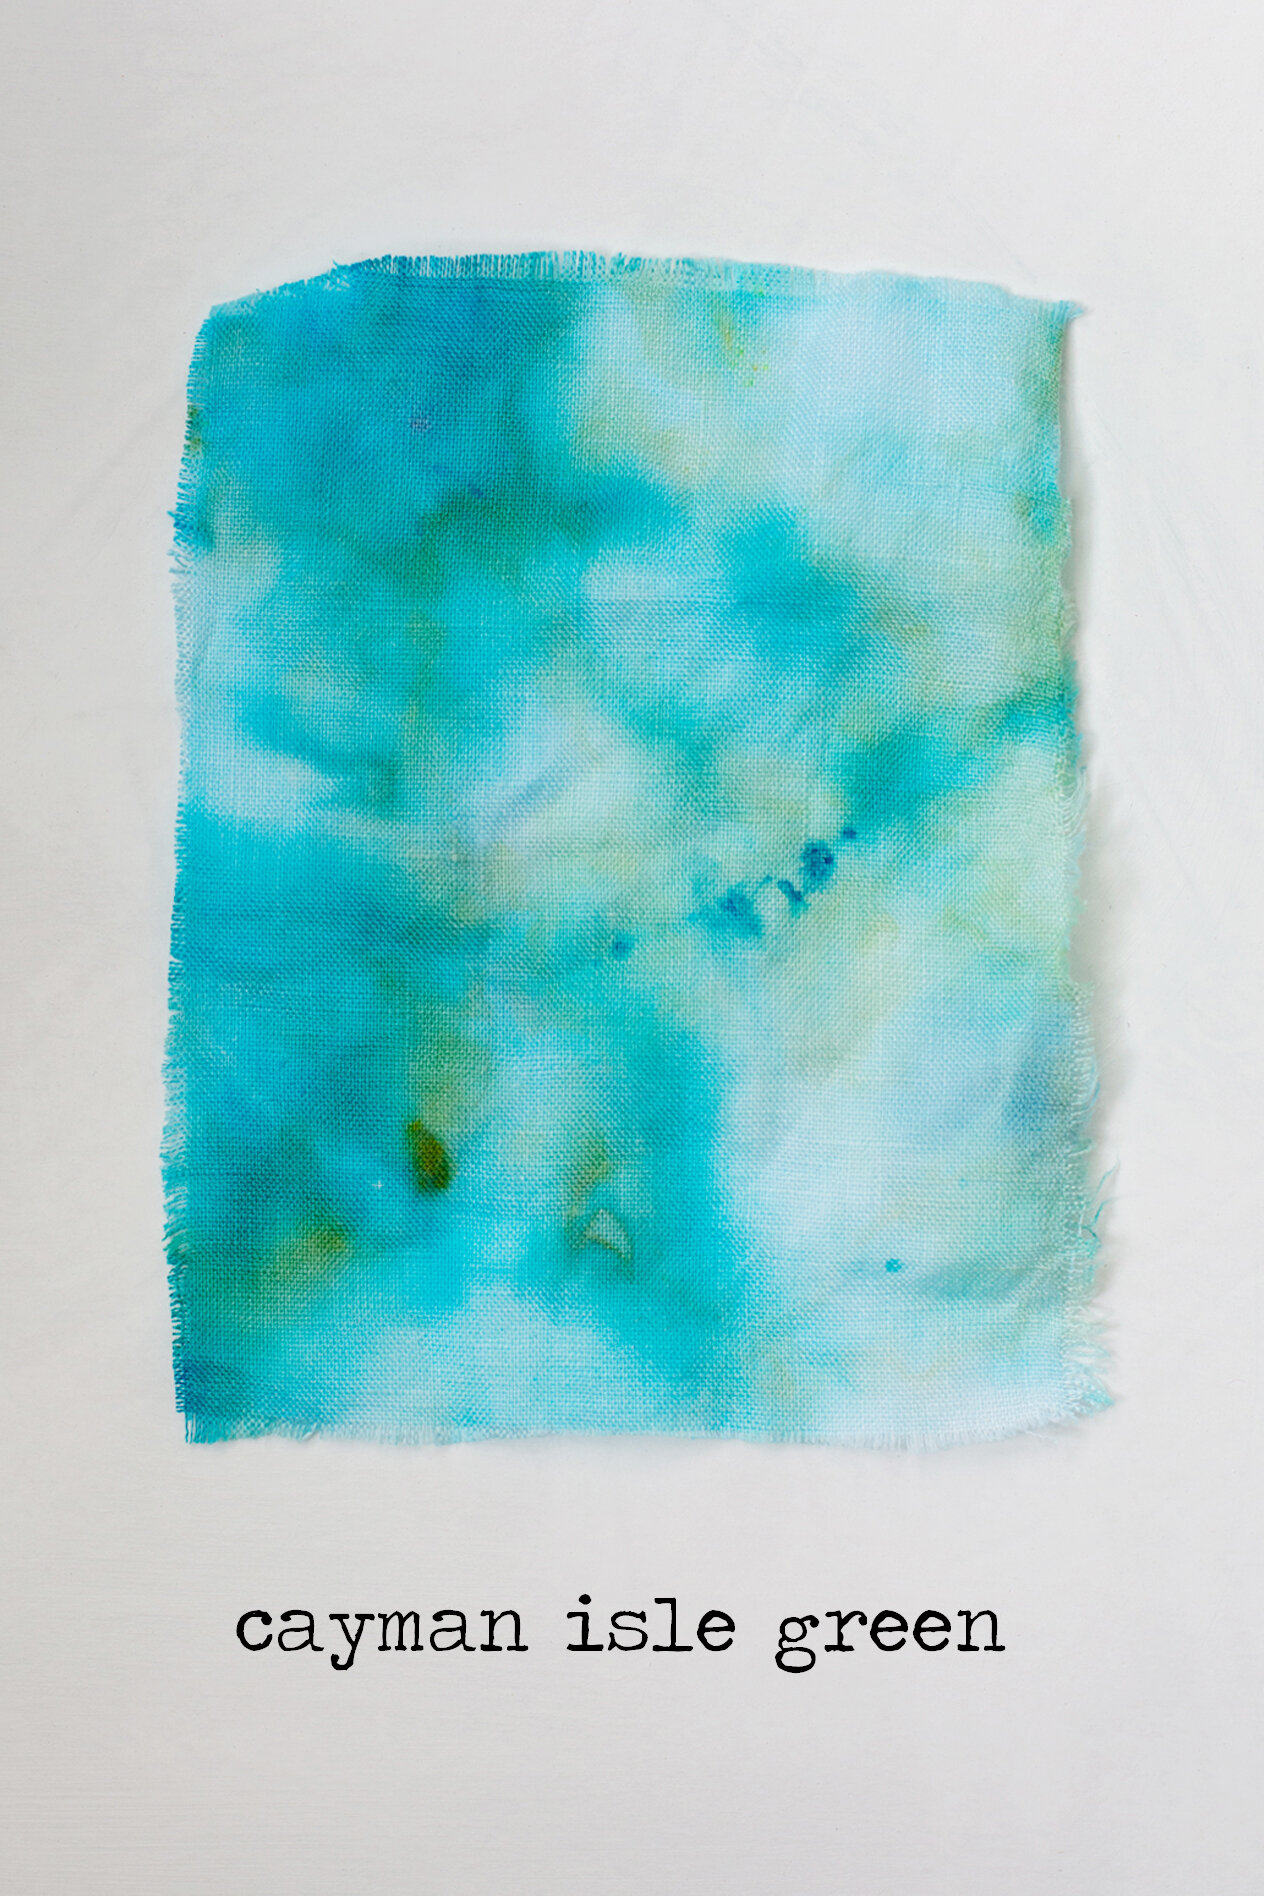
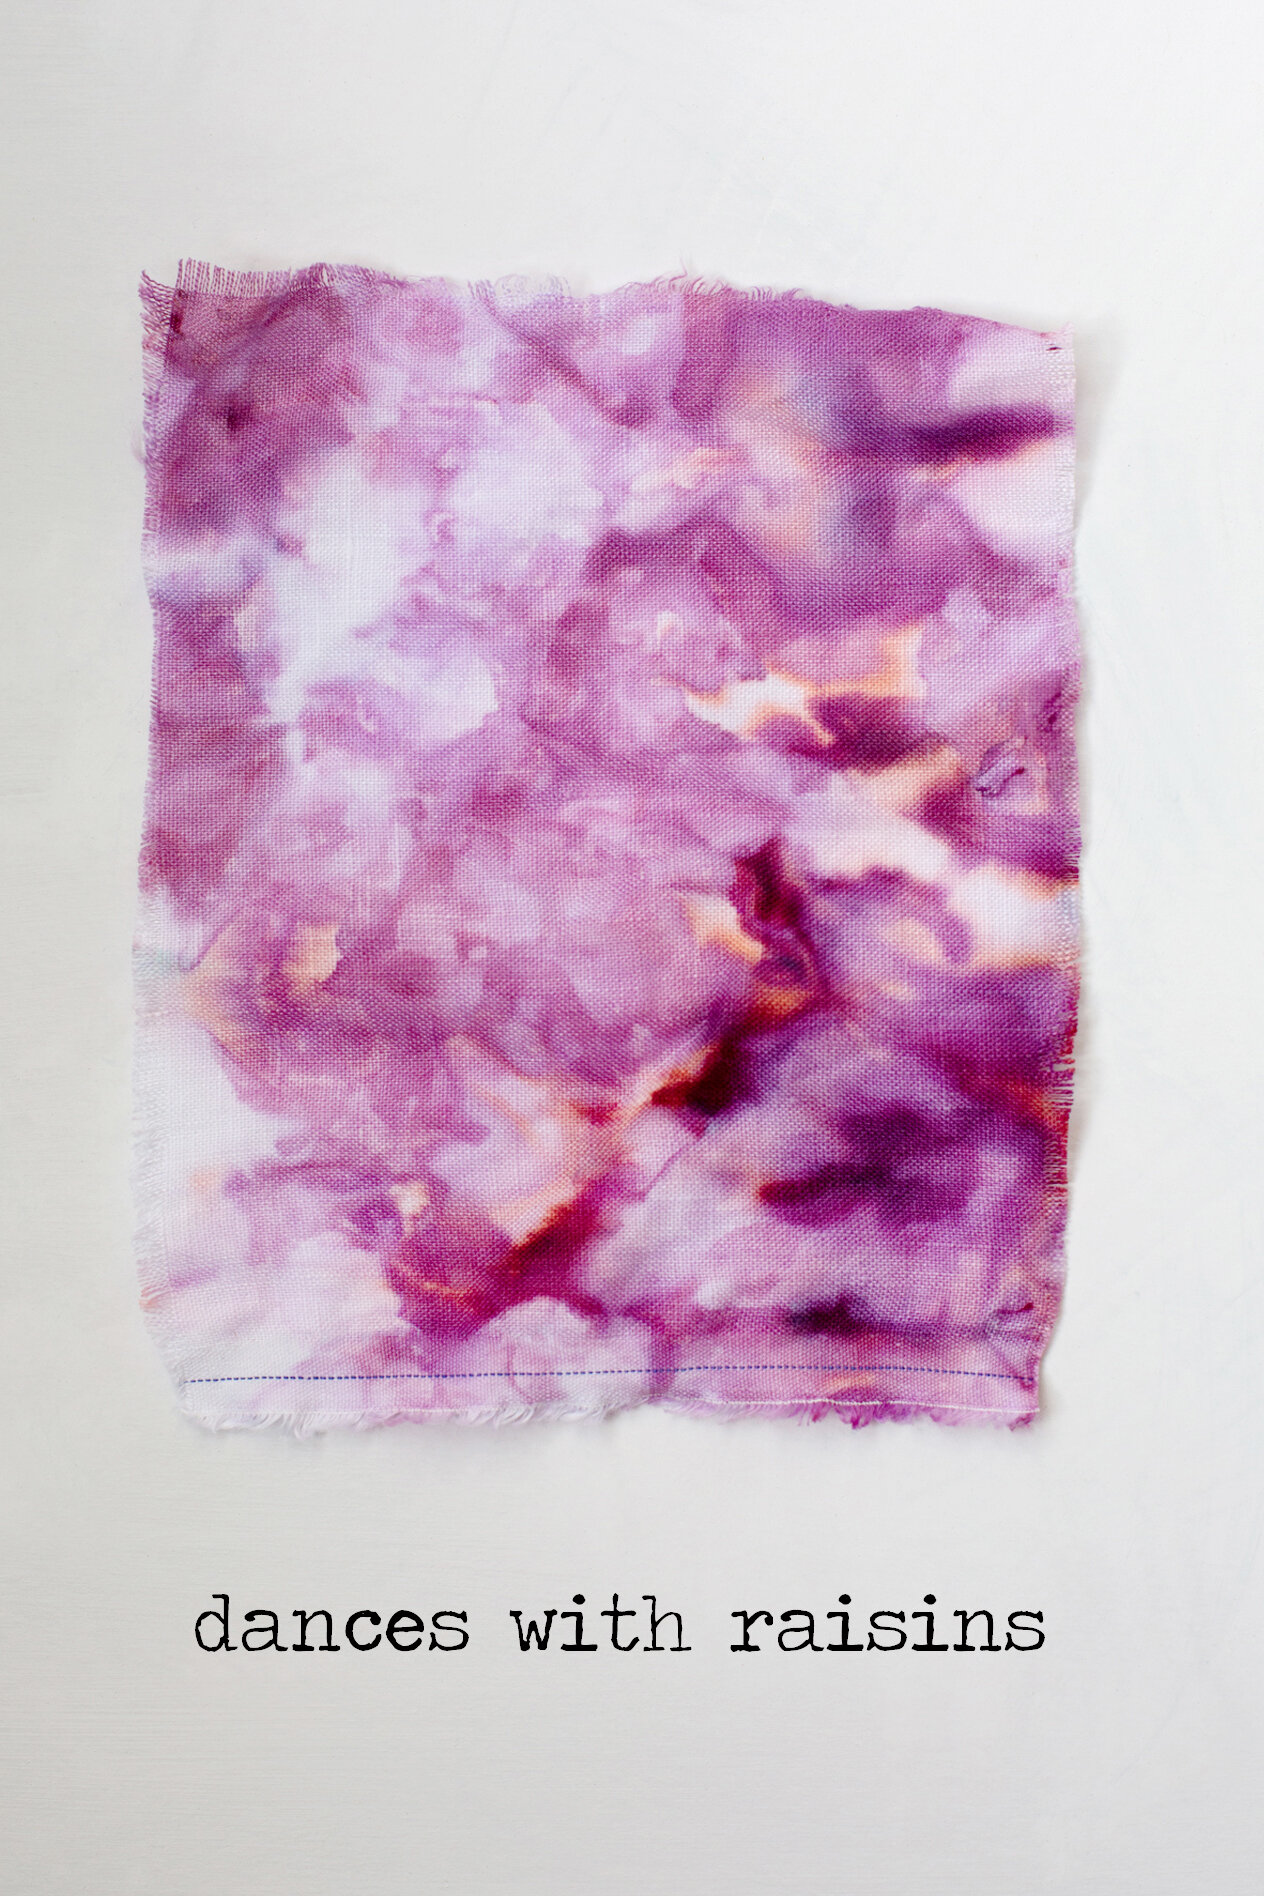
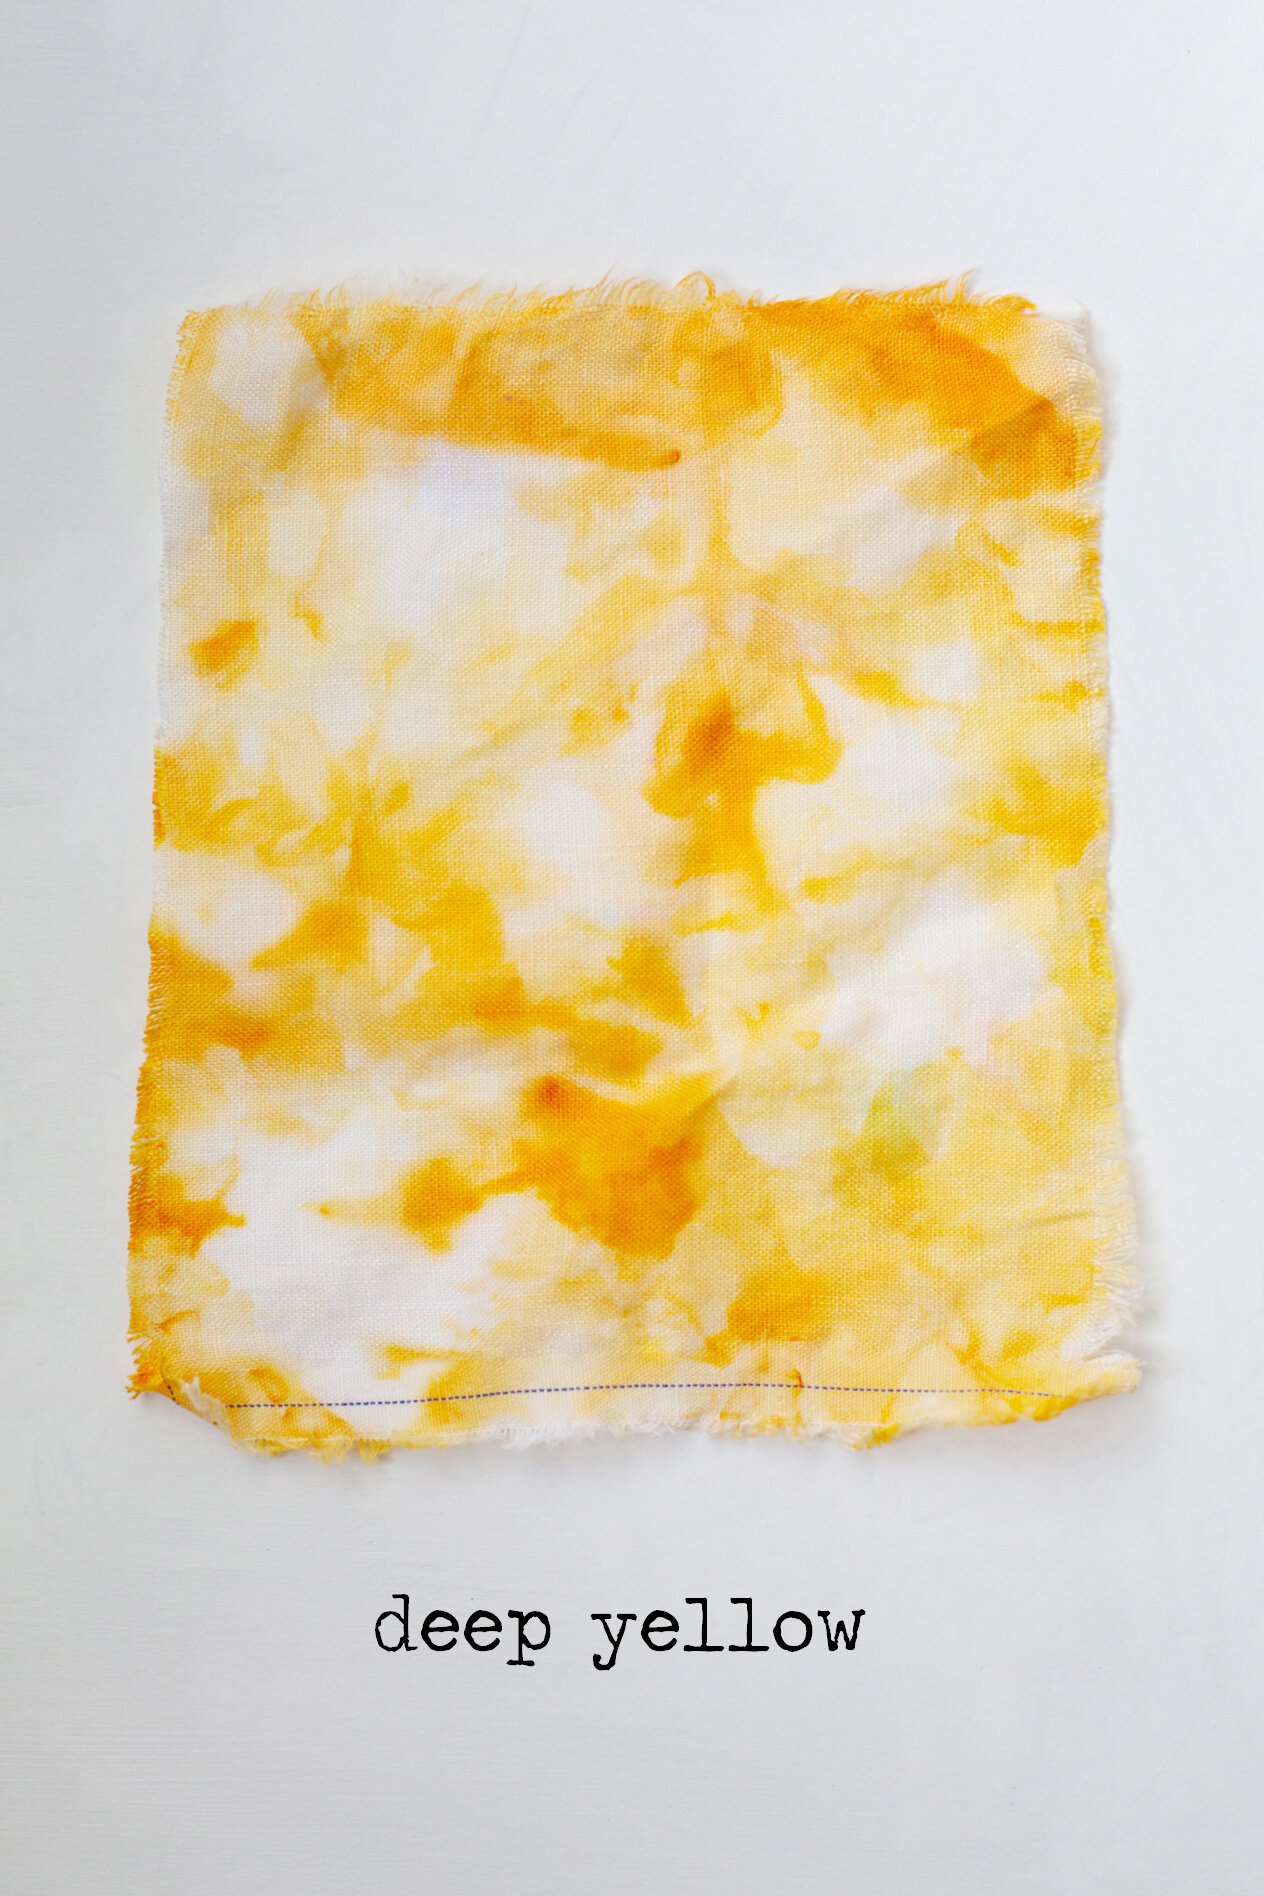
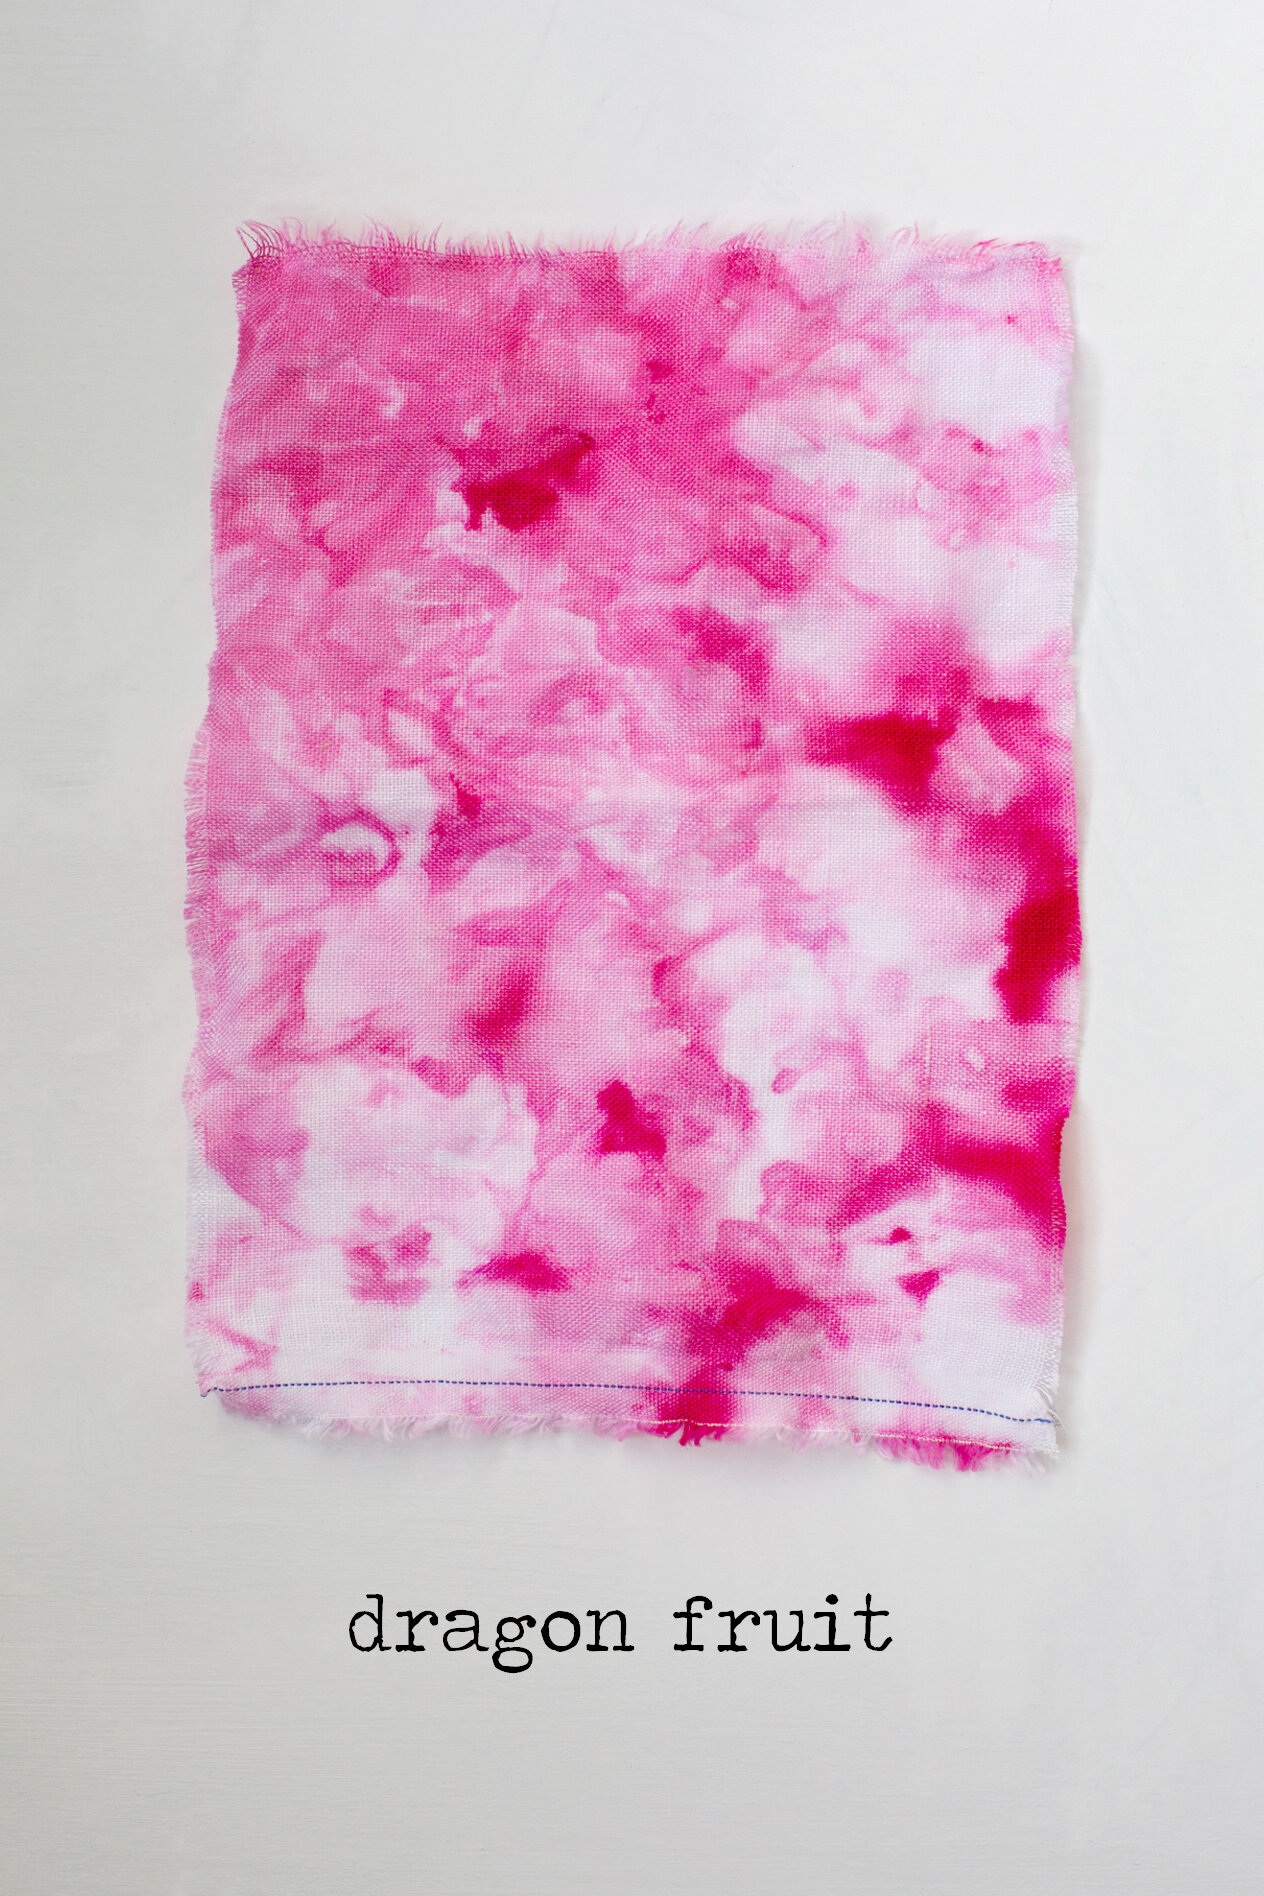
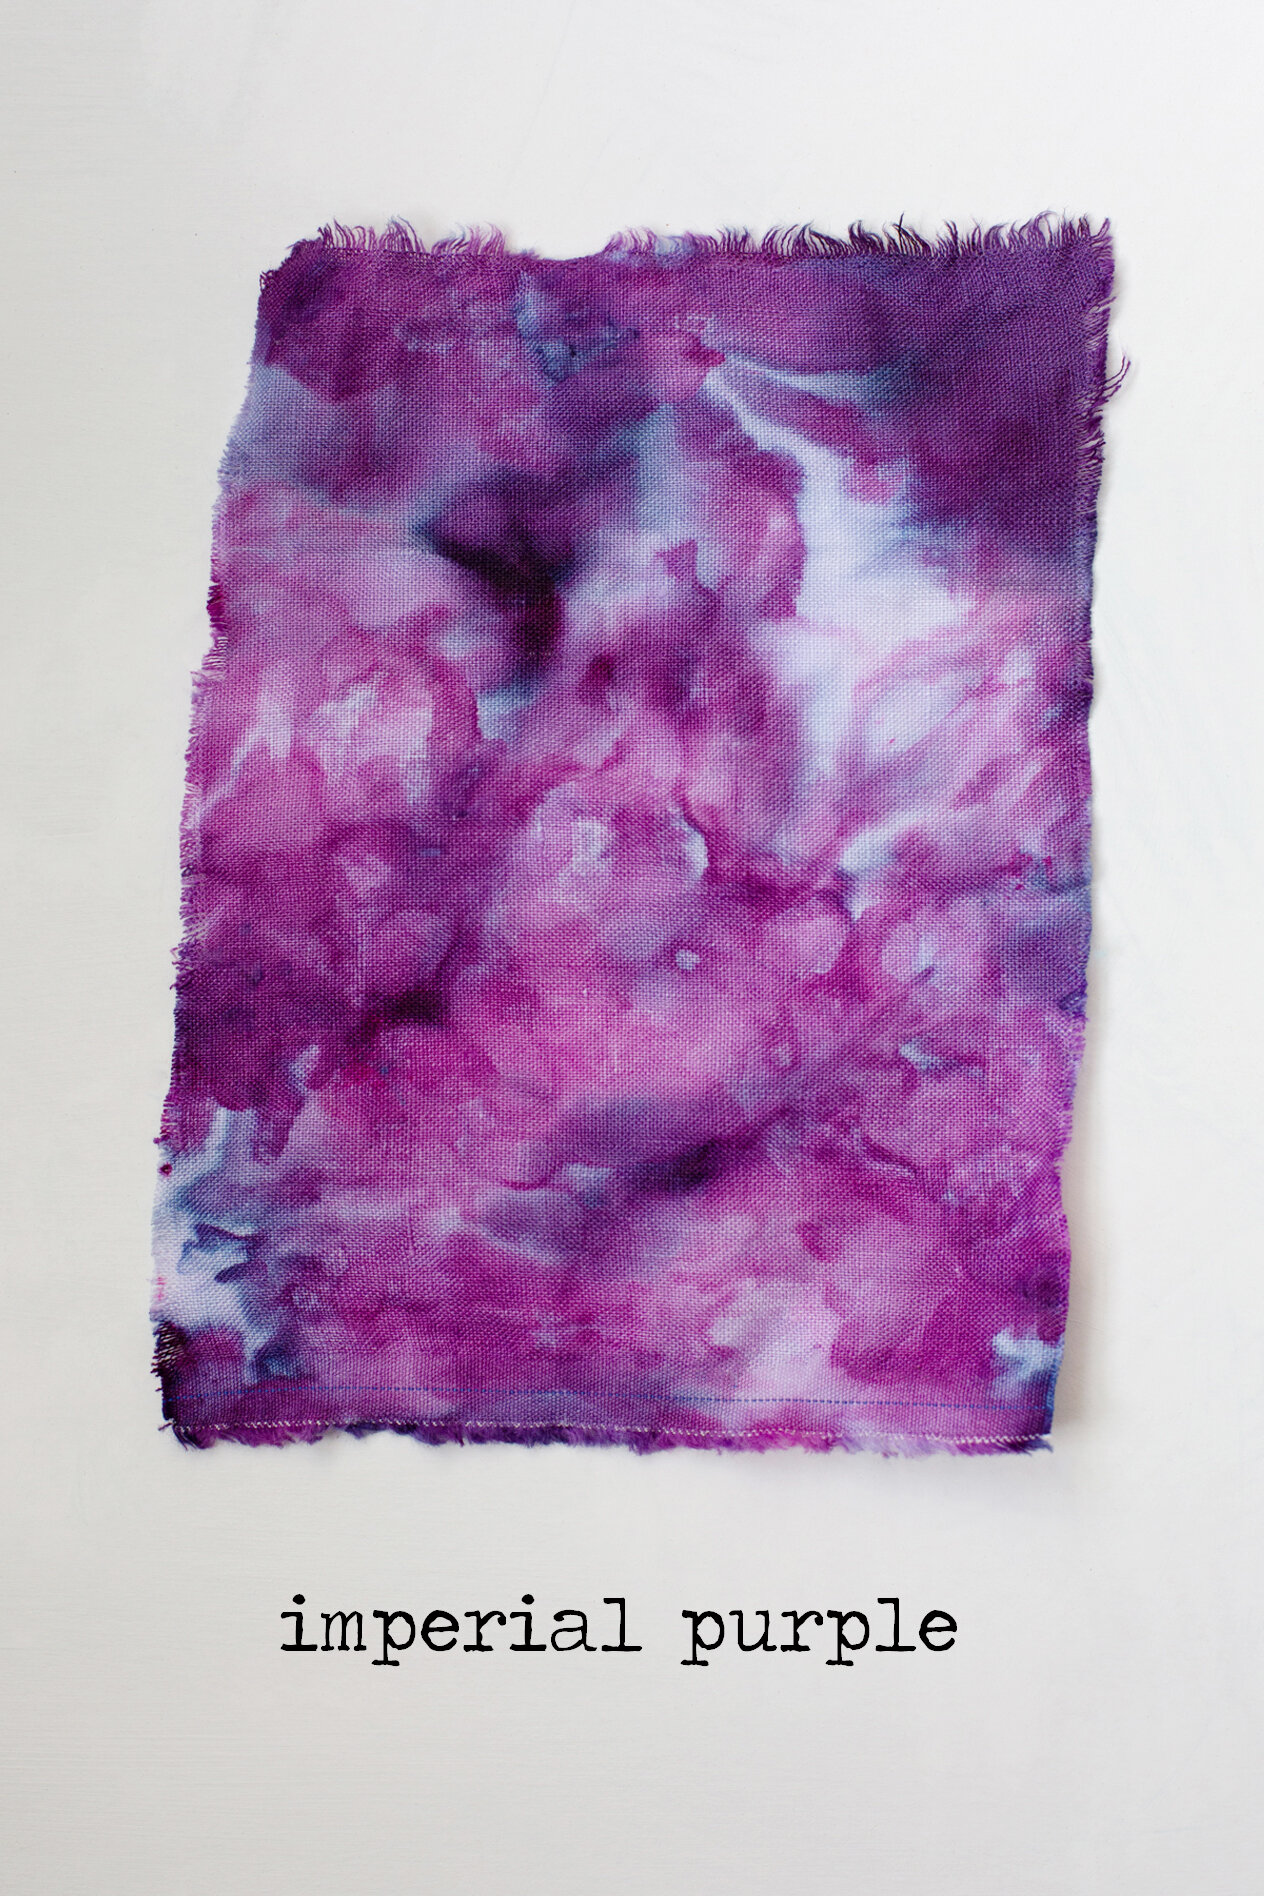
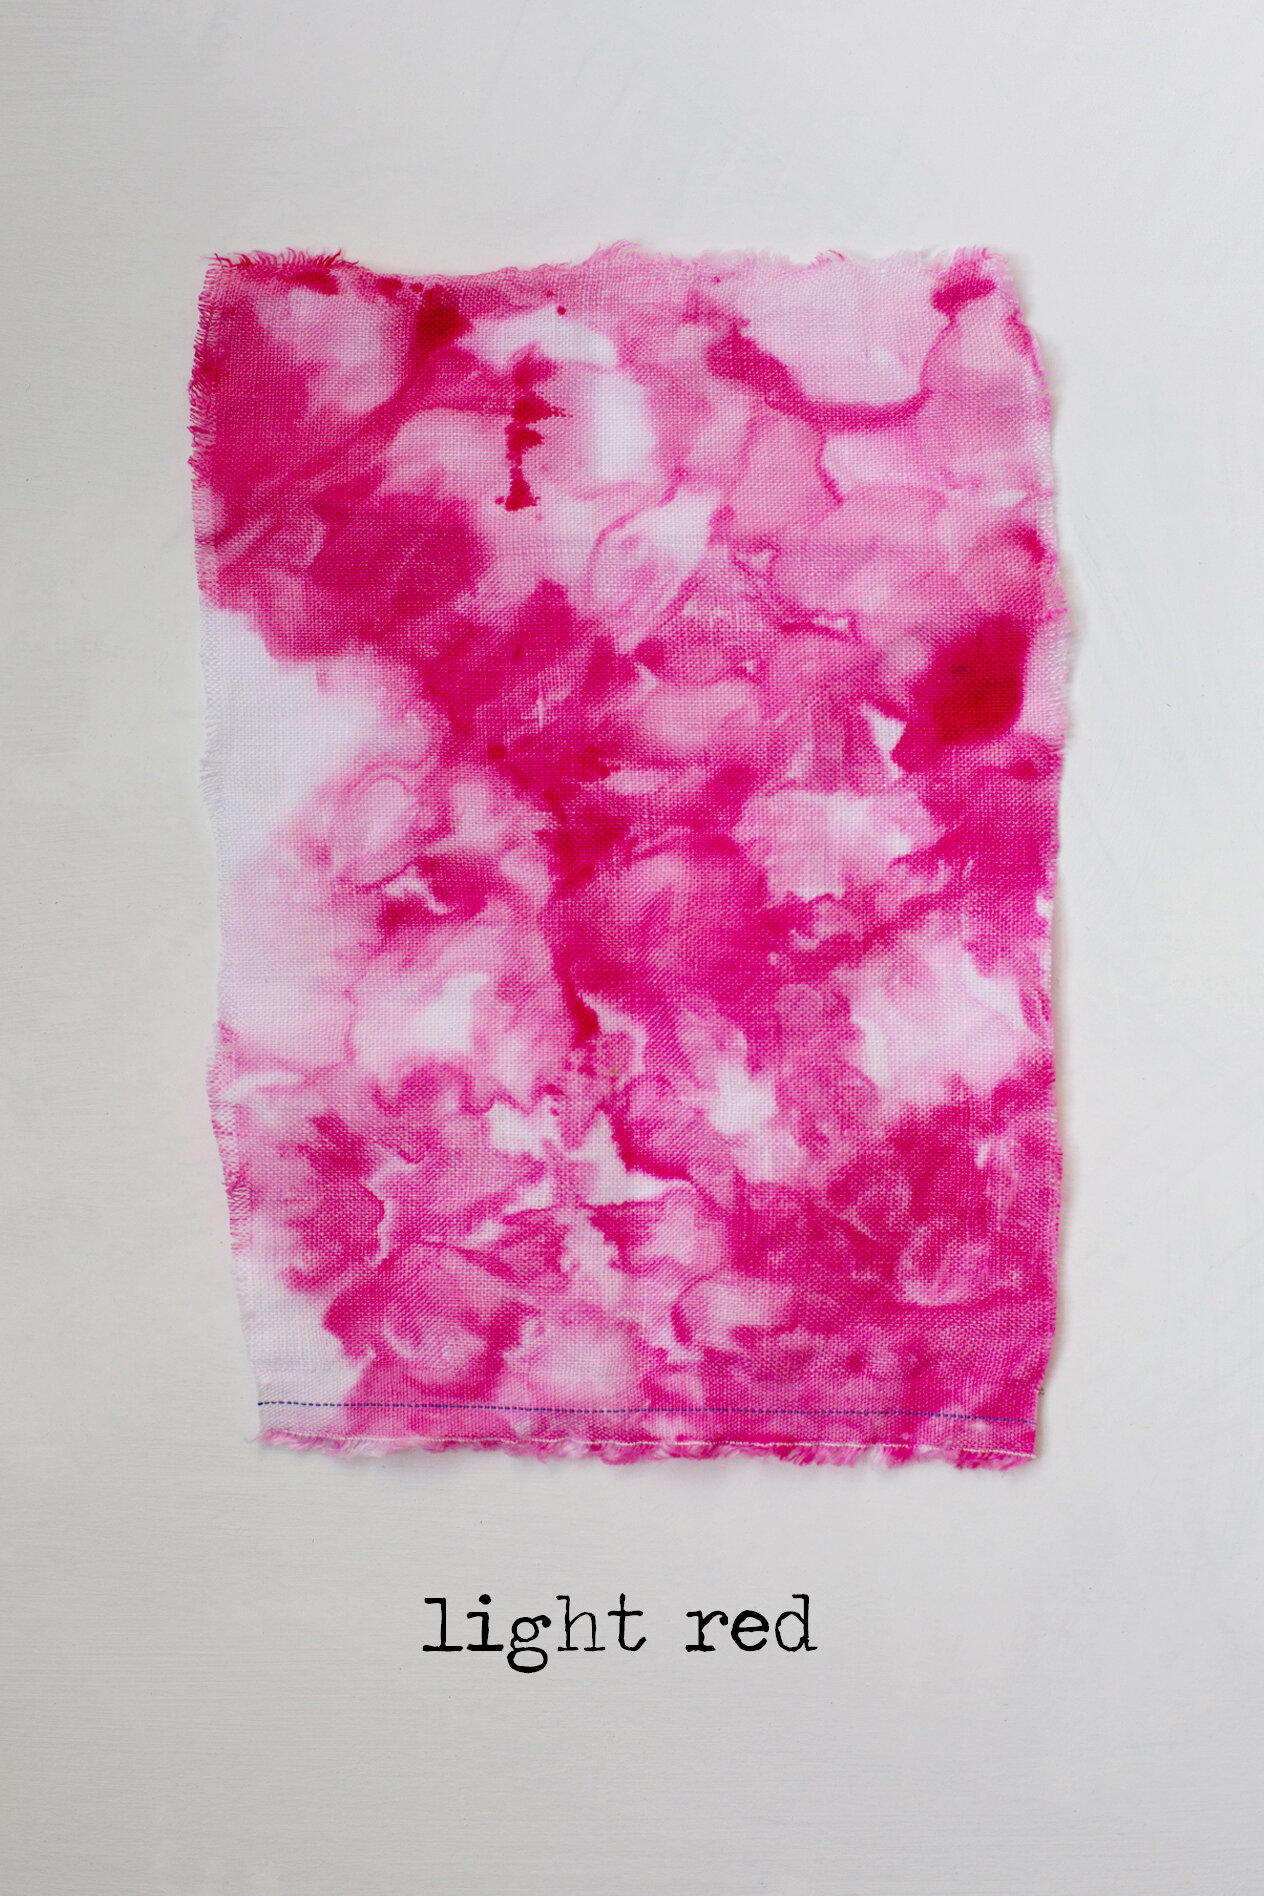
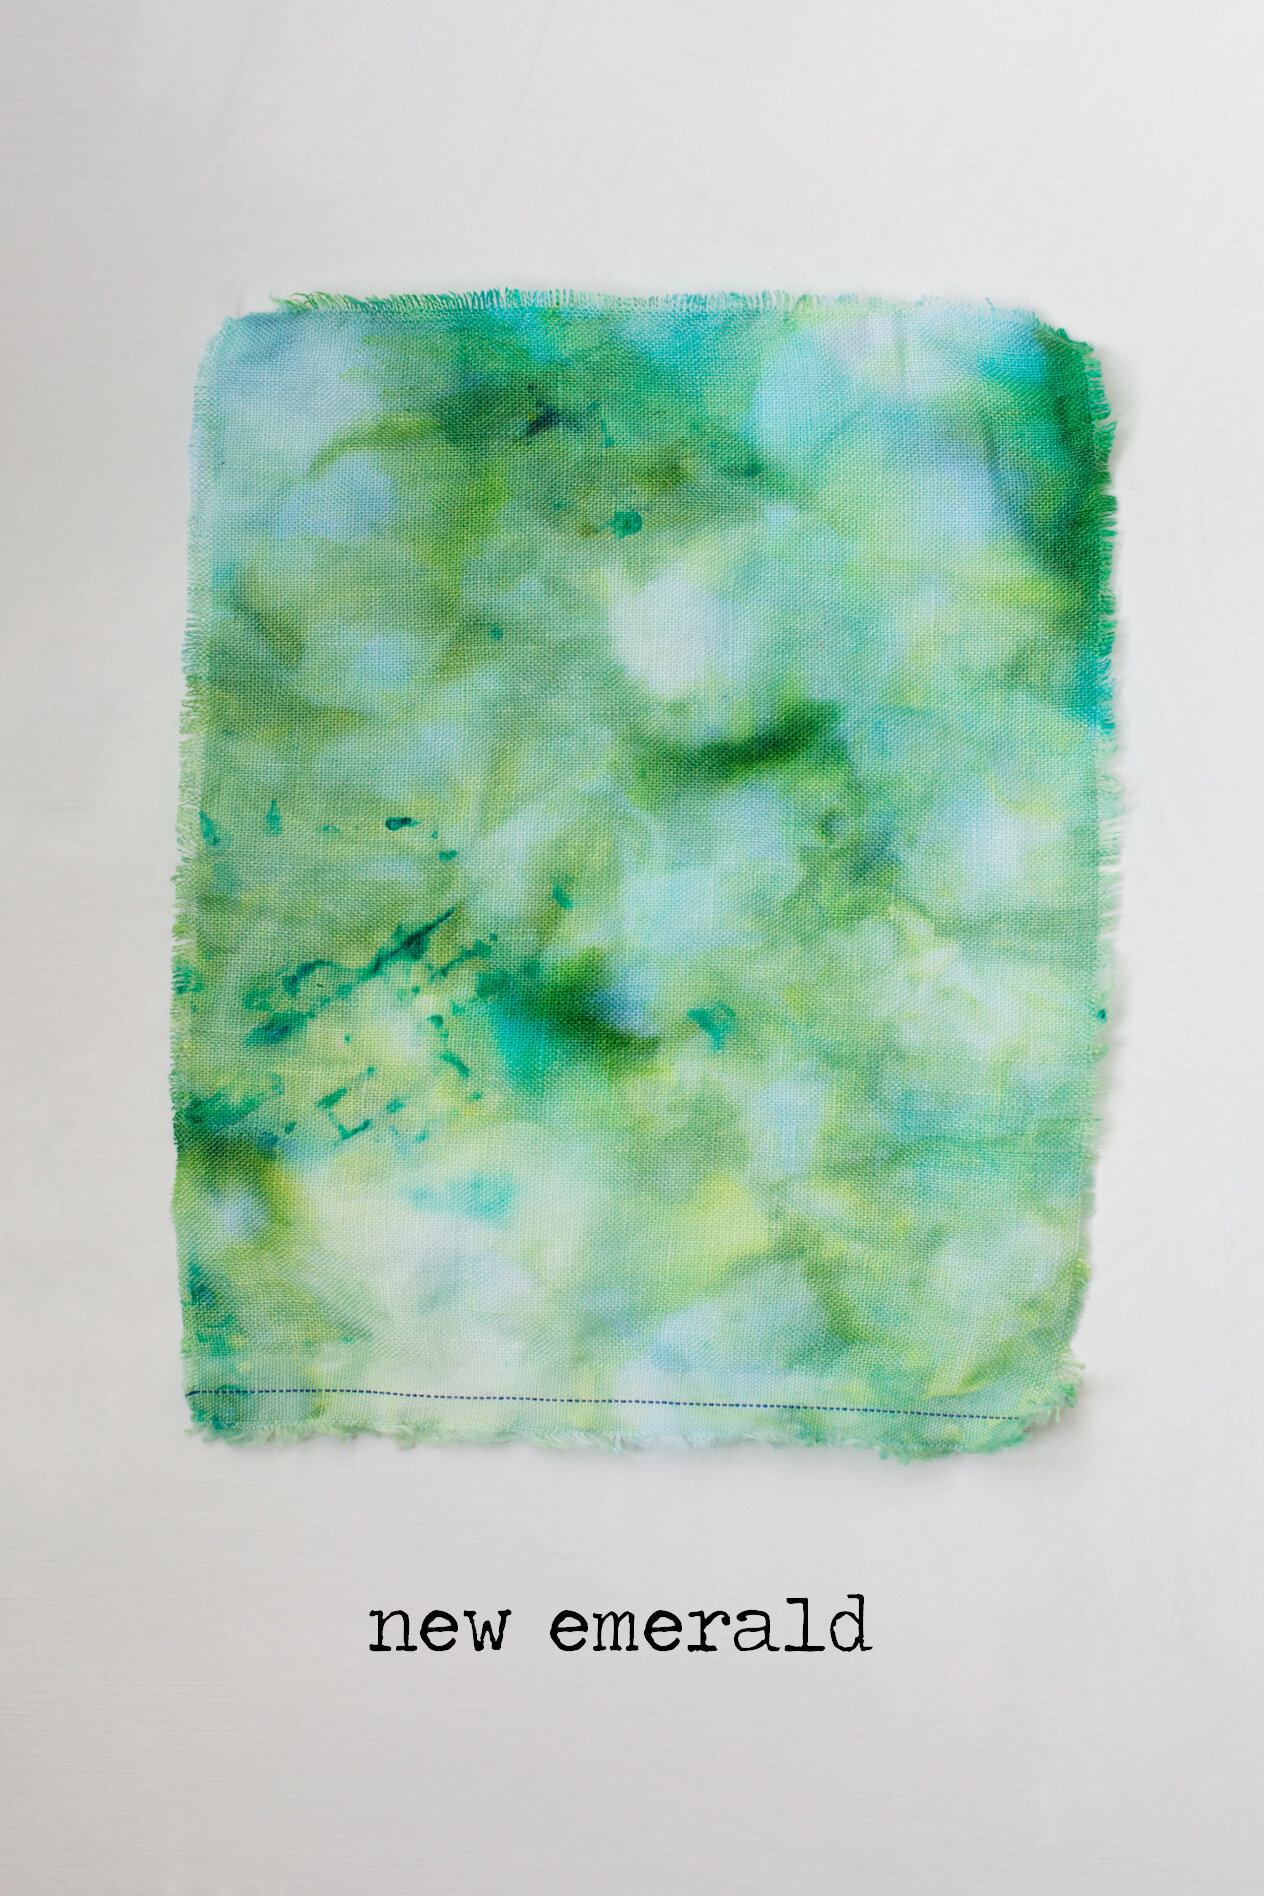
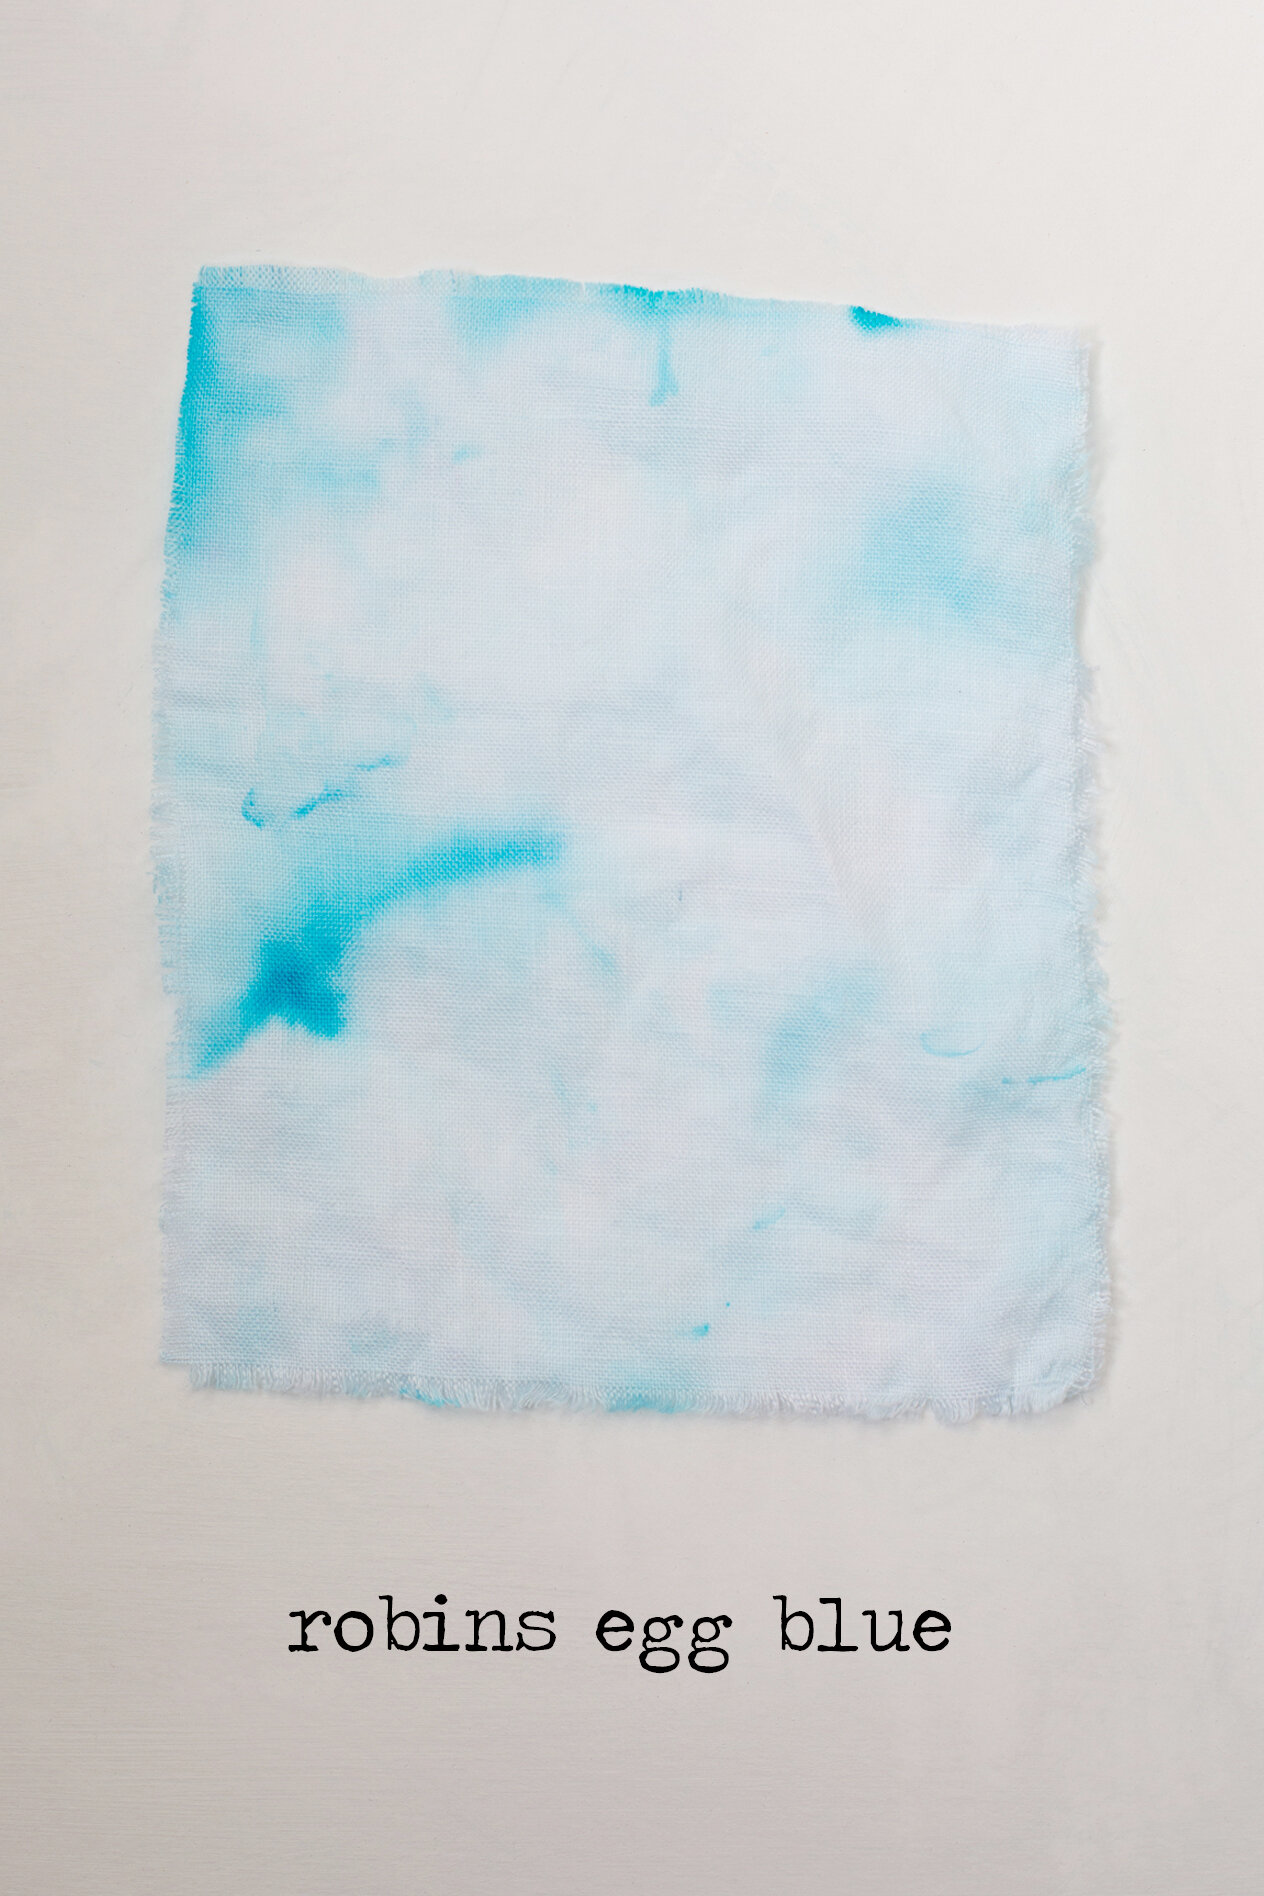
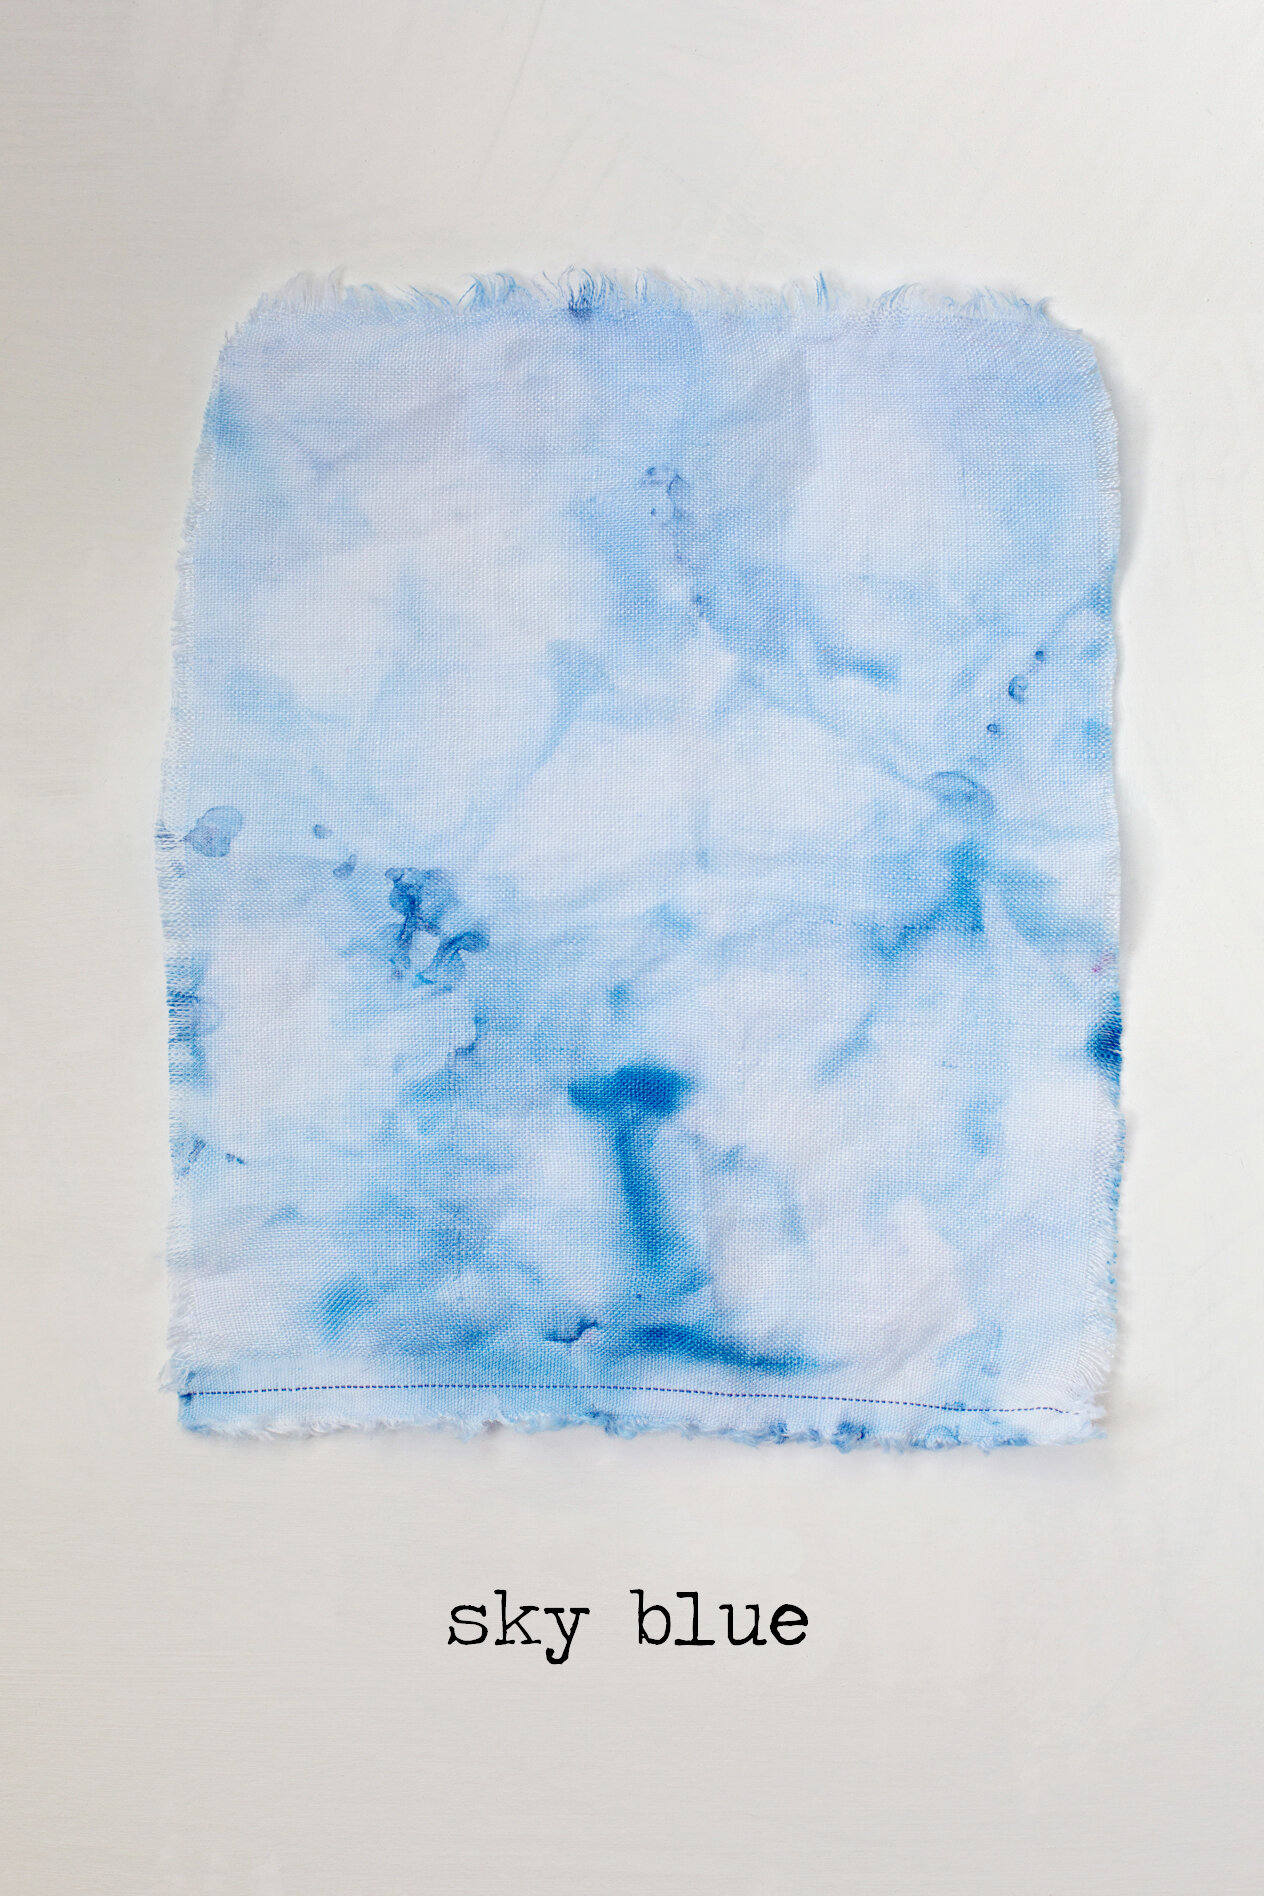
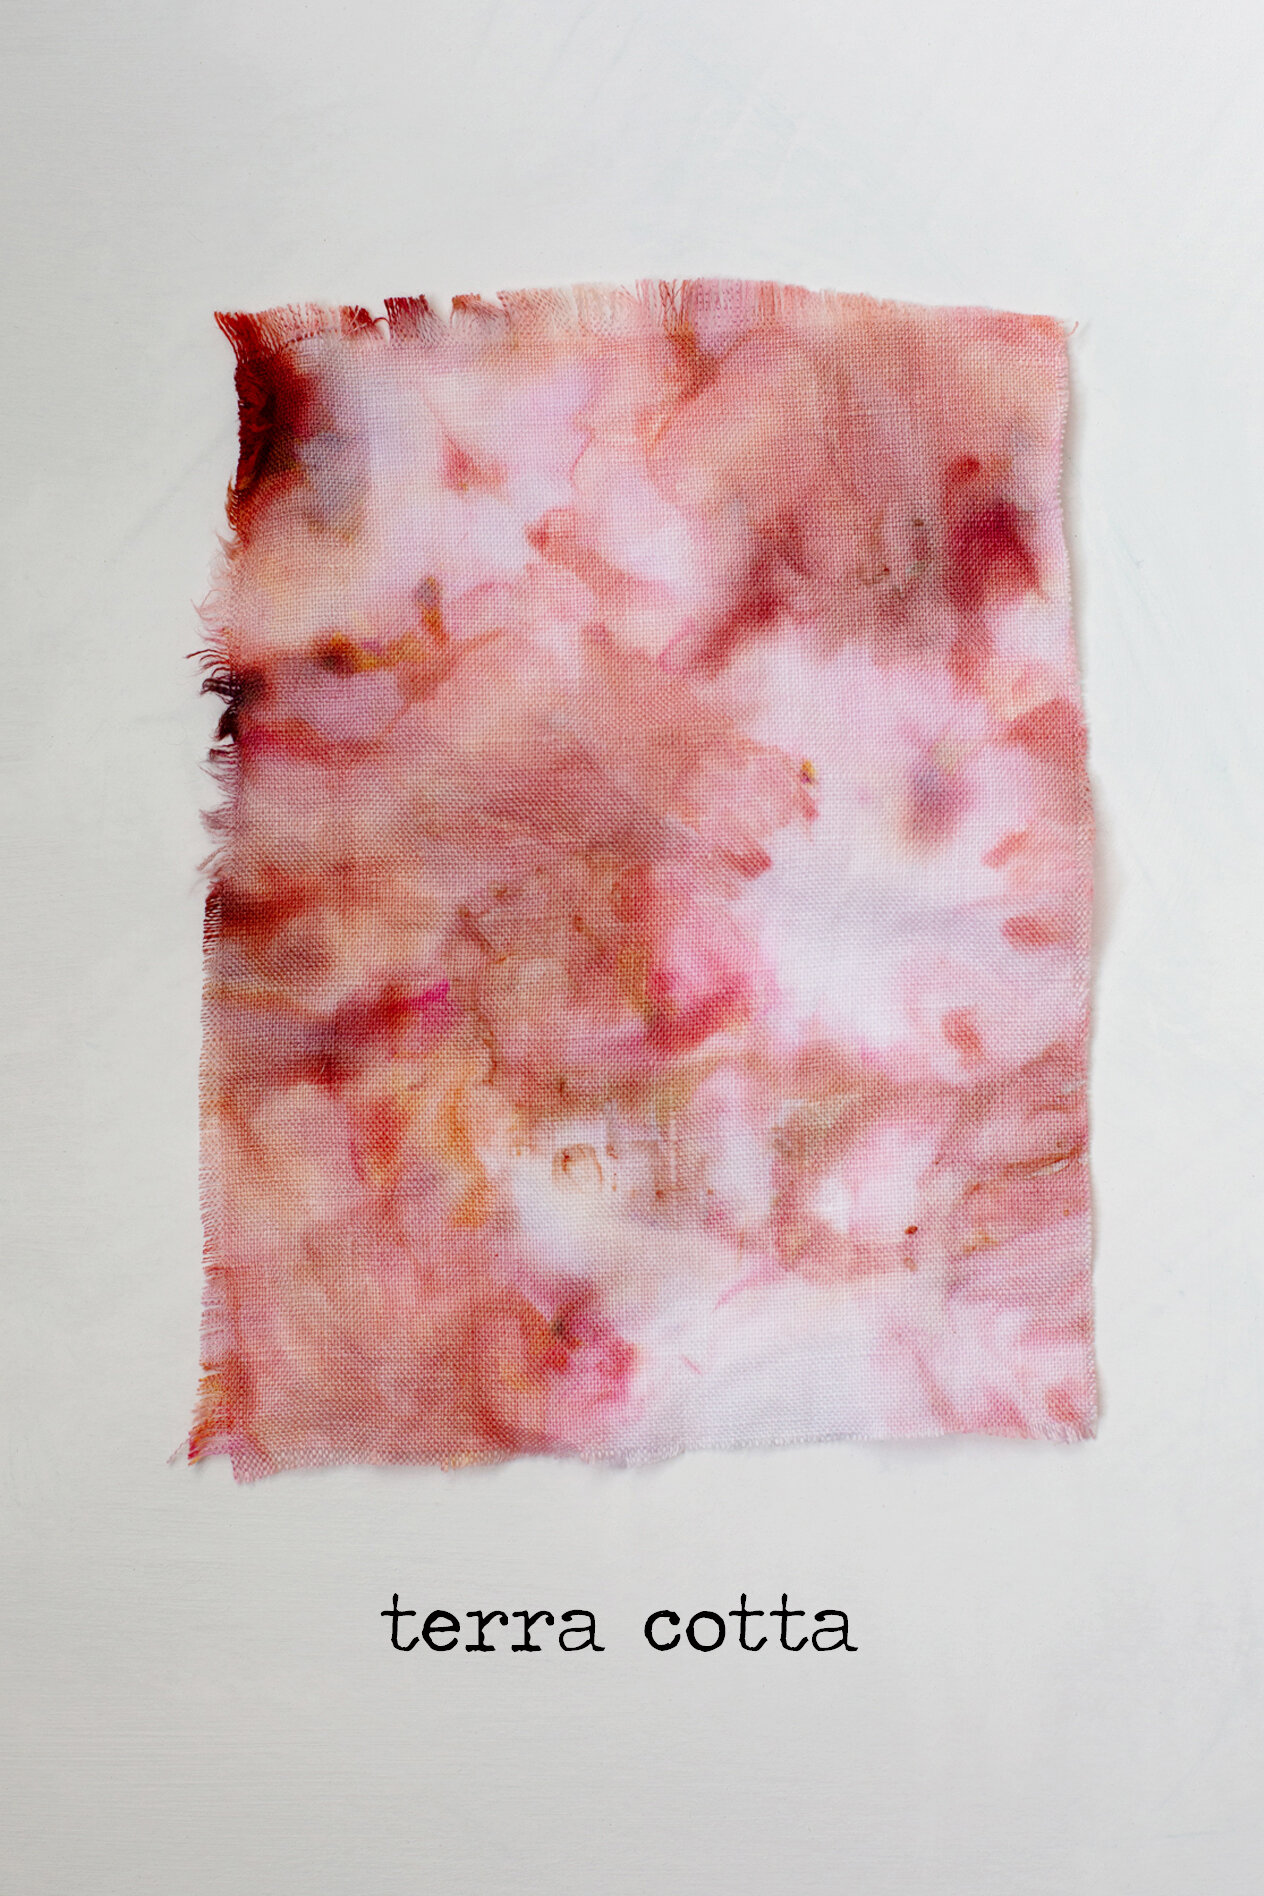
One of the magical things about Ice Dying- aside from the swirling patterns and soft watercolor effect- is that one color becomes many as a by-product of the process. Any secondary color that you pick up will do this, separating into the many hues that make up that one shade as the ice melts away. As I planned out my first experiment, I wanted to get a sense of what that actually looks like but was coming up short in my research, so I decided to create a little guide of my own- with swatches. The process is organic, so your project won’t look * exactly * like mine, but it’s a good little visual to get you started. If you swatch any colors of your own, I would love to see the results.

All in all, it’s a great little project. Much of it is pretty hands-off, and I loved that because you work with dry powder, you don’t have to mix and use up large batches at a time. I love playing with color, so getting to play with a sprinkle of one shade here, a sprinkle there, and watch it evolve into something special was very satisfying.

Time:
Application is quick, but you’ll need to wait a day to rinse for best results
Skill Level:
Easy/Moderate
Supplies:
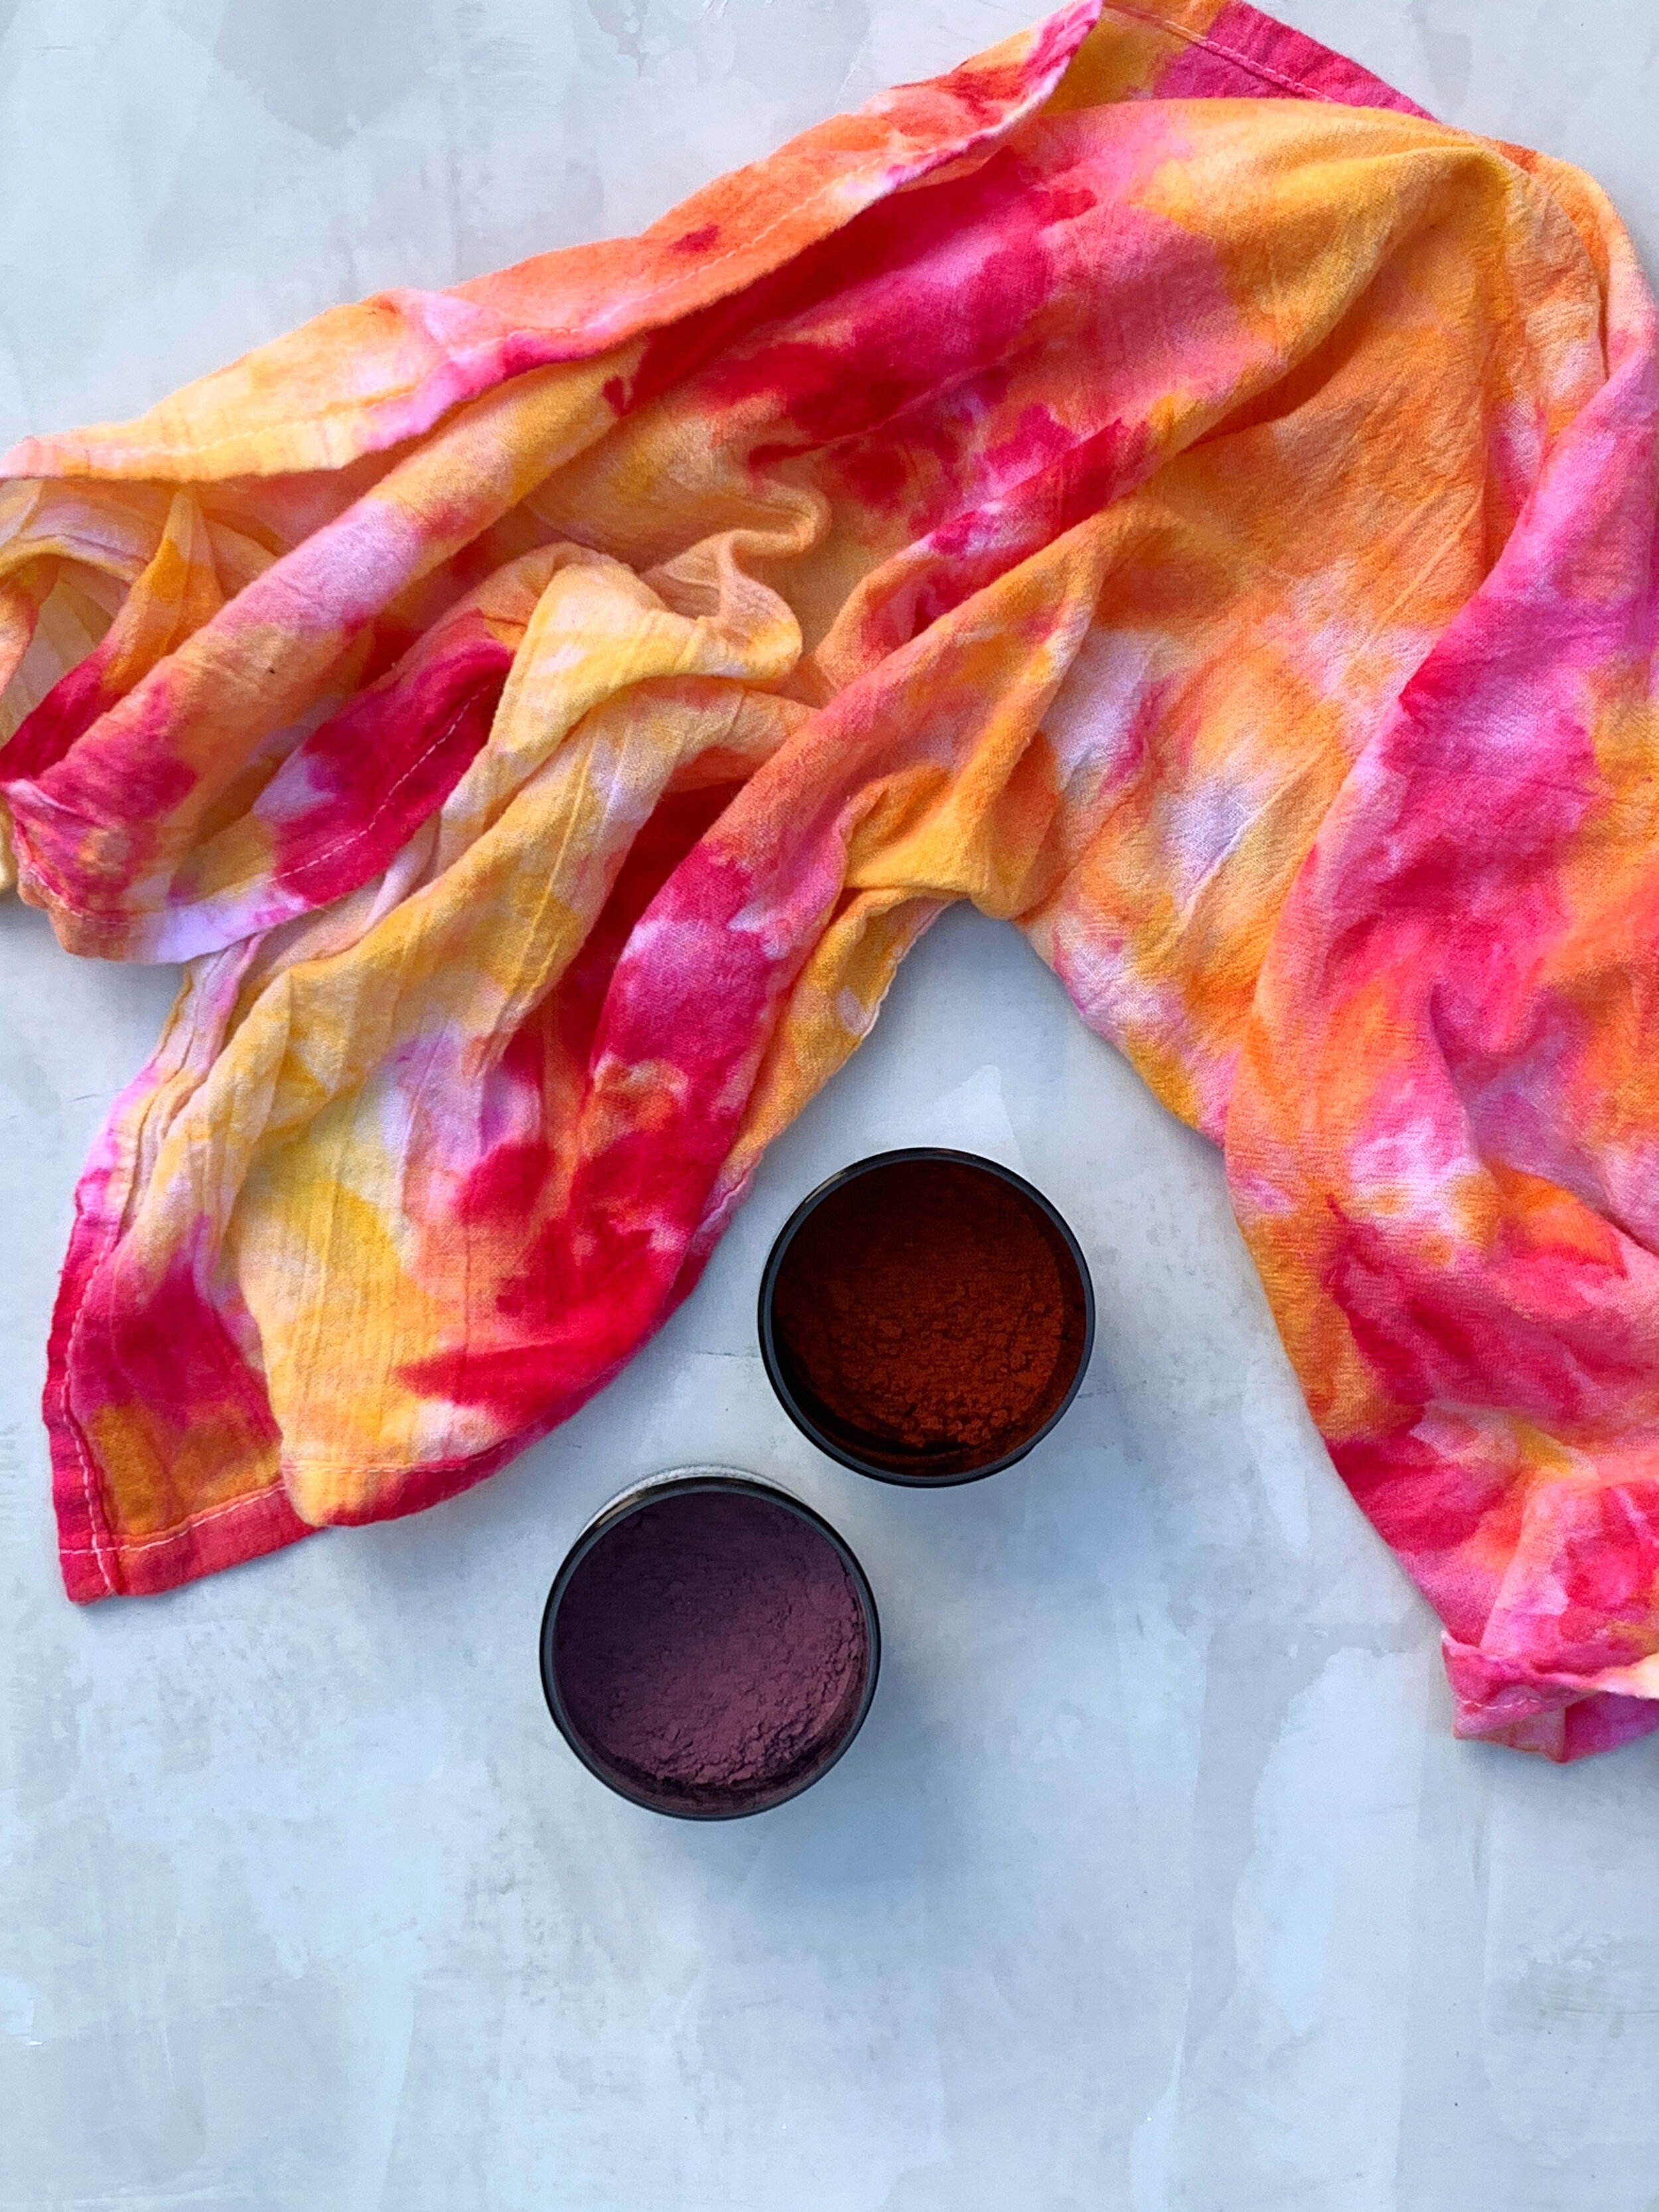
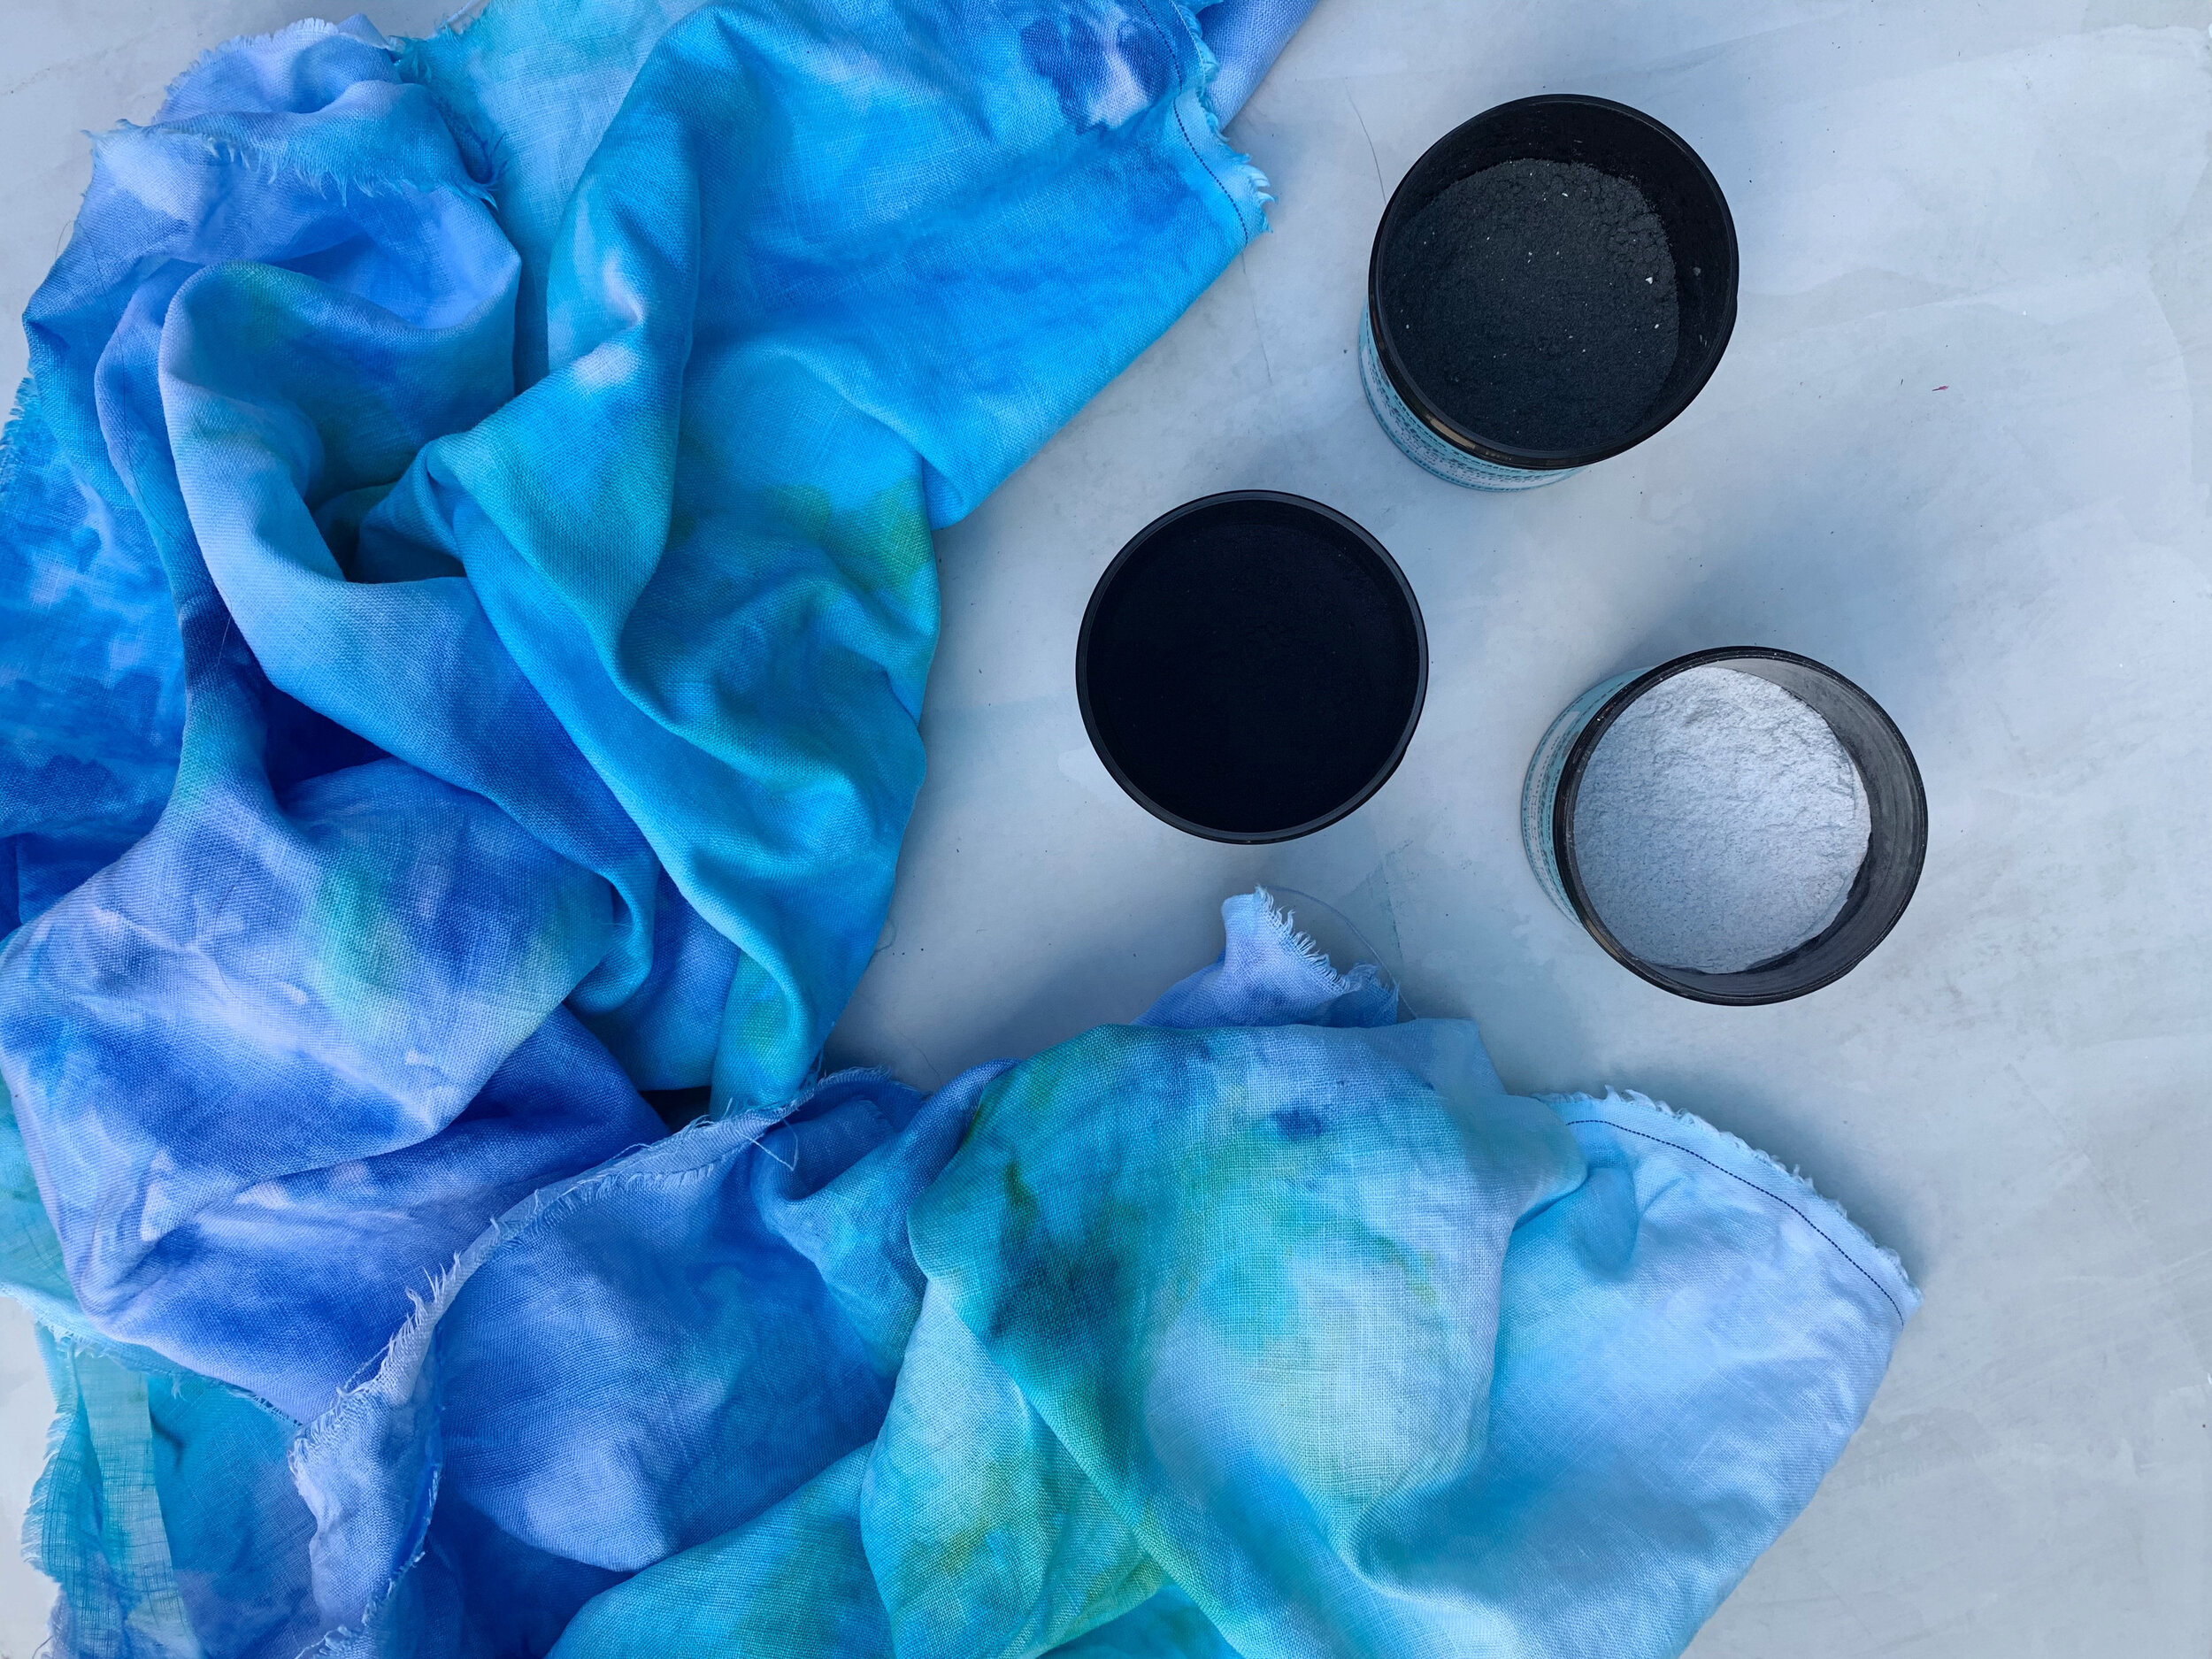
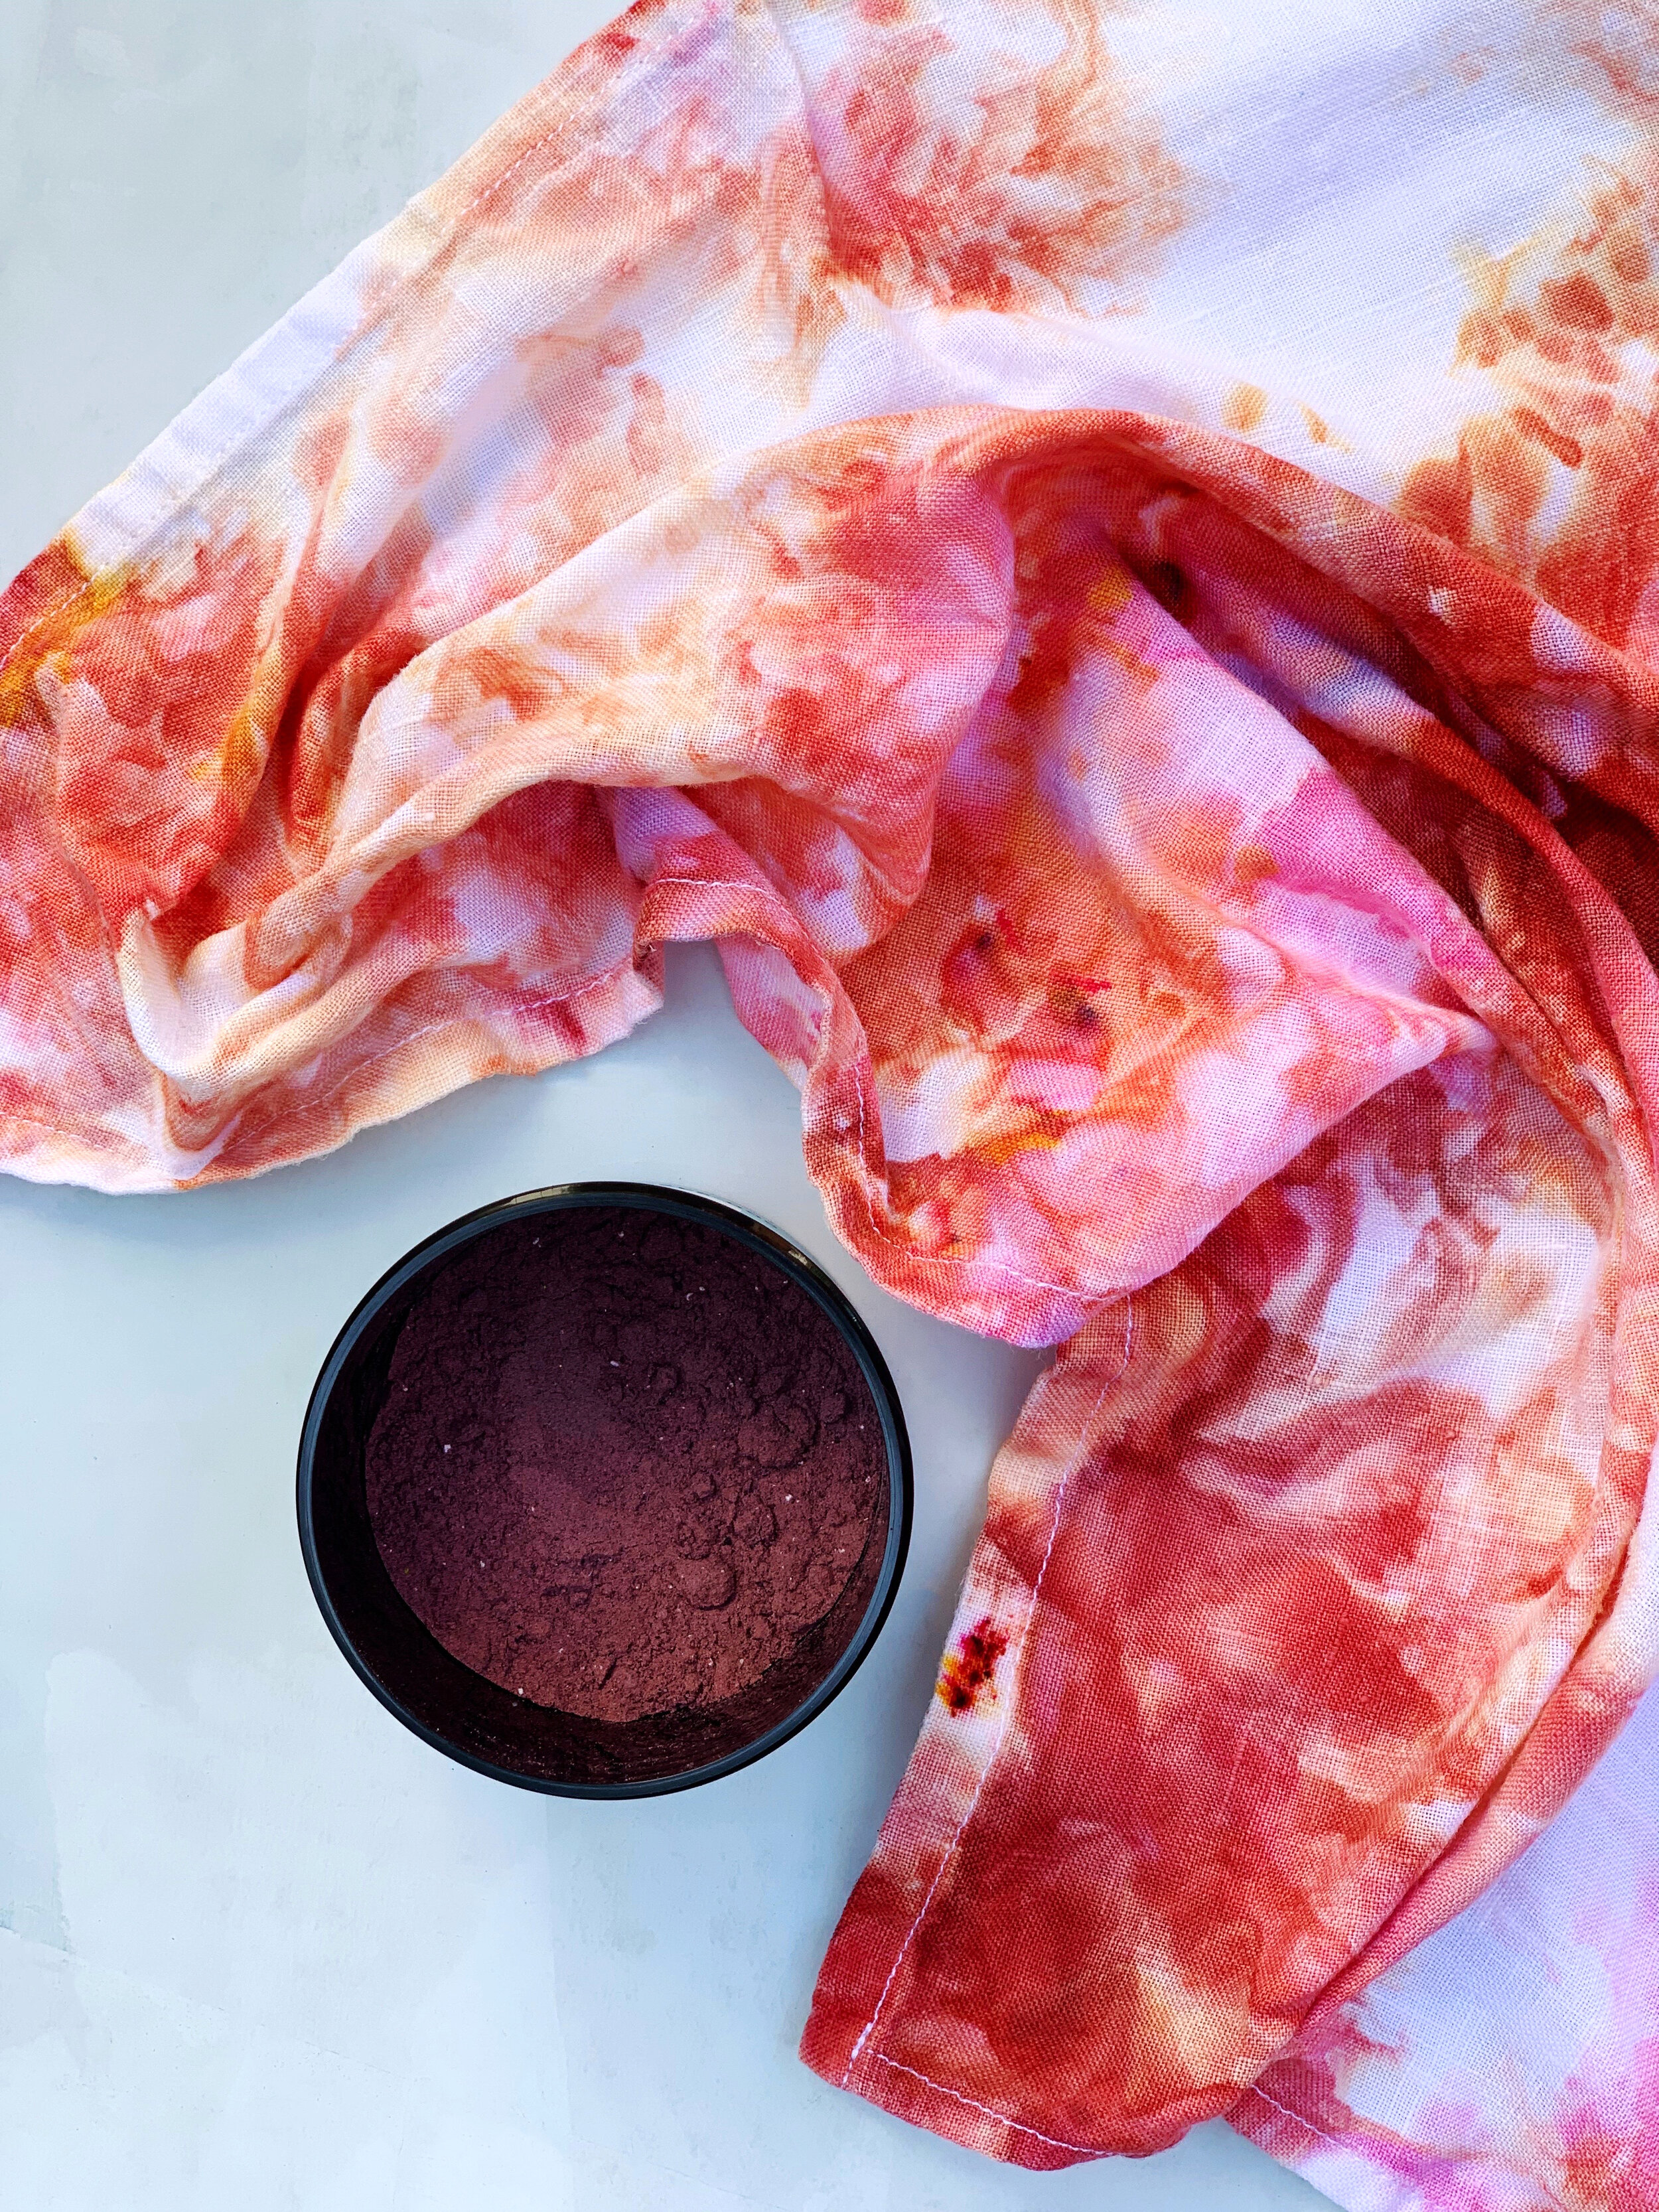
Fiber Reactive Procion Powdered Dye
Ice
Natural Fabric: Cotton, Linen or Silk work best
Saran Wrap or Lid
How to:
1. Prewash your items.
2. Mix Soda Ash in a bucket according to instructions. You can save and reuse the mixture for up to a week.
3. Presoak your fabric in the Soda Ash Fixer for at least 30 minutes, if you are using silk limit time to 15.
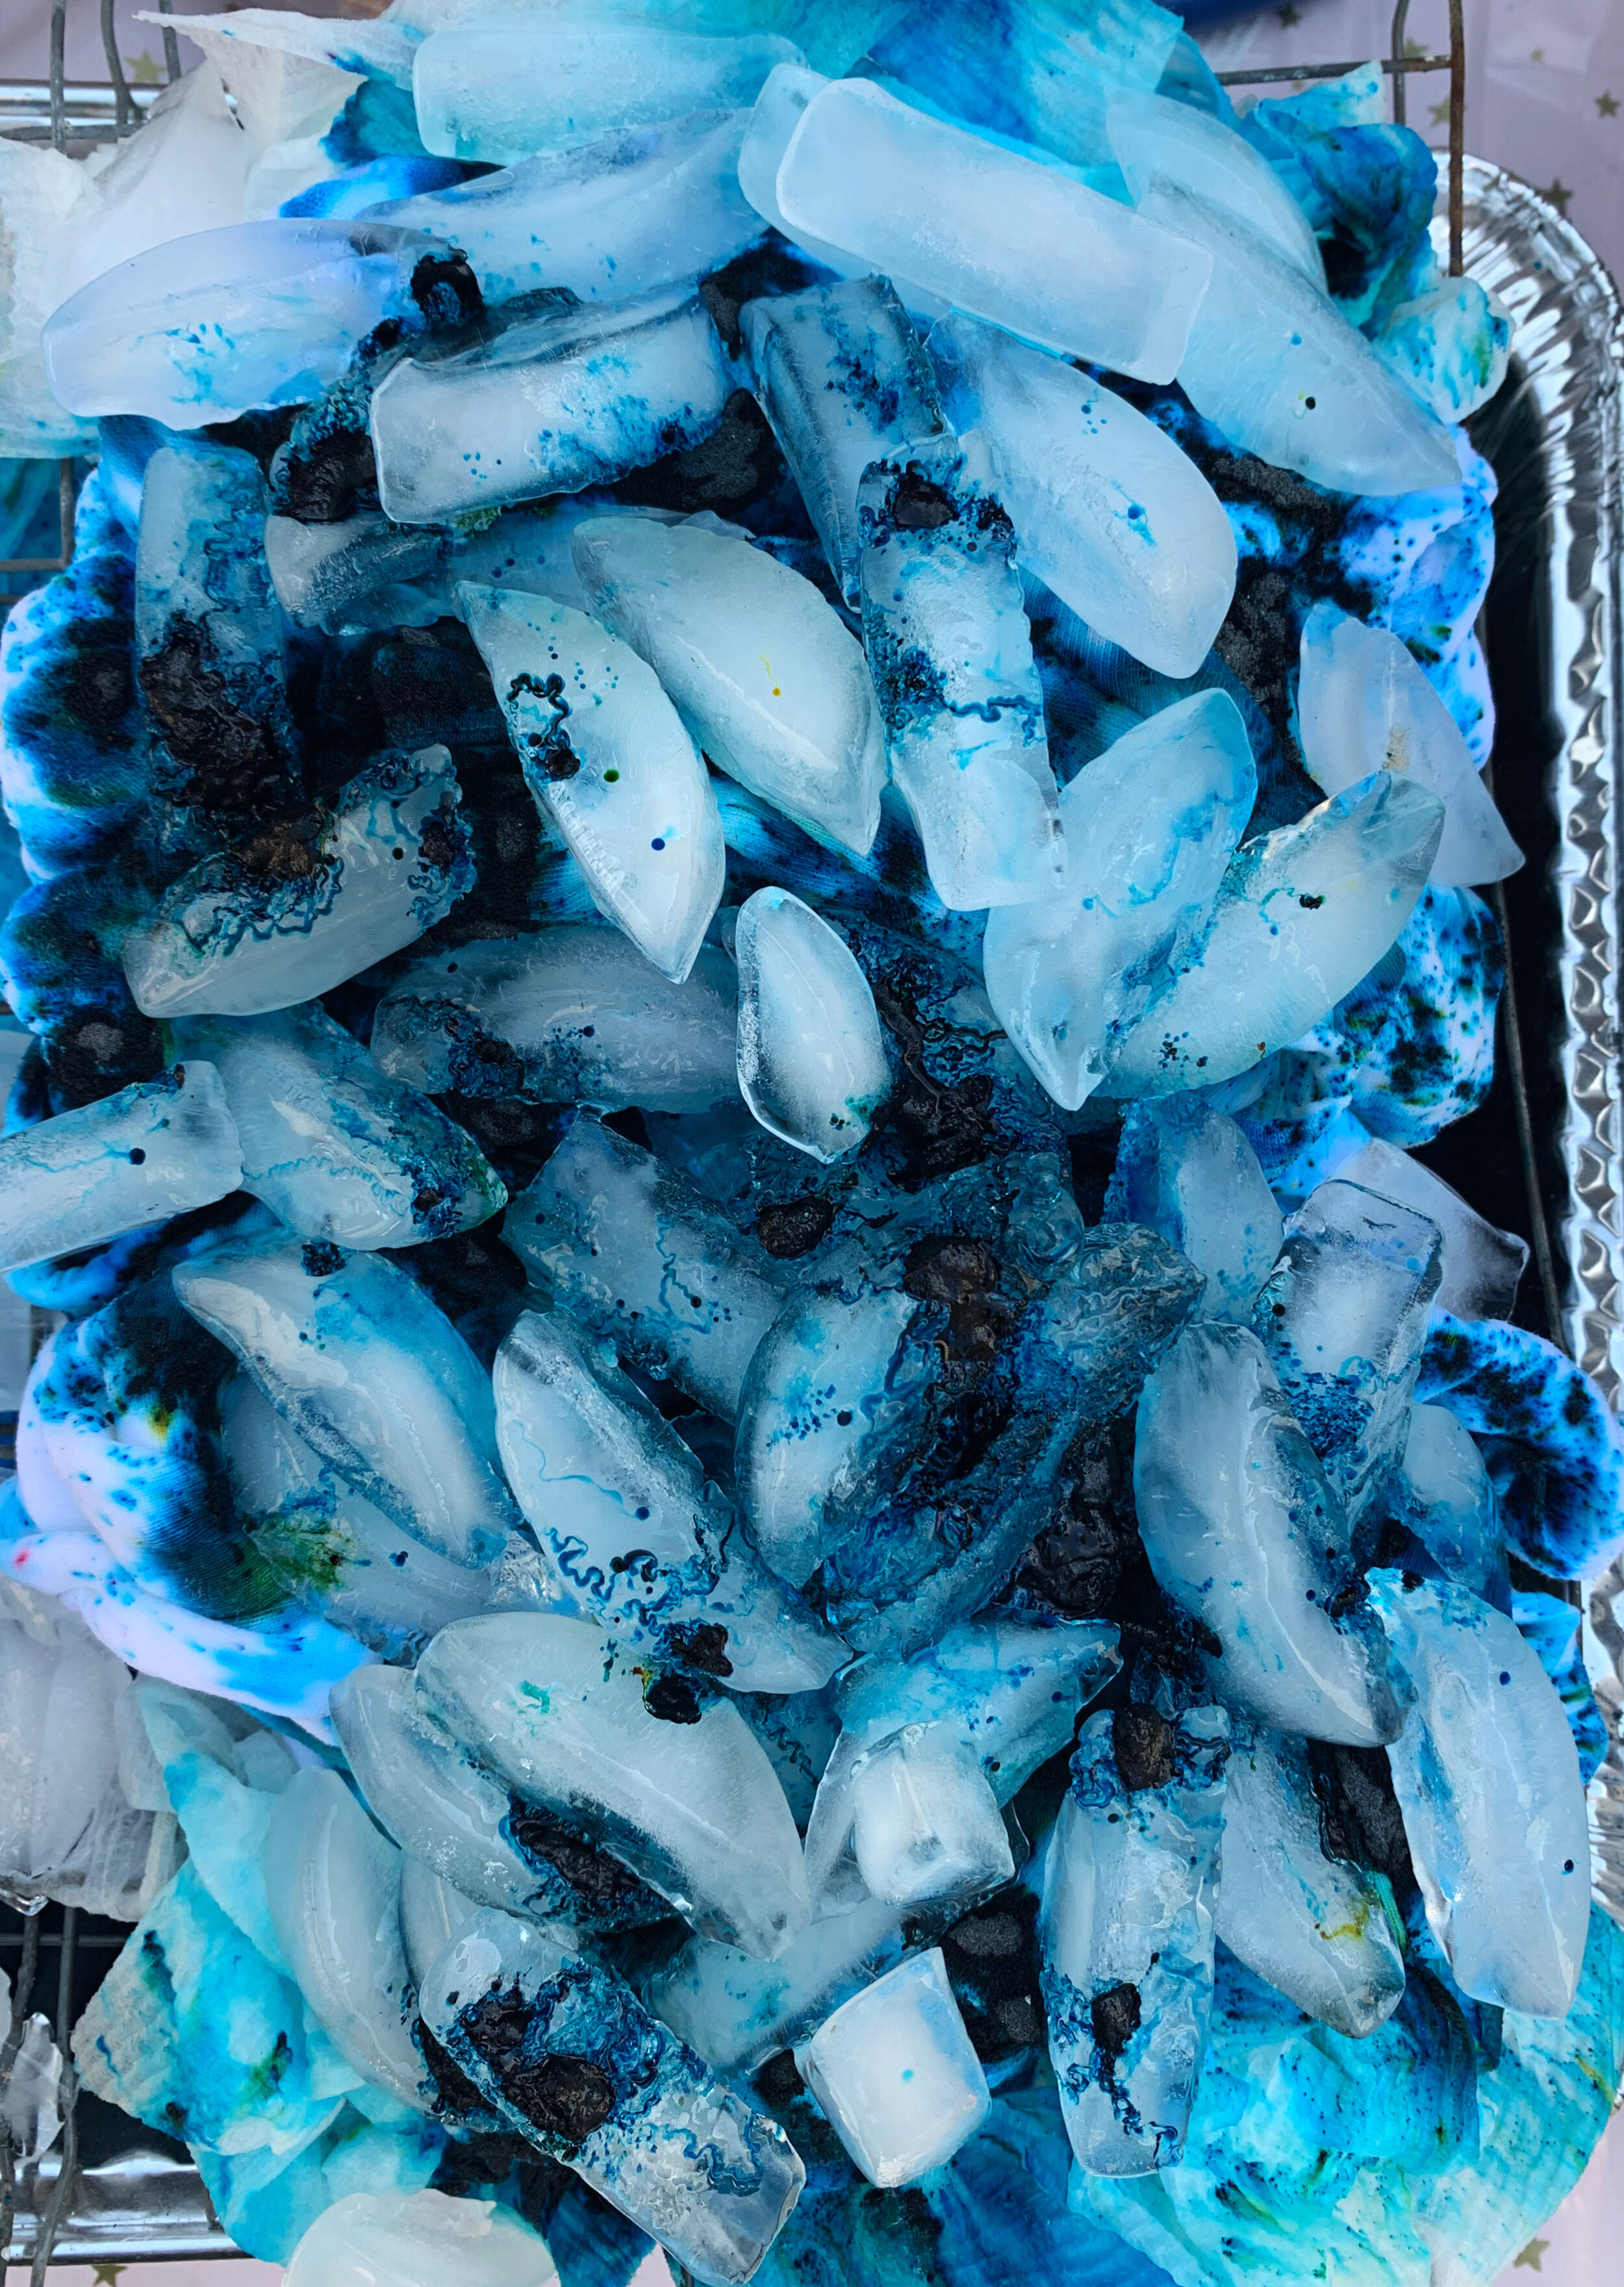
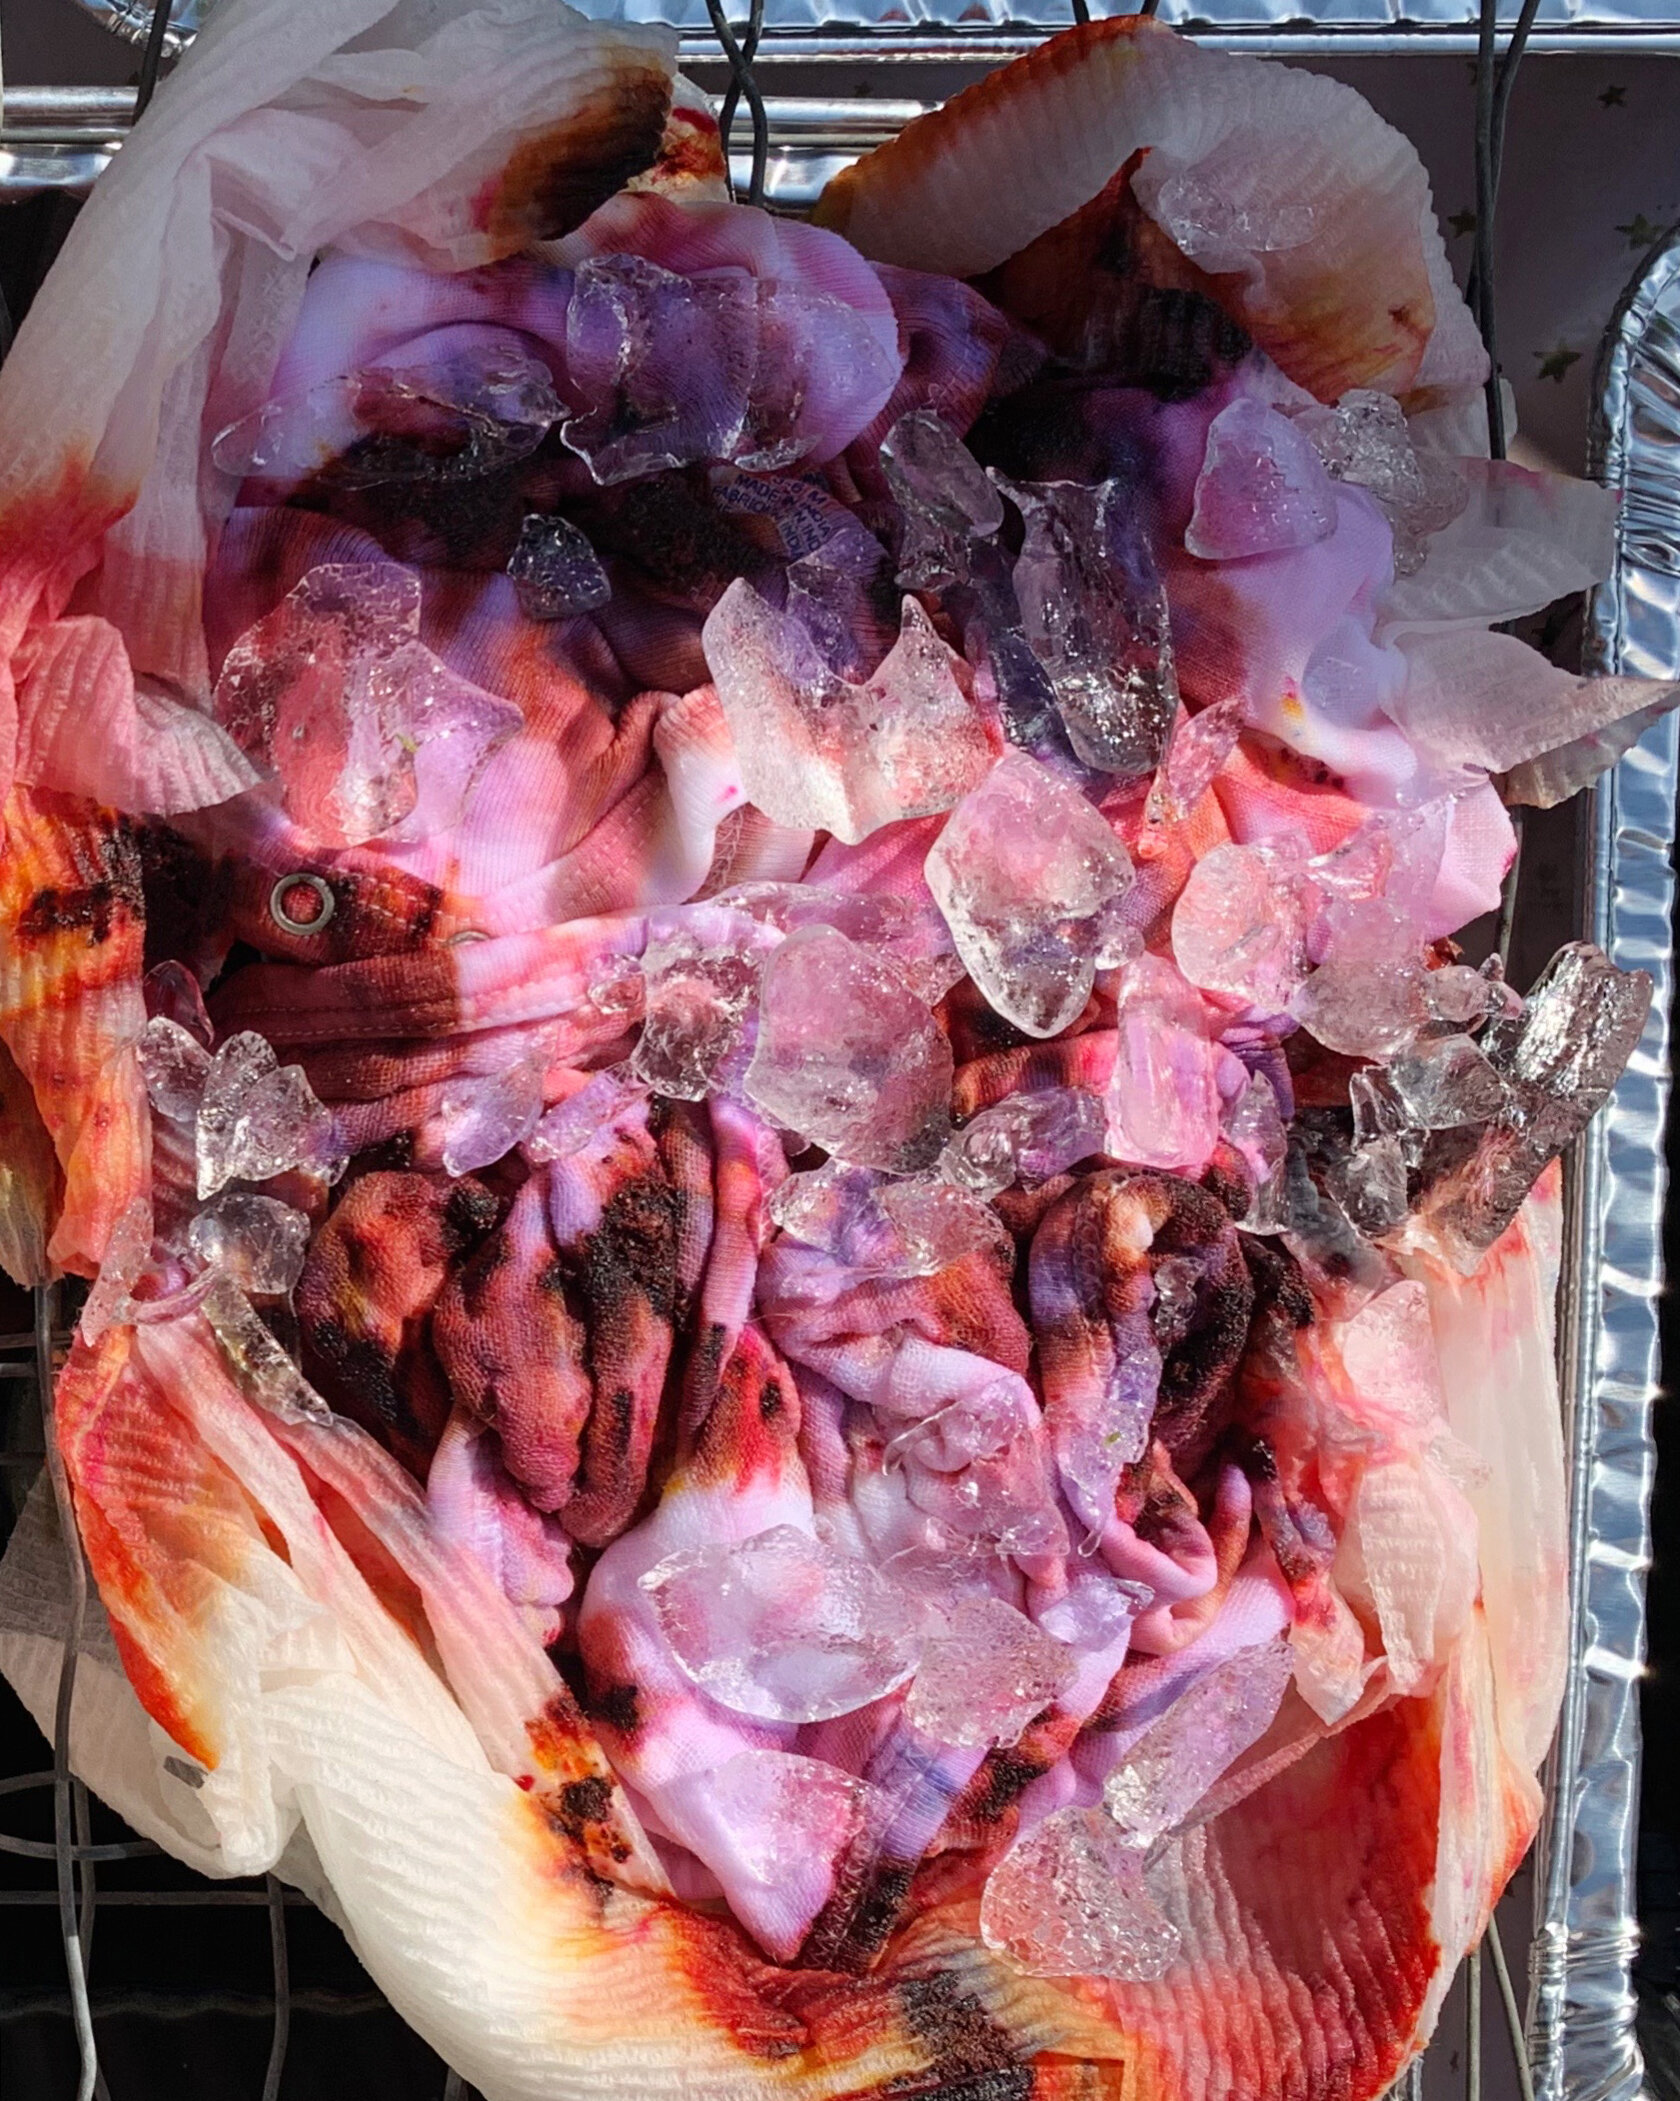
4. Set up your rack over a tray, bucket or stainless steel sink. You want the fabric to be elevated enough that it won’t sit in the liquid dye after the ice melts and runs through.
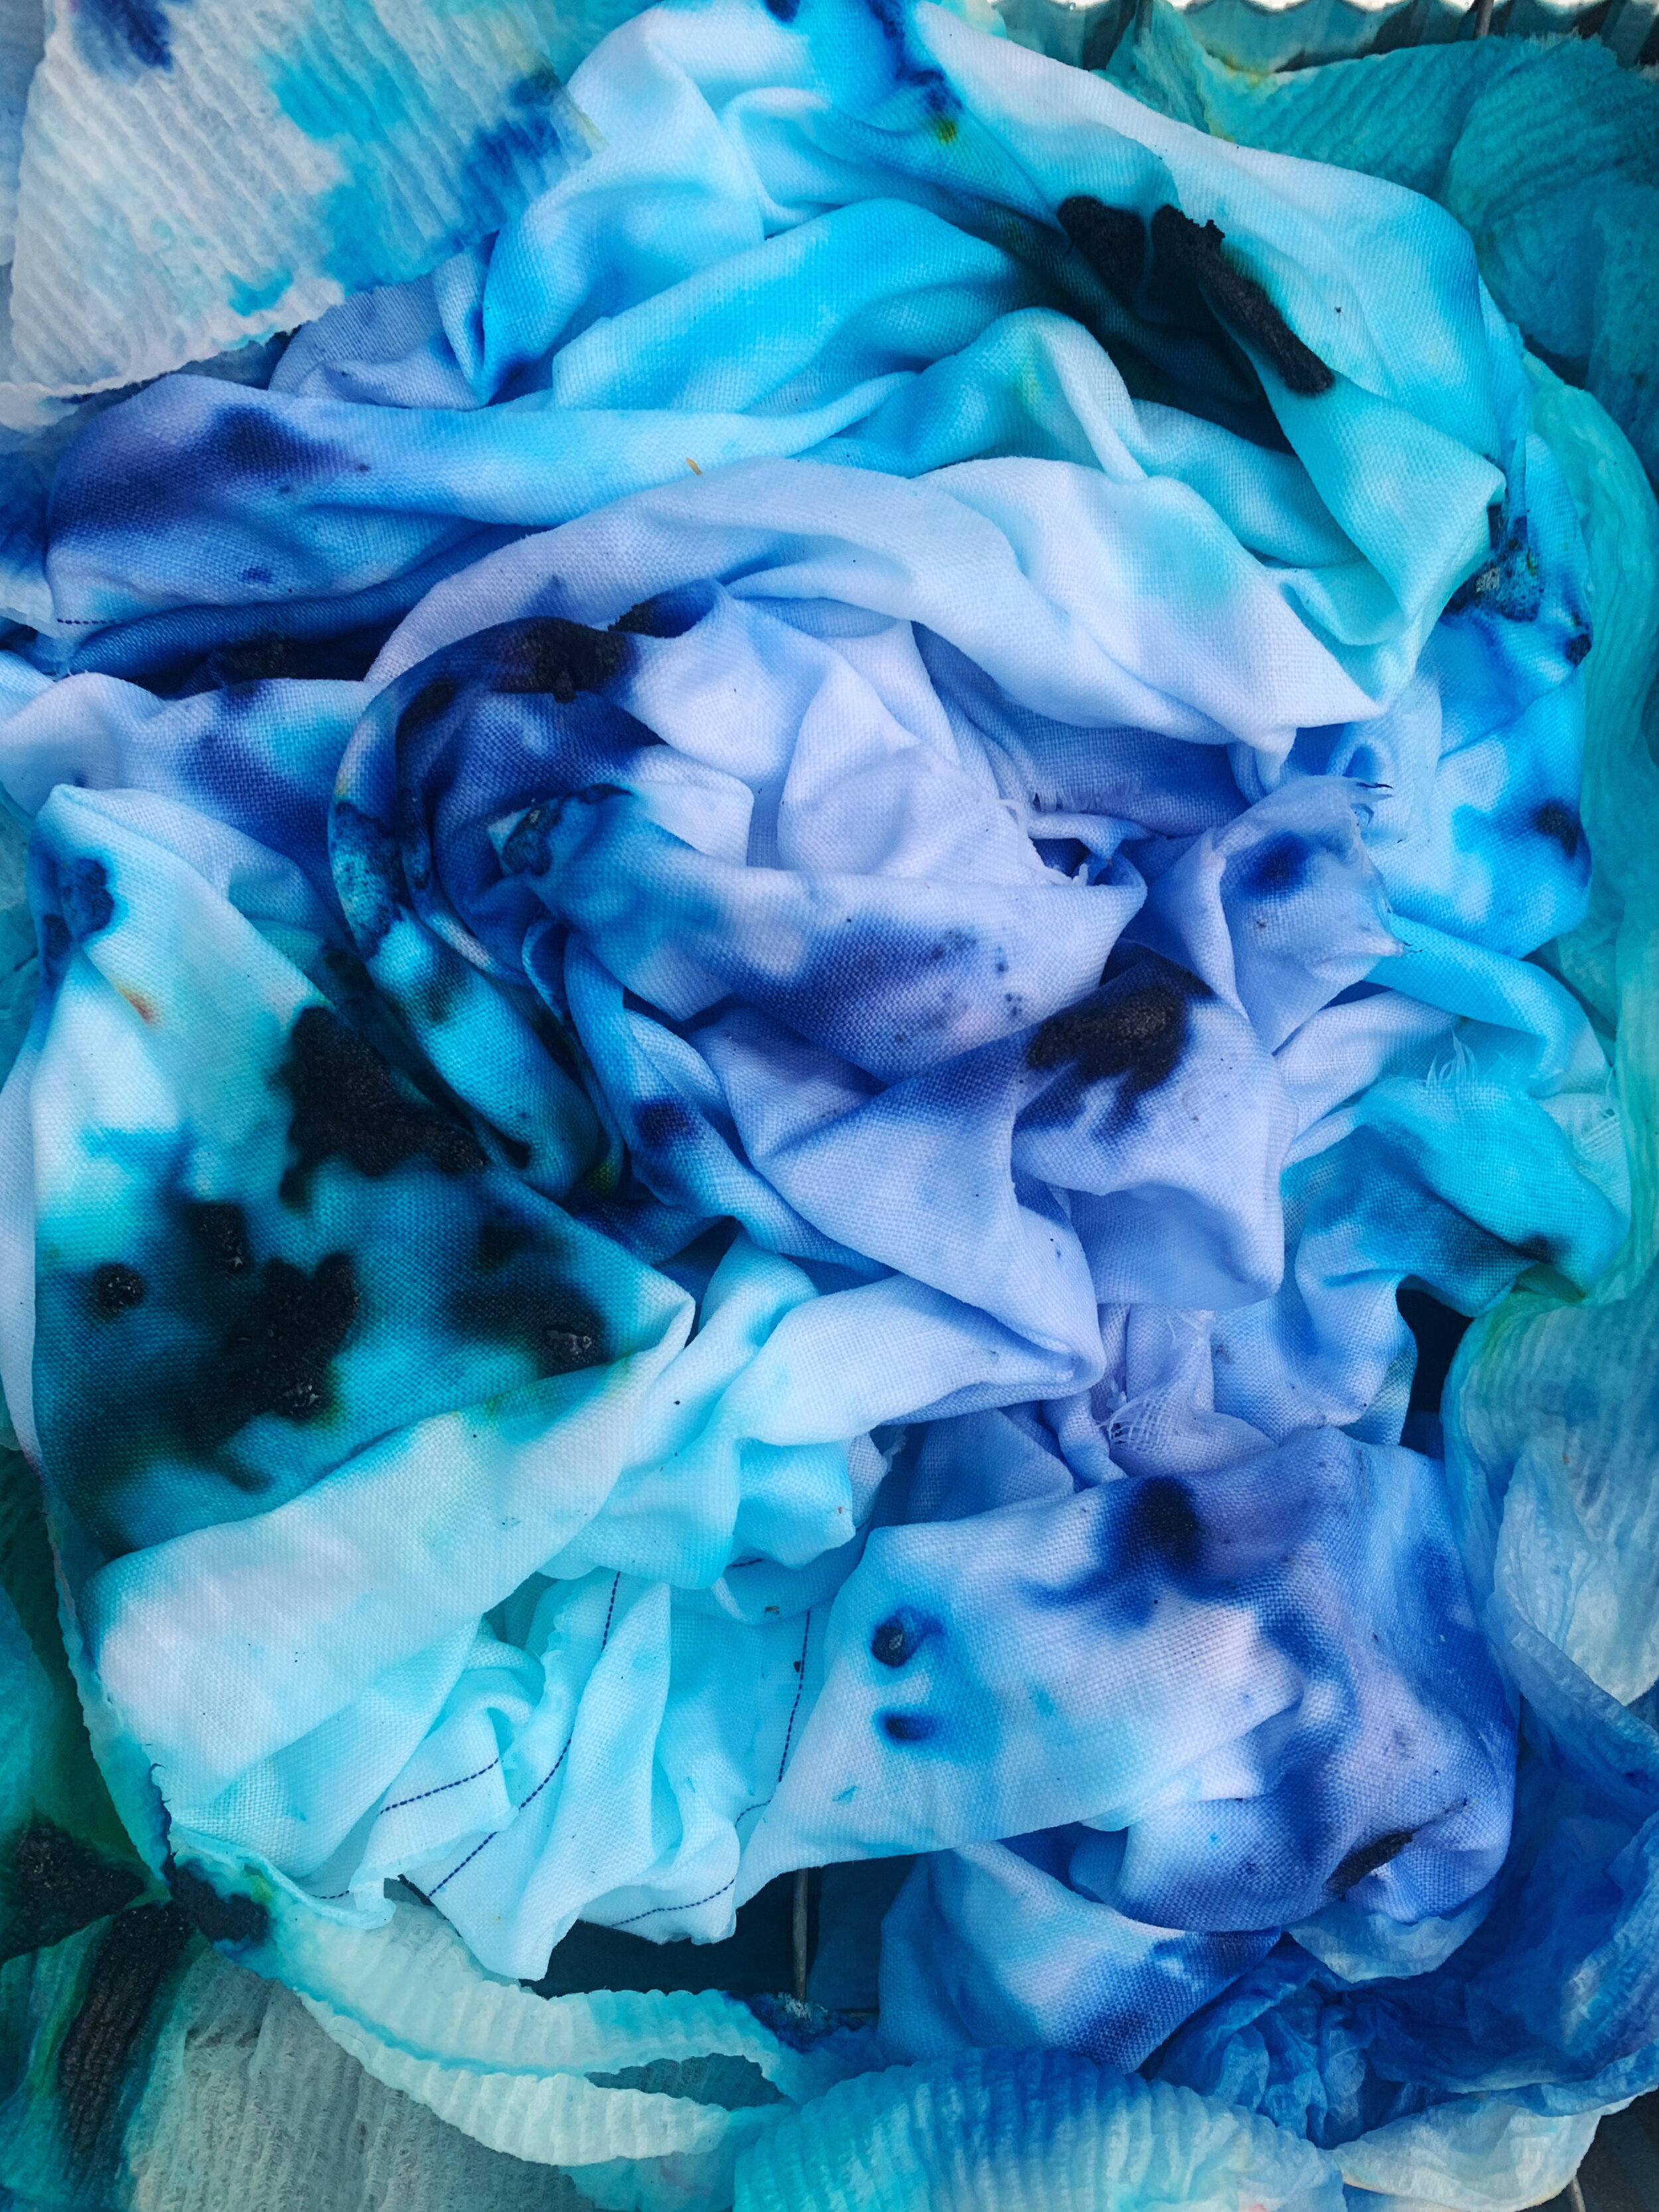
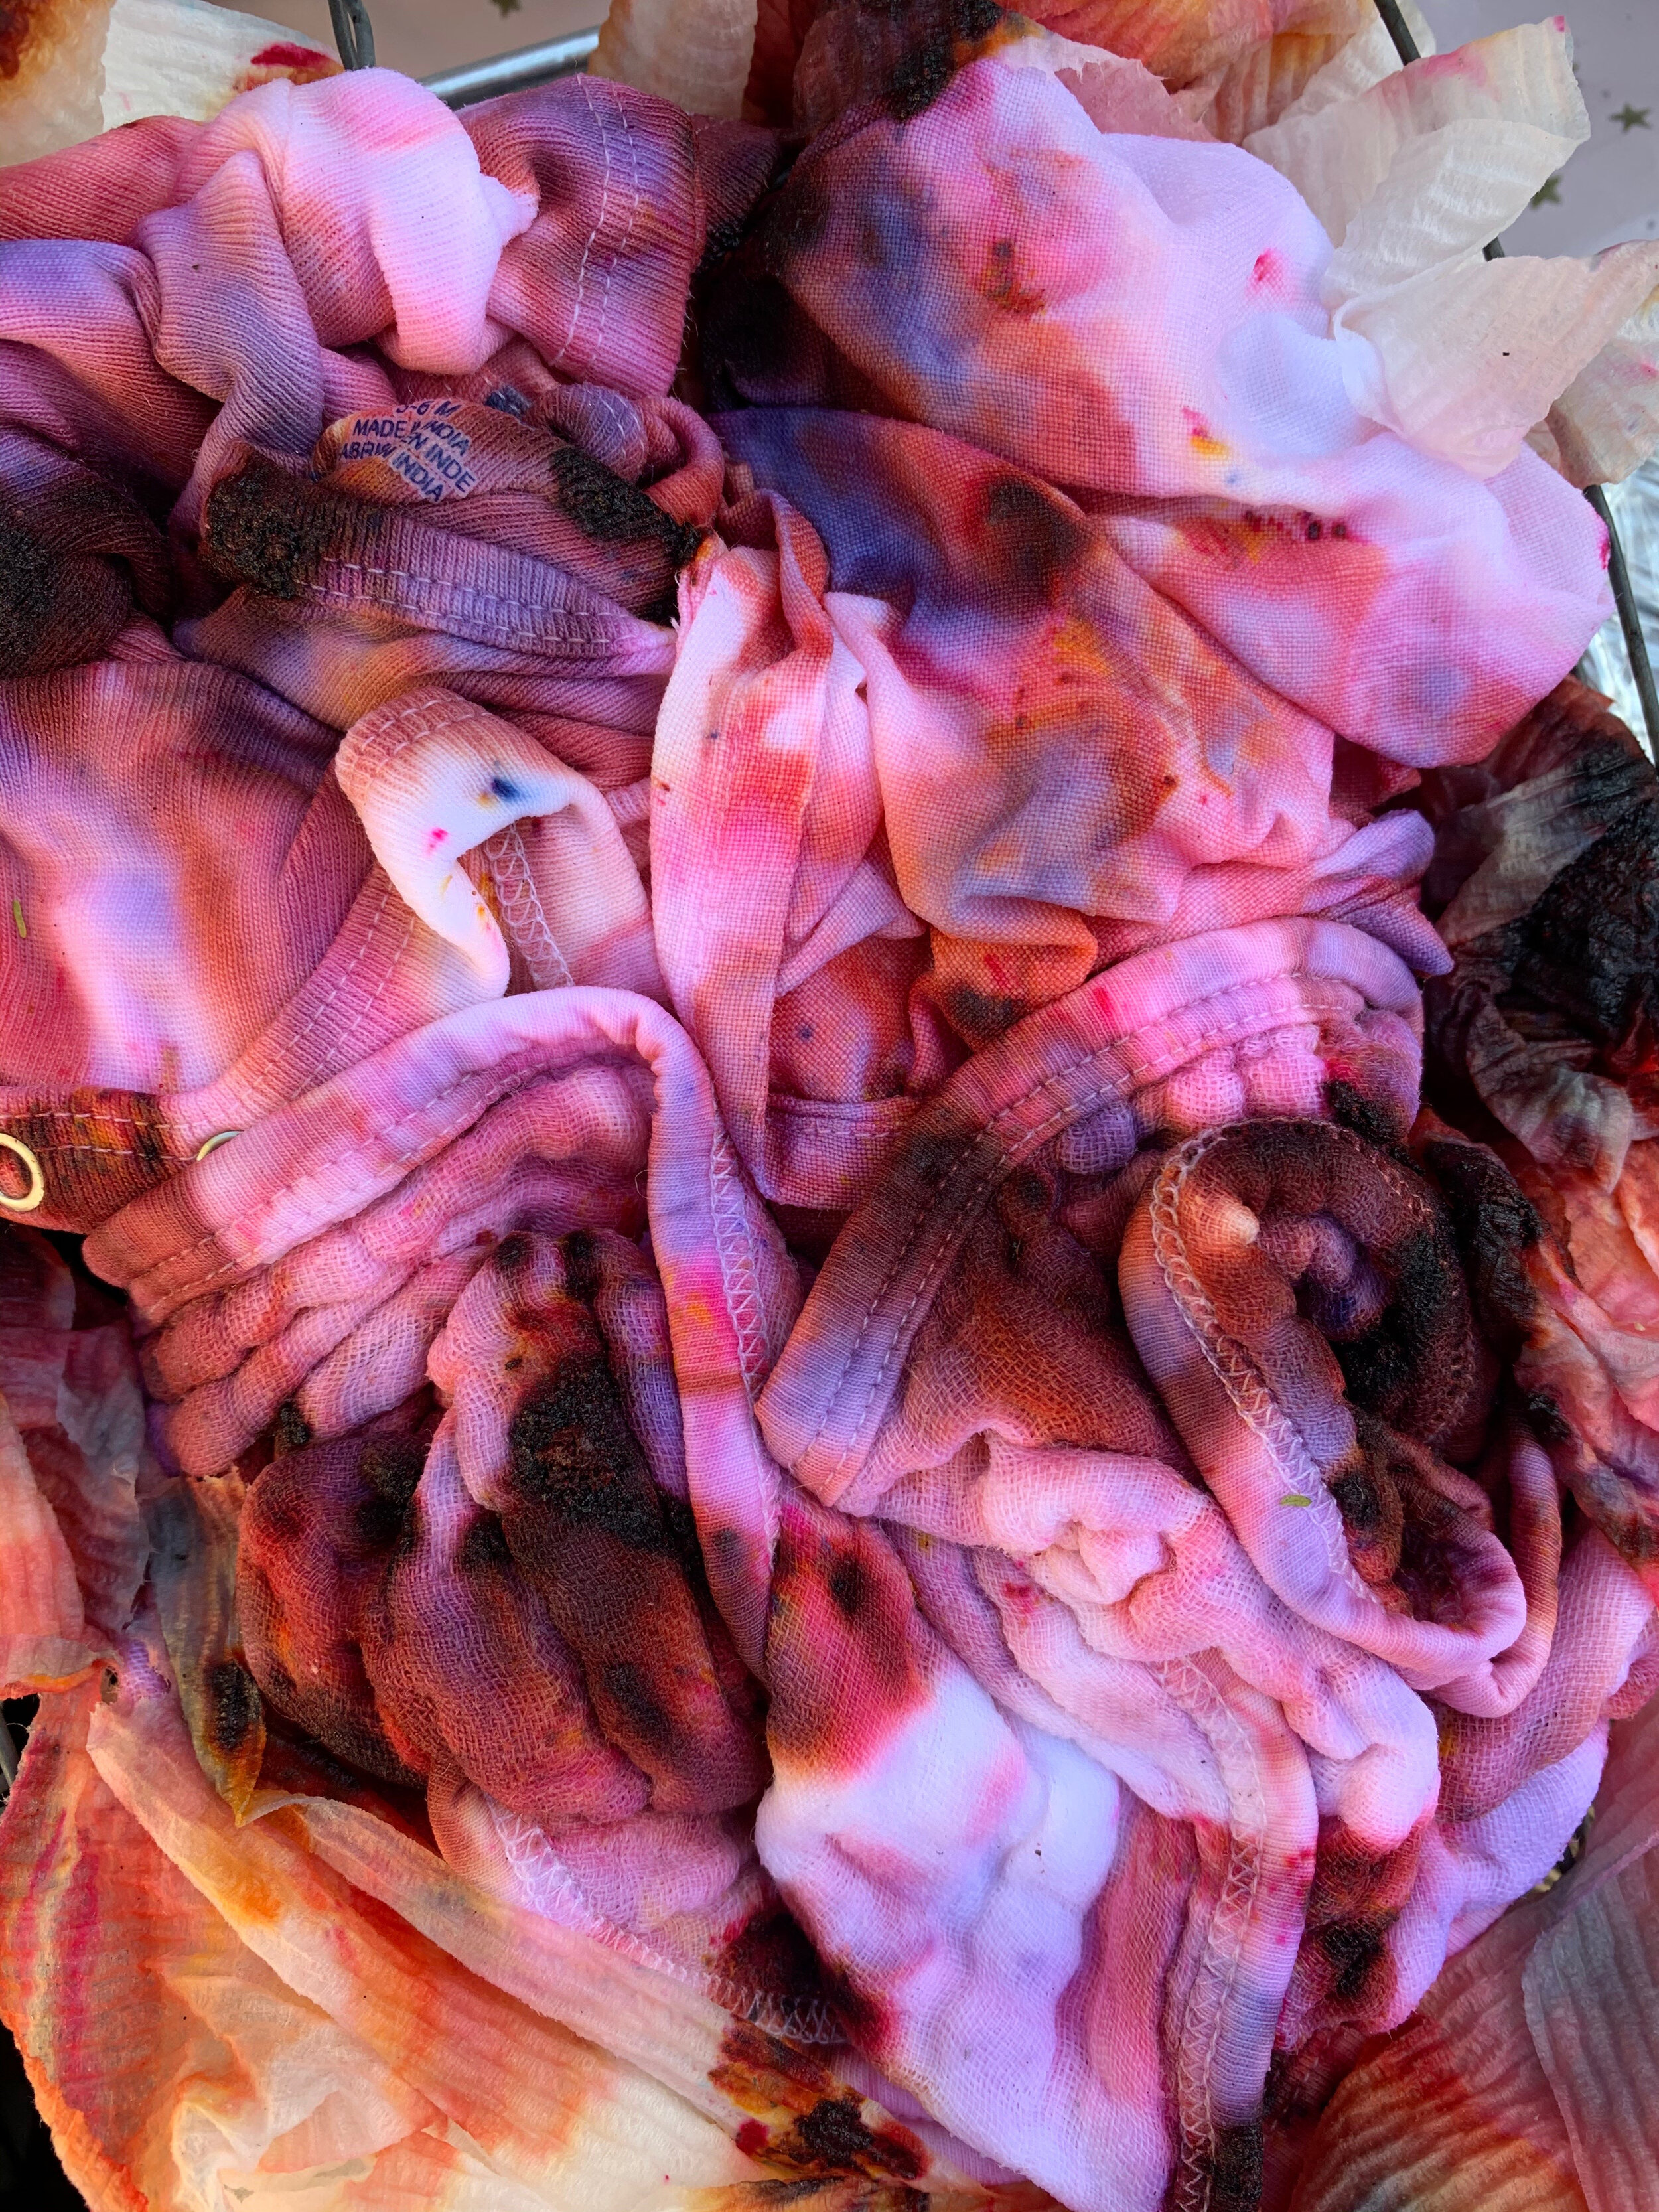
5. Wring out your fabric and arrange on the rack. You can twist, bunch, fold or even tie to achieve different patterns by I simply scrunched it in most of the examples and let the ice do the heavy lifting here.

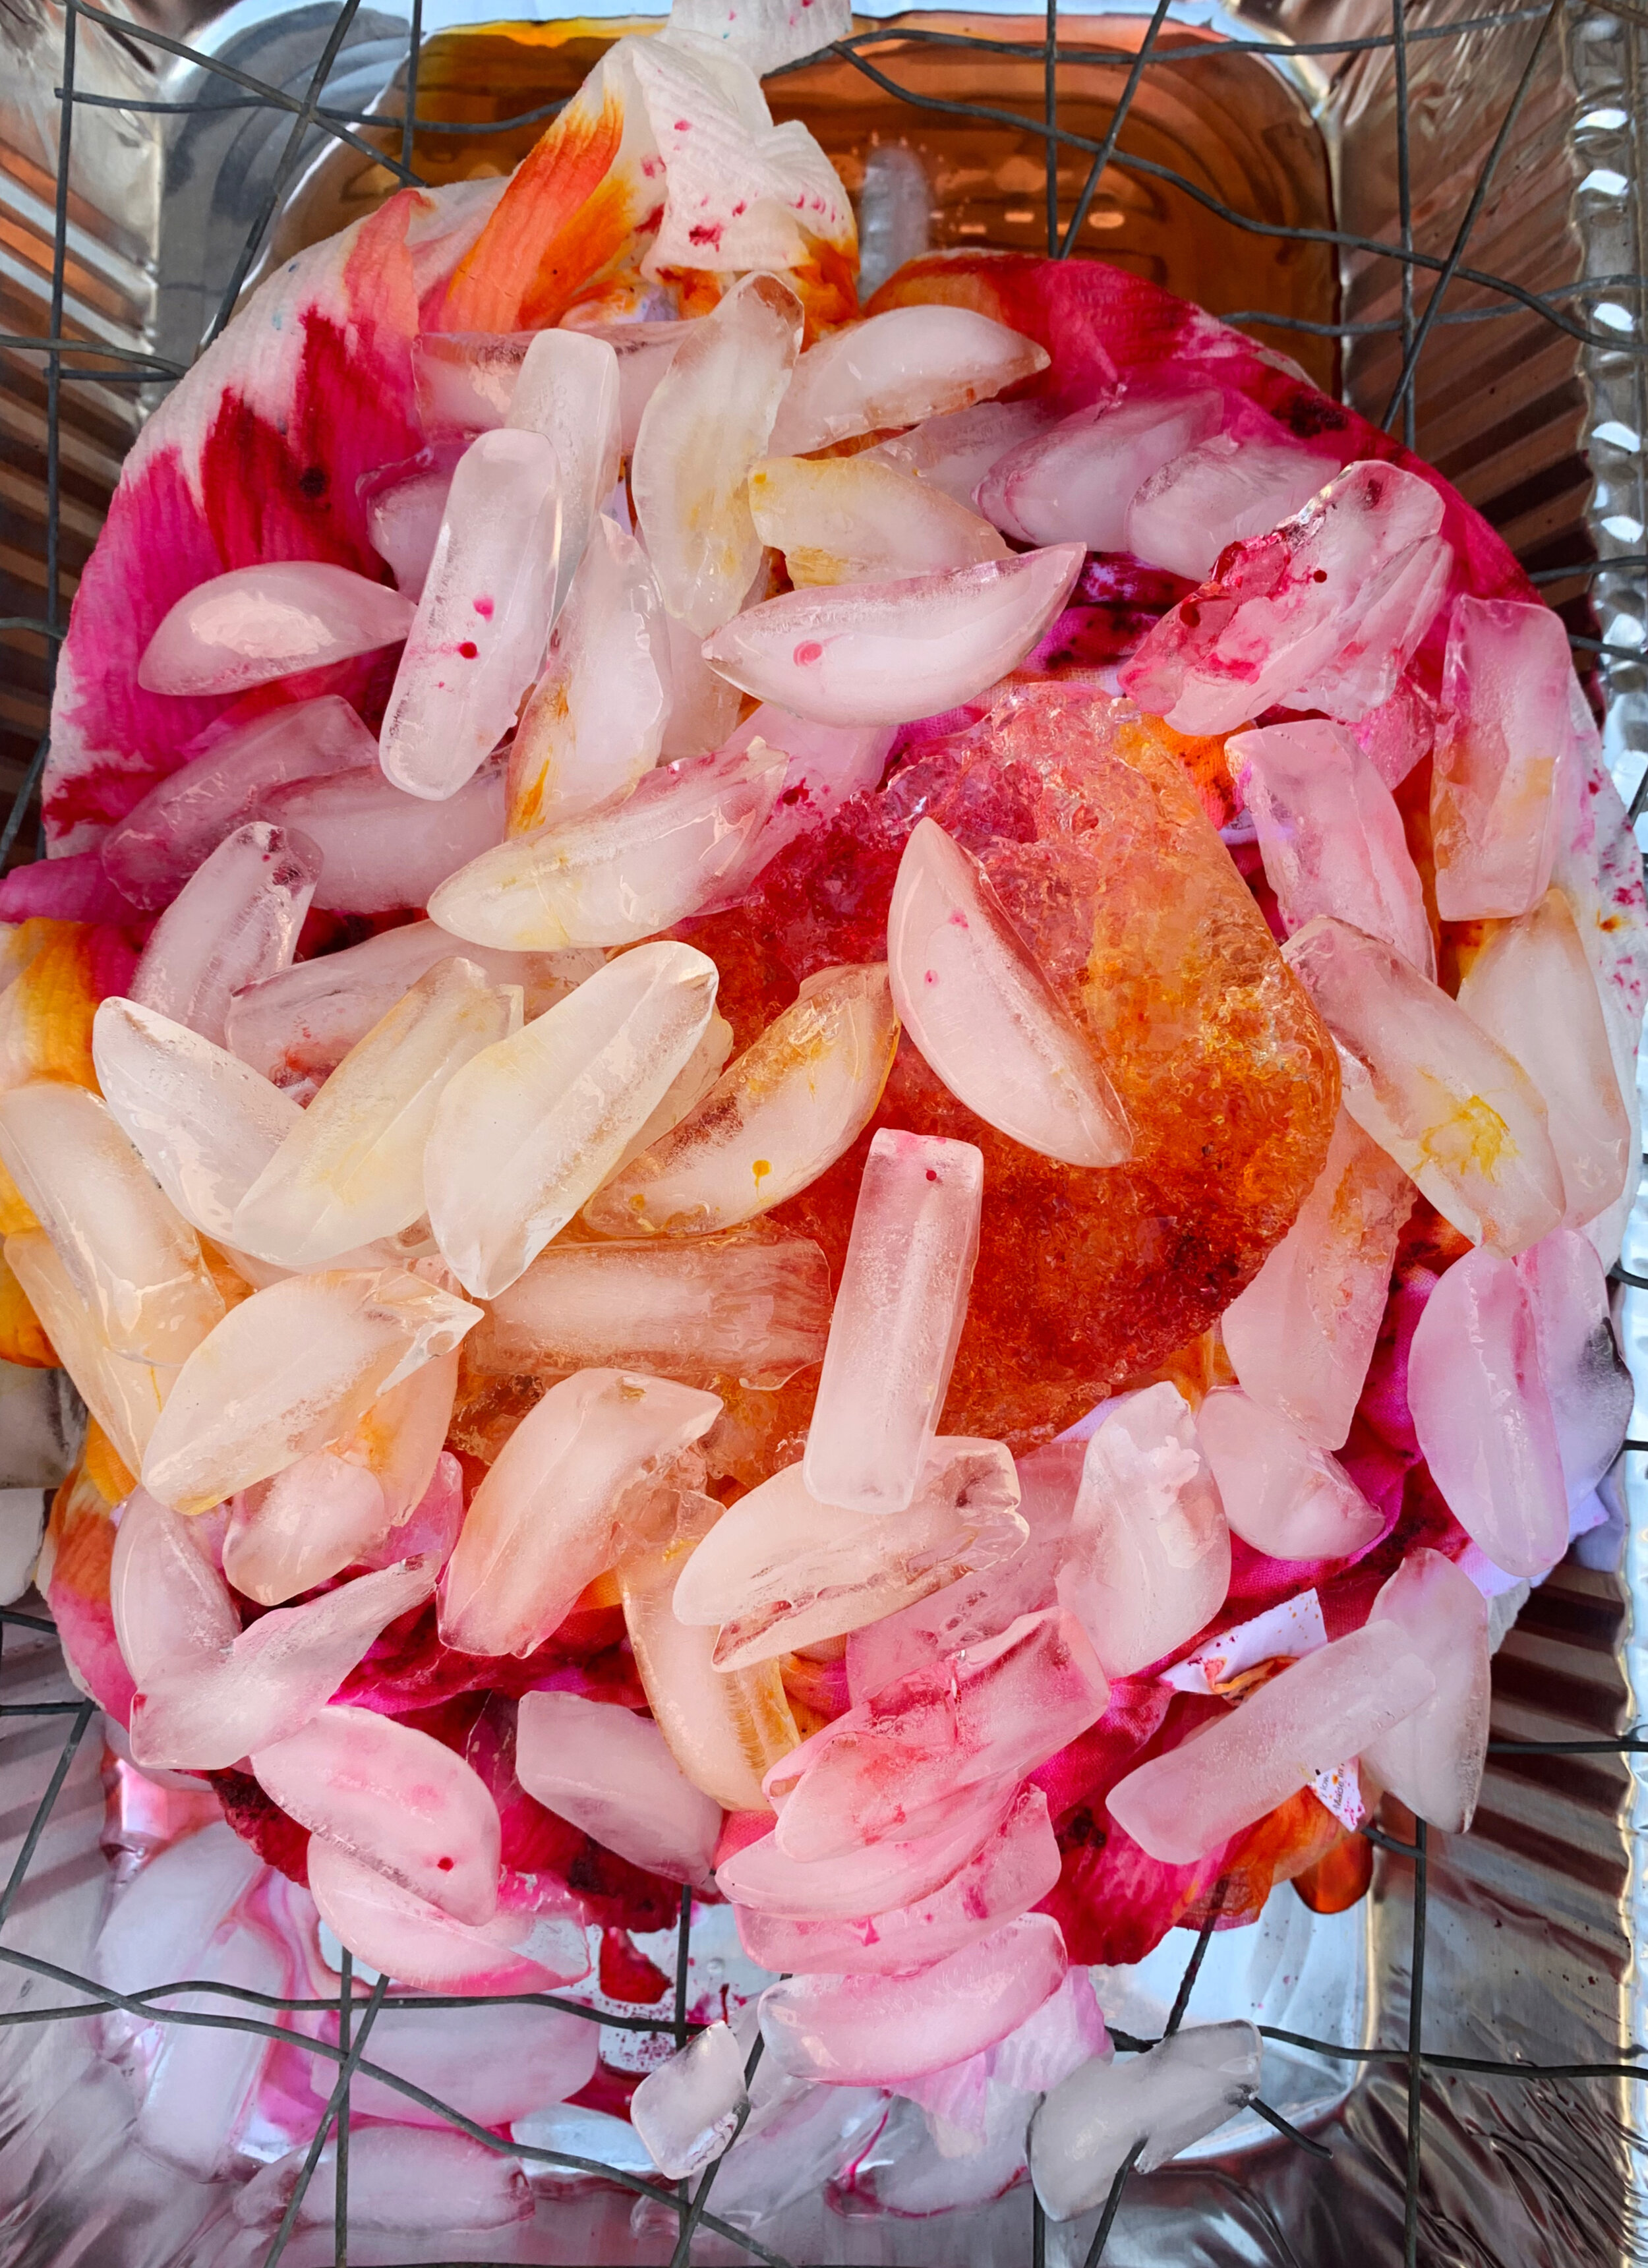
6. Cover the fabric completely with ice. If it’s escaping on the sides or dyeing multiple pieces on one rack, we used tinfoil to create a border to keep things in place.
7. Using a disposable spoon lightly sprinkle a small amount of the dye over the ice. Make sure you’re working in the shade if you’re outdoors so it won’t melt too quickly.
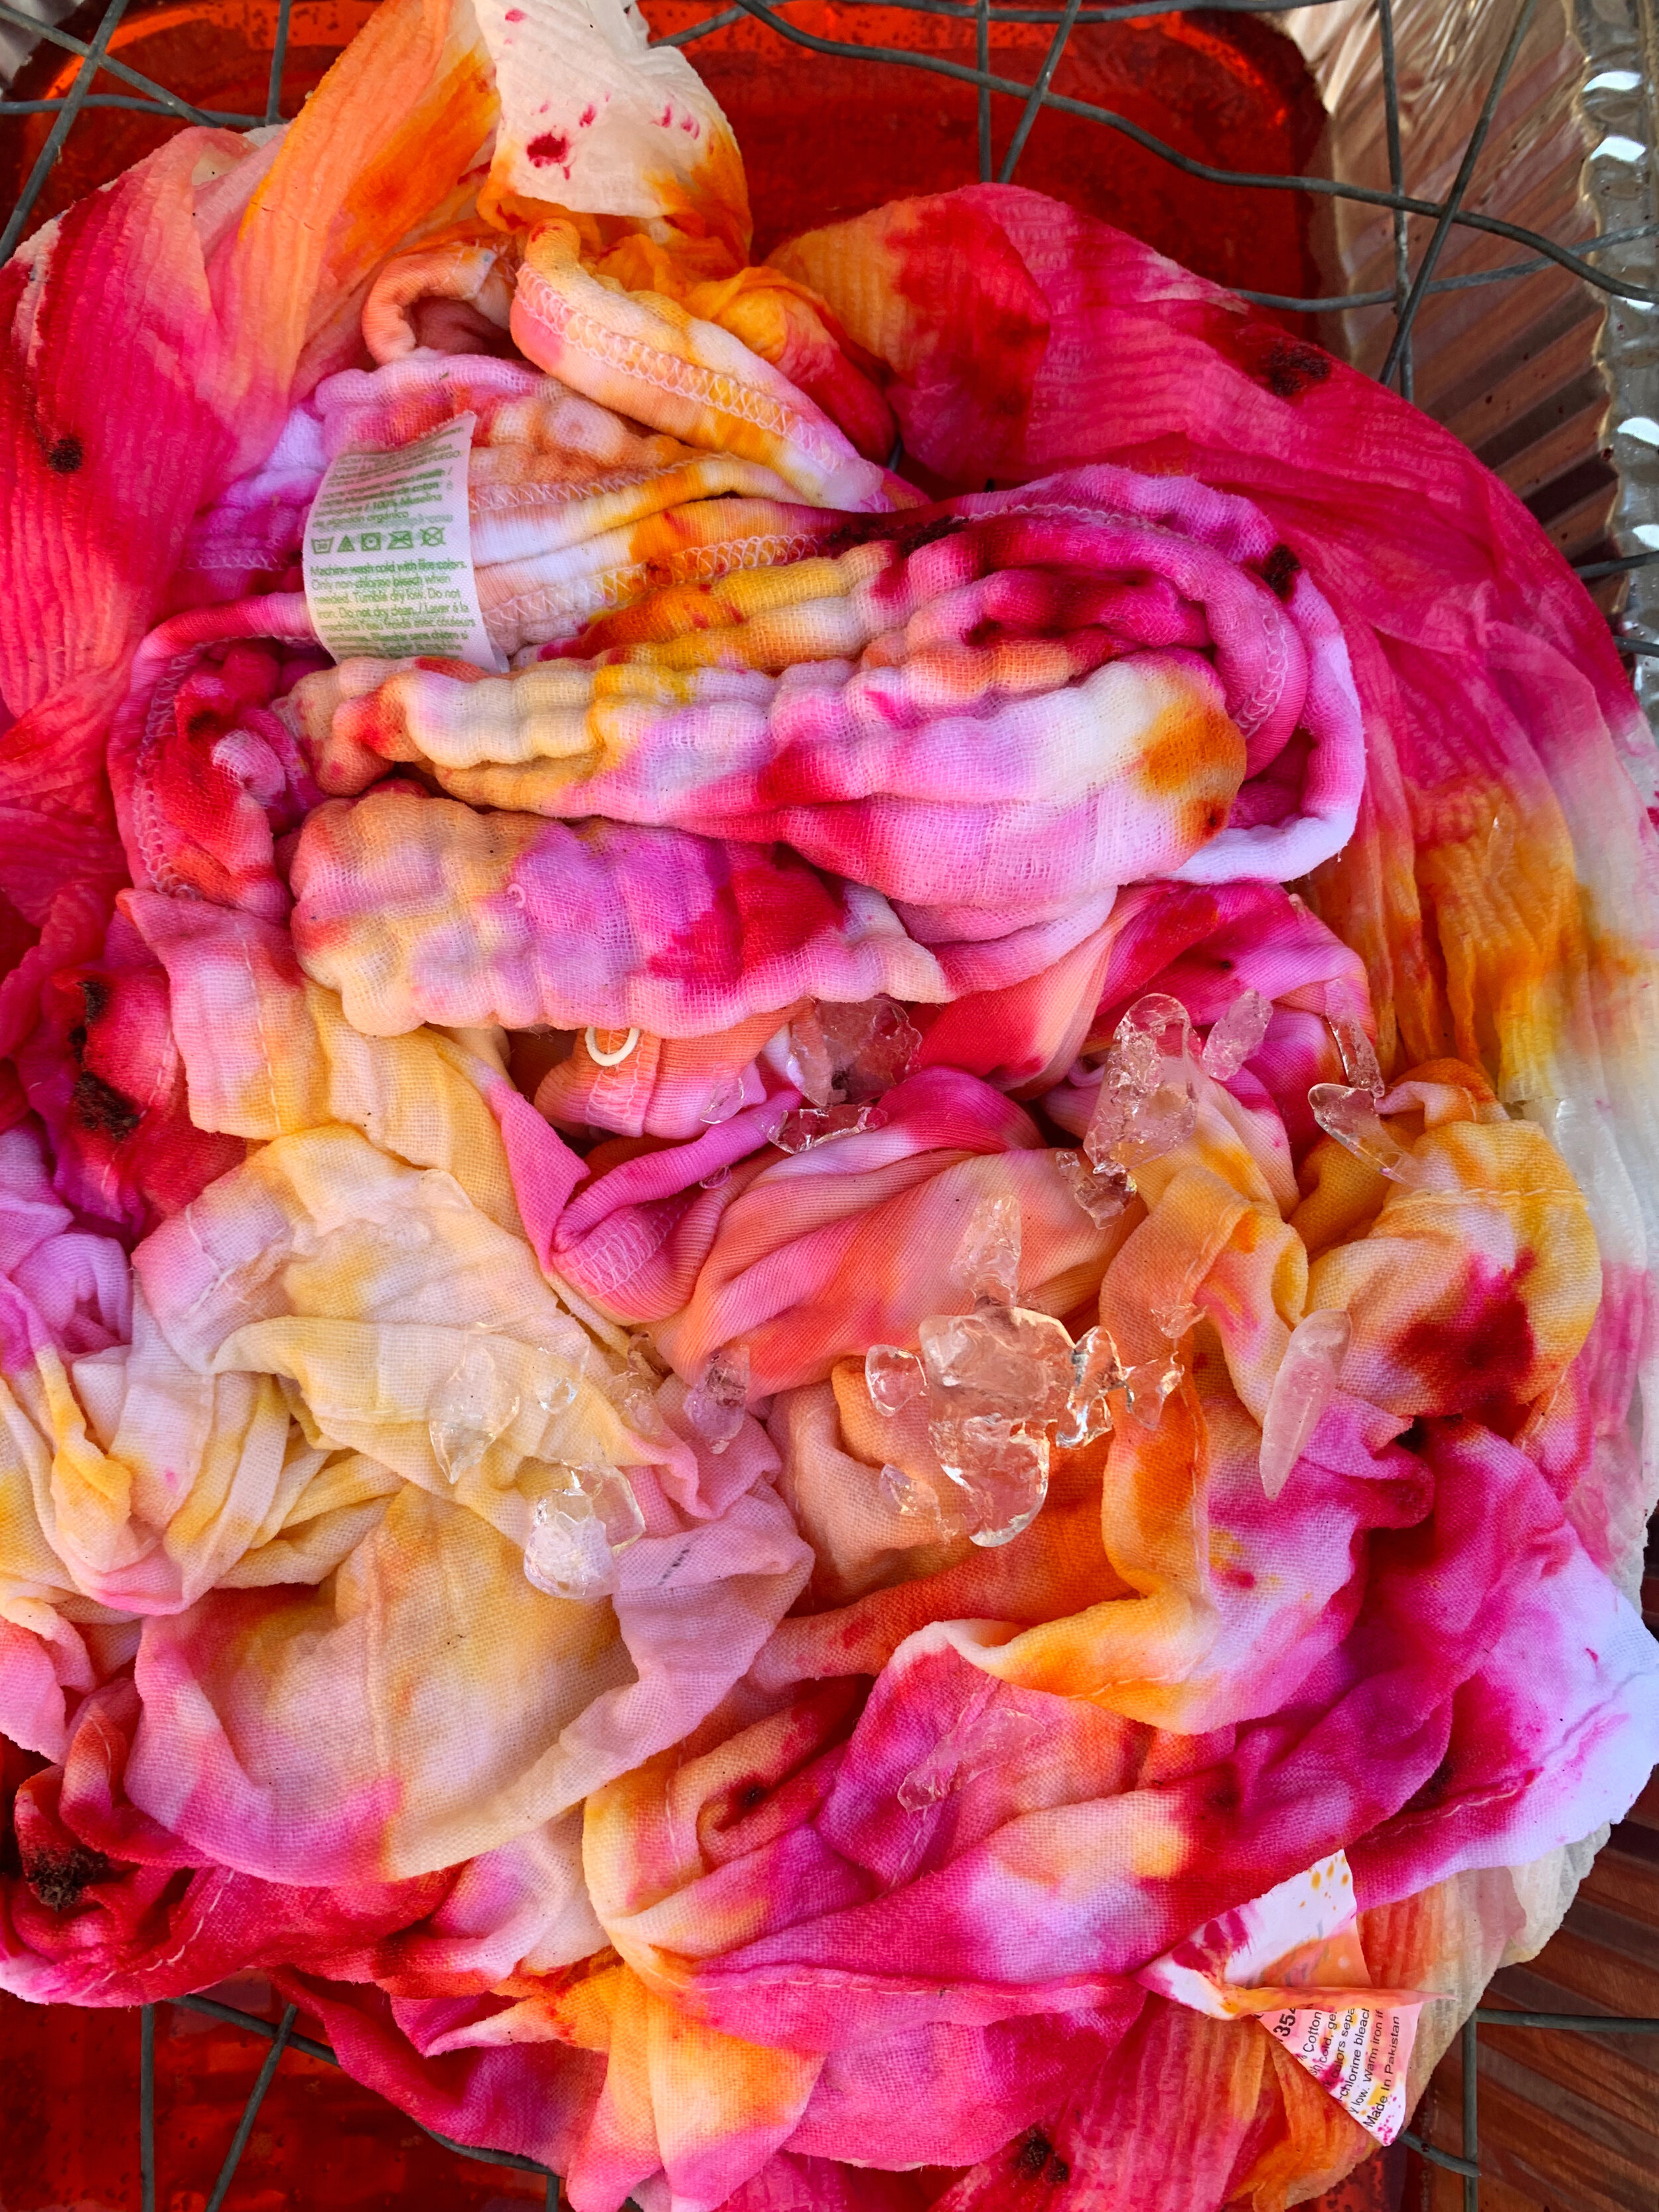
8. Sit back, relax, and let the ice do its thing! You can rinse it out once the ice is melted, but we tested both methods and saw more color shifts and vibrant results when waiting 24 hours. If you plan to leave it for a full day, covering it with saran wrap will keep it from drying out.
9. Rinse your items until the water runs clear. Avoid rinsing anyplace you don’t want to stain. We worked outdoors, but a stainless steel sink is a safe option if you have one.
10. Wash your items and enjoy!
Tips:
Work in the shade.
Less is more. Use less than you think you need and sprinkle on a little at a time.
You can rinse out once the ice has melted- but we recommend waiting 24 hours to get the full effect.
Folding your fabric will give you a Rorschach pattern, gently scrunching is how we achieved most of the patterns here.

*This post contains affiliate links and I will be compensated if you make a purchase after clicking on my links, click here for our full policy and disclosures.